Showing posts with label Sally Hansen. Show all posts

Sunday, December 26, 2021

Christmas Glitter Mani 2021

I fell behind with posting, but I really wanted to get this Christmas Mani up on the blog (even though there are a few older manis that I have yet to post! 😅), as it's becoming a bit of a tradition for me to do this same mani at Christmas-time:

Christmas Glitter Mani 2021

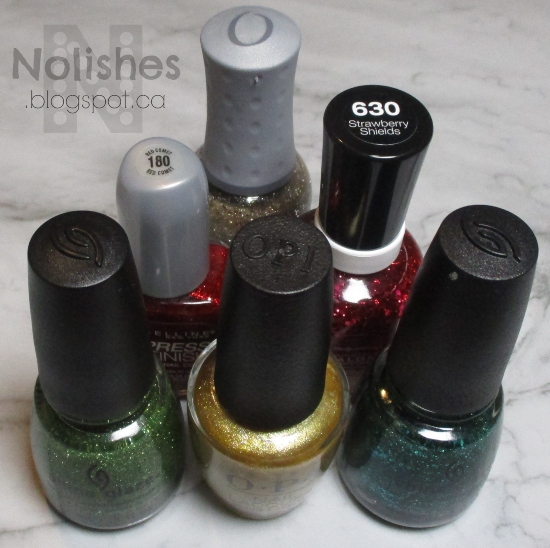
Polishes Used Christmas Glitter Mani 2021

I talked about the first two times that I did this manicure in this post from December 2018. I'm pretty sure that this is actually the fourth time I re-created this mani, as I distinctly remember wearing it during the holidays in 2019, however, it looks like I didn't take any pictures of it that year.

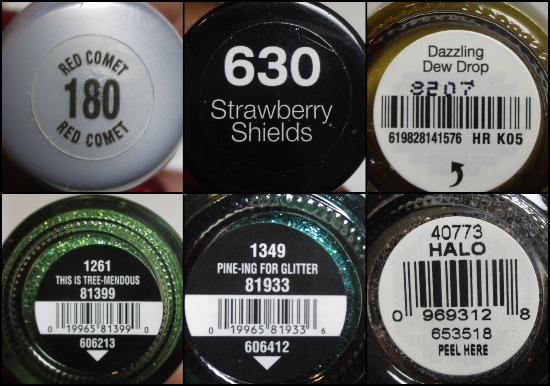
One change that I made from the original version, is that I am using a different gold base polish for my middle finger. In the first two versions I used Orly 'Luxe' as the base coat, which is a bit more of a true gold colour. This year (and I think last year too), I started using OPI 'Dazzling Dew Drop', which is a bit more of a brassy, yellow-toned gold. I think that this shade of gold works a little better with this bright, playful look. For both versions, I used Orly 'Halo' as the glitter topper over the gold polishes.

Christmas Glitter Mani 2021 - Polishes

Polishes Used - Label Shots

Once again, I love how it turned out! This manicure was so much fun to wear, as it instantly put me in a festive mood!  

Happy Holidays to all!

Tuesday, July 20, 2021

Sky Blue Dotticure

Today I have a dotticure to share:

Sky Blue Dotticure

This manicure was quick and easy to do, and a lot of fun to wear. It's simply a bright sky blue base, with silver, orange, and dark teal layered polka-dots. This is the perfect type of mani to do if you want to incorporate a little nail art into your manicure, but don't want to do a lot of thinking or planning. I haven't been doing a lot of manicures lately, so it has been really fun to revisit this hobby after a little while away!

Polishes Used

Polishes Used - Label Shots

Friday, March 12, 2021

Green Plaid Manicure

I decided to do a green plaid manicure as a warm-up to St Patrick's Day. Here's what I came up with:

Green Plaid Manicure

For the plaid nails, I used Zoya 'Ireland' as the base, and I double-stamped plaid images from my UberChic Beauty stamping plate, 'Pretty in Plaid 2'. For the stamping, I used Zoya 'Hunter', and then Sally Hansen Color Foil 'Liquid Gold'. I did a sparkly hunter green accent nail on my ring finger, using Morgan Taylor 'Mistress of Mayhem', from their Fall 2020 'Disney Villains' collection. I also did a gold accent nail on my middle finger, using Rimmel 'Dazzle'.

To finish off the mani, I put on a layer of glossy topcoat - but then I decided it would look better matte! I then carefully applied a mattifying topcoat, trying to avoid putting it over the gold stamping,  so that the gold would still be super shiny.

Polishes Used


All in all, I'm really happy with how this mani turned out. I purchased the 'Pretty in Plaid 2' plate relatively recently, and ever since, I've been wanting to do more plaid manicures. I'm glad that I was able to incorporate some plaid into this one!

Plate Used - UberChic Beauty Pretty in Plaid 2

Tuesday, March 9, 2021

Blue, Orange, and Silver Stamped and Dotted Manicure

I finally managed to do a little nail stamping! It's been a while, but it was fun to get back into it again. Here's what I came up with:

Blue, Orange, and Silver Stamped and Dotted Manicure

I started with a simple base of Sally Hansen Complete Salon Manicure 'Calypso Blue'. Then I stamped some silver accents on my middle and ring fingers using an image from my ÜberChic Beauty ‘Culture Rich’ stamping plate. I finished it off by using a dotting tool to add orange dots on the nails.

The manicure came together rather quickly, as the embellishments were done pretty much at the spur of the moment. However, I really like how it turned out!

Materials Used
 

Sunday, August 30, 2020

Sally Hansen Xtreme Wear 'Pucker Up'

 Today, I have a swatch of Sally Hansen Xtreme Wear 'Pucker Up':

Sally Hansen Xtreme Wear 'Pucker Up'

This is a bright, poppy red polish, with a jelly-like consistency and shiny, slightly translucent finish. It is very intensely pigmented, and covers quite well even after one coat. I enjoyed wearing this polish - it's bold and fun, yet classic and elegant at the same time!

Sally Hansen Xtreme Wear 'Pucker Up' - Label Shot

Sunday, August 9, 2020

Polish Cutout Decal Mani: Version 3

Today I have another polish cutout Decal manicure to share:

 Polish Cutout Decal Mani, Version 3

I still had some sheets of polish leftover from my decal making manicures that I shared on the blog a few posts ago: the 'Polish Cutout Decal Mani' version 1, and version 2. I didn't wan't to waste the sheets of polish, so I came up with a quick abstract mani using strips of polish I cut from the sheets using my pinking shears, and regular scissors. I topped the manicure with a matte glitter topper called 'Can I Get an Untz Untz' from China Glaze's iconic 'Summer Nights' collection that they released in Summer 2015.

Label Shot: 'Can I Get an Untz Untz'

The finished look isn't exactly as I had envisioned, but I kind of like the chaotic, random vibes that this manicure gives off! Cutting up the nail polish strips and applying them directly to the nail was a great way to use up more of the sheets of polish.  There still are more odds and ends left, so if I feel up to it, I may be able to do one more version of the 'Polish Cutout Decal Mani', but we'll see...

Polishes Used - Sally Hansen Polishes

Monday, August 3, 2020

Collections of Yore: Jelly Belly + Sally Hansen Insta-Dri Collab

I've decided to start a new series on my blog called 'Collections of Yore', where I highlight nail polish collections that came out in the past which I still have in my collection. There have been so many wonderful collections that have been released over the years, and it's nice to take a trip down memory lane, and to be inspired to revisit old favourites. 

Sometimes it's so easy to get caught up in the hype for the next new thing... Lately, I've been really making an effort to do a lot more 'shopping of my stash' and giving some love to the polishes that I already have in my collection. A lot of the polish collections that I want to revisit in this 'Collections of Yore' series were super popular when they came out, so I know that a lot of other people may still have a lot of these polishes too. Hopefully these trips down memory lane will be beneficial to other polish enthusiasts as well.

The first polish collection I wanted to highlight in this first instalment of the series, was only released about a year and a half ago: The Jelly Belly + Sally Hansen Insta-Dri Collaboration from February 2019.

There were a total of 11 shades in the collection, 7 creme polishes, and 4 glitter crelly polishes. I only picked up 8 of the polishes. The three polishes from the collection that I passed on were 'Coconut', a creamy white creme polish; 'Tutti Frutti', a multi-coloured glitter crelly in a sheer purple-pink base; and 'Island Punch' a dusty lilac creme polish. 

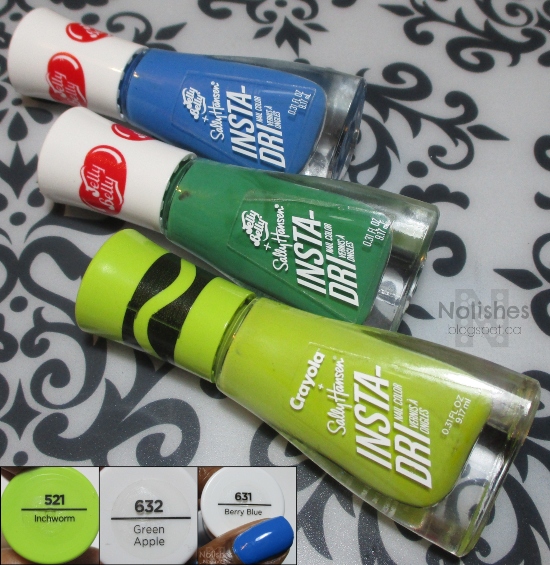
Below, I've included a picture of the 8 polishes that I purchased from the collection. The top row contains 'Very Cherry', 'Peach', 'Strawberry Cheesecake', 'Buttered Popcorn', and 'Bubble Gum', and the bottom row contains 'Green Apple', 'Berry Blue', and 'Blueberry'. The shade names with hyperlinks link to posts where I've swatched the colours. I've also used a couple of the shades in nail art which you can link to here and here.

Collections of Yore: Jelly Belly + Sally Hansen Insta-Dri Collaboration, Feb 2019


I really enjoyed this collection. I love Sally Hansen Insta-Dri polishes for nail stamping and nail art. The cremes are typically very opaque, highly-pigmented, one-coaters which work well for a variety of nail art applications. The shades from this collection that I have used so far have lived up to this Sally Hansen Insta-Dri reputation, and did not disappoint! I also think that the glitter crellies in the collection are really gorgeous. All in all, I'm really looking forward to using these polishes more in the future, and I am happy to have them as part of my collection!

Polish Cutout Decal Mani, Version 2

Polish Cutout Decal Mani, Version 2

Today, I have another polish cutout decal mani using the leftover materials from my last post. This time I used 'Green Apple' as my base polish and added cutouts I made with pinking shears, and a hole punch from dried sheets of 'Inchworm' and 'Berry Blue'. I really like how this mani came out. I love the geometric shapes, and the fun colours.


Polish Cutout Decal Mani, Version 2

Sunday, August 2, 2020

Polish Cutout Decal Mani

Polish Cutout Decal Mani

Today I have a quick nail art manicure to share. Recently when organizing my stationery, I found a bunch of materials I bought to make nail polish decals: decorative shears (pinking, scalloping, etc) and novelty shaped hole punches (stars, hearts, butterflies, dragonflies etc...). I decided to do a quick manicure to play with all of the materials!

For this manicure, I used the scalloping shears to make the layered waves on my middle finger, and I used the star shaped hole punch to make the star decals on my ring finger. Below, I've included a picture of the materials that I used.

Polish Cutout Decal Mani: Materials used

For the decals, I decided to go with some quick drying, opaque and super-pigmented polishes, so my Sally Hansen Insta-Dri polishes fit the bill for the job. I spread out a layer of each of the 3 polishes I chose on my born pretty nail art mat, and added a second coat after those had dried. Then I went to work creating some fun shapes to add to my nails. I always over-estimate how much polish I will need for the decals, so I had a bunch of polish sheets left over. I plan to do another decal mani or two to use up a bit more of the sheets. Stay tuned for more decal fun!


Polish Cutout Decal Mani: Polishes Used

Friday, July 17, 2020

Summer Fun Shimmery Skittles Mani


Today I have another summery skittles mani to share, this time using all bright shimmery colours. I even managed to throw in a bit of embellisment, with some nail jewels! 

For the manicure I used four different Sally Hansen Polishes. I've been having a lot of fun shopping my stash lately, and using older polishes that I haven't really used much in years. I've been rediscovering a lot of fun drug store polishes that I bought back when I just started getting into nail polish, some of which are now discontinued.

Polishes Used
Sally Hansen Xtreme Wear ‘Hot Magenta’
Sally Hansen Complete Salon Manicure ‘Wedding Glitters’
Sally Hansen Xtreme Wear ‘Ivy League’
Sally Hansen Hi-Definition Nail Colour
‘Three D’


All in all, I really like how this manicure turned out. I think the colours work really well together, and they are so cheerful!

Wednesday, July 15, 2020

Blue, Gold and Orange Skittles Mani featuring Sally Hansen Pacific Blue


As discussed in my last post, I managed to do another skittles manicure! This mani features the iconic original version of Sally Hansen Xtreme Wear 'Pacific Blue'. This polish caused quite a stir in the nail polish world when it was reformulated back in 2014. The original version was super popular, and much beloved in nail polish circles, and has now become somewhat of a collector's item. I've had the bottle in the photo above for several years now - I'm estimating that I may have purchased it anywhere between 7 to 10 years ago!

In the manicure, I used Pacific blue on both my thumb and ring finger. I chose complementary shades of light blue, gold and orange to complete the look.

Morgan Taylor ‘No Filter Needed’,  Sally Hansen Xtreme Wear ‘Pacific Blue’,  Rimmel 60 Seconds ‘Dazzle’  and Orly ‘Melt Your Popsicle’

Polishes Used
Morgan Taylor ‘No Filter Needed’
Sally Hansen Xtreme Wear ‘Pacific Blue’
Rimmel 60 Seconds ‘Dazzle’
Orly ‘Melt Your Popsicle’

I really like how this manicure turned out. The colour combination is fun and energetic, and works really well for the summer! I'm happy I was able to throw a neon polish into the look, with Orly's neon orange 'Melt Your Popsicle', as well as a bit of bling with Rimmel's gold shimmer polish 'Dazzle'. 

Morgan Taylor ‘No Filter Needed’,  Sally Hansen Xtreme Wear ‘Pacific Blue’,  Rimmel 60 Seconds ‘Dazzle’  and Orly ‘Melt Your Popsicle’

Monday, July 13, 2020

Metallic (Partial) Rainbow Skittles Mani

Metallic Rainbow Skittles Mani created using Orly 'Crawford's Wine', Orly 'Flicker', Revlon 'Hypnotize', Sally Hansen 'Emerald City', and Sally Hansen 'Blue It'

It's been a while since I got a chance to feature some new nail art on this blog. It's been difficult lately to find time to sit down and create a design and then execute it. As a result, I've been doing a lot of simple (one-polish) manicures. I decided to try to dip back into creativity, with one of the simplest forms of nail art - the skittles mani.  I wanted to do something bright and cheery, so I decided on the Metallic Rainbow Skittles mani photographed above.

Bottle shot of the 5 polishes used for the Metallic Rainbow Skittles Mani: Orly 'Crawford's Wine', Orly 'Flicker', Revlon 'Hypnotize', Sally Hansen 'Emerald City', and Sally Hansen 'Blue It'

Polishes Used
Orly 'Crawford's Wine'
Orly 'Flicker'
Revlon Brilliant Strength 'Hypnotize'
Sally Hansen Xtreme Wear  'Emerald City'
Sally Hansen Xtreme Wear  'Blue It'

I love how this mani turned out - it is so fun and colourful, that I'm inspired to do more! However, I think I may just stick with skittles manicures for the time being, because they are relatively quick and easy to accomplish. Who knows, maybe I'll even be able to throw in the odd manicure with other embellishments, and/or some stamping here and there... we'll see where this goes!

Label shots of the 5 polishes used for the Metallic Rainbow Skittles Mani: Orly 'Crawford's Wine', Orly 'Flicker', Revlon 'Hypnotize', Sally Hansen 'Emerald City', and Sally Hansen 'Blue It'

Sunday, July 12, 2020

Sally Hansen Xtreme Wear 'Crushed'


Sally Hansen Xtreme Wear 'Crushed' is a gorgeous, shimmery, bright orange polish that just screams summer. It's one of those super-finely milled shimmer polishes that essentially reads as metallic on the nail. It gave great coverage, had a decent drying time, and there were no issues with application. The polish is really fun and cheery to wear due to the in-your-face texture, colour and shine. All in all, I'm really happy with this polish.

Sunday, April 5, 2020

Pastel Green Manicure with Splatter Effect Glitter

Manicure using Sally Hansen Complete Salon Manicure 'Green Tea', and Claire's Cosmetics 'Splatter Paint'

Today I have another mani photo pulled from my archives - the metadata advises that it was from October 2013. This is s simple glitter mani using 2 polishes: Sally Hansen Complete Salon Manicure 'Green Tea', and Claire's Cosmetics 'Splatter Paint'.

There's actually something really awesome about this combination of polishes. I really like how this look came out...  I would even repeat this look now, almost 7 years later!!!  

Manicure using Sally Hansen Complete Salon Manicure 'Green Tea', and Claire's Cosmetics 'Splatter Paint'

Sunday, September 22, 2019

Blue and Silver Stamped Manicure featuring China Glaze 'Dorothy Who'


Polishes Used
China Glaze ‘Dorothy Who?’
Sally Hansen Color Foil ‘Sterling Silver’
Stamping Plate Used
Maniology/Bundle Monster ‘Chic Peek’ BM-XL476
ÜberChic Beauty Love and Marriage – Plate 02

Here's a little mani that I threw together with a glitter polish that I had handy, and some nearby stamping plates! This is the first time that I've used my bottle of China Glaze's 'Dorothy Who', so I'm glad I was able to take this one off the untried list... It truly is a lovely shade of blue! 

China Glaze 'Dorothy Who?', and Sally Hansen Color Foil 'Sterling Silver'

After painting my nails with the polish, I wanted to jazz the look up a bit with a little stamping. I had used the ÜberChic Beauty Love and Marriage 02 plate for my last manicure, the Burgundy and Gold Stamped Mani, and had not put the plate away yet, so I decided to use it again for this manicure. The negative space heart stamped image on my middle finger is from that plate. On my ring finger, I stamped a textural image from my Bundle Monster Chic Peek BM-SL476 plate.

Sunday, September 15, 2019

Burgundy and Gold Stamped Mani


Burgundy and Gold stamping manicure using Essie Gel Couture 'Spiked with Style', and Sally Hansen Color Foil 'Liquid Gold', and UberChic Beauty stamping plate Love and Marriage 02.

Polishes Used
Essie ‘Spiked with Style’
Sally Hansen Color Foil ‘Liquid Gold’
Stamping Plate Used
ÜberChic Beauty Love and Marriage – Plate 02

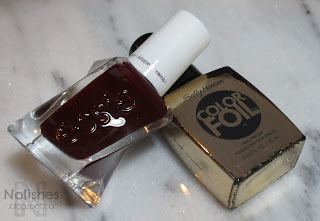
Today I have a really quick and easy manicure to share. It was created using a base of a gorgeous burgundy creme polish from Essie's Gel Couture line called 'Spiked with Style'. I then embelished my thumbs, middle and ring fingers with some images from ÜberChic Beauty plate 'Love and Marriage - 02', which I stamped in one my favourite gold polish for stamping, Sally Hansen's 'Liquid Gold' from the limited edition Color Foil line. I reviewed this line for my first ever post on this blog, back in July, 2014.  Aaaah, the memories!

Essie Gel Couture 'Spiked with Style', and Sally Hansen Color Foil 'Liquid Gold'

My favourite part of this manicure is the elegant negative space heart with filigree background image that is stamped on the thumbnail...  it is so precious! The image is designed so beautifully - I just love it! I think that the colours I chose work really well with the design, and I'm also really impressed that I managed to centre the image quite nicely on the nail (well, at least I did on the hand that I photographed!  😉).  

Below I have a few additional shots of the manicure, arranged into a photo collage... Enjoy!

Collage of photos featuring Burgundy and Gold stamping manicure using Essie Gel Couture 'Spiked with Style', and Sally Hansen Color Foil 'Liquid Gold', and UberChic Beauty stamping plate Love and Marriage 02.

Thursday, August 22, 2019

Metallic Red and Silver Stamped Mani

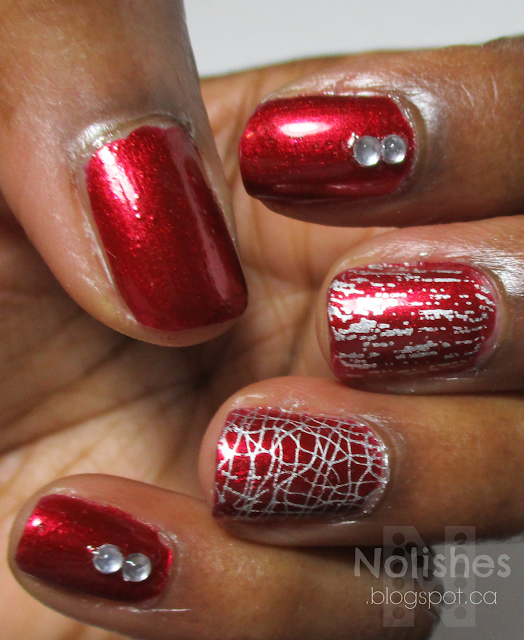
Today I have a simple nail stamping manicure to share using metallic red and silver polishes, and embellished with some nail art jewels:

Nail stamping nail art manicure featuring red metallic polish OPI's ‘A Little Guilt Under the Kilt’ from the Fall 2019 Scotland collection, and silver metallic polish Sally Hansen ‘Silver Sweep' (original formula). Nail stamping images were from ÜberChic Beauty's ÜberMini 'Texture-licious' plate 3

Polishes Used
Stamping Plate Used
OPI ‘A Little Guilt Under the Kilt’
Über Mini: Texture-licious – Plate 3
Sally Hansen ‘Silver Sweep’*
                 
*Original formula                 

I created this manicure by starting off with a base of metallic red nail polish, OPI's 'A Little Guilt Under the Kilt'. Next, I stamped 2 separate textural images from ÜberChic Beauty's ÜberMini 'Texture-licious' plate 3 on both my ring and middle fingers. I used a metallic silver polish for the stamping, my quickly depleting bottle of original formula Sally Hansen's 'Silver Sweep'. I completed the look by placing 2 colourless nail art jewels each, on my pinky and index fingers.

OPI ‘A Little Guilt Under the Kilt’ from the Fall 2019 Scotland collection, and Sally Hansen ‘Silver Sweep' (original formula)

I did this manicure during the middle of the work week, so I didn't really have a lot of time for planning and execution. Typically in these situations, I would do a traditional manicure using just one shade of polish on all of my nails. However, I've been trying to get back into the habit of doing nail art regularly, so I decided to go a step further and do some basic nail stamping and add some embellishments. I'm really pleased with how the look turned out, and it has served as a reminder for me that a manicure does not have to be complicated or time-consuming to be beautiful. In fact, sometimes simpler is better, since I don't end up going over-board and doing way too much! 😄

Below, I've included a few additional pictures of the manicure:

Nail stamping nail art manicure featuring red metallic polish OPI's ‘A Little Guilt Under the Kilt’ from the Fall 2019 Scotland collection, and silver metallic polish Sally Hansen ‘Silver Sweep' (original formula). Nail stamping images were from ÜberChic Beauty's ÜberMini 'Texture-licious' plate 3

Sunday, August 18, 2019

'Panning for Gold' Stamped Glitter and Pond Manicure

Manicure featuring jelly polish 'pond' elements, teal glitter, and gold nail stamping. Polishes used: Essie Silk Watercolor ‘Pen & Inky’, Essie Glazed Days ‘Ooh La Lolly’, China Glaze ‘Water You Waiting For’, and Sally Hansen Color Foil – 'Liquid Gold'.  Stamping plates used:  ÜberChic Beauty – Moroccan Delight, and Über Mini: Texture-licious – Plate 2

Today's manicure is a water-themed look centred around the idea of panning for gold. I wanted to do a pond manicure using the Essie jelly polish collections that I've been playing around with for the last few posts, the 'Silk Watercolor' collection from 2015, and the new 'Glazed Days' collection released earlier this year.  

Polishes Used
Stamping Plates Used
Essie Silk Watercolor ‘Pen & Inky’
ÜberChic Beauty – Moroccan Delight
Essie Glazed Days ‘Ooh La Lolly’
Über Mini: Texture-licious – Plate 2
China Glaze ‘Water You Waiting For’

Sally Hansen Color Foil – 'Liquid Gold'


Teal, blue and gold glitter and 'Pond' stamped manicure featuring Essie Silk Watercolor ‘Pen & Inky’, Essie Glazed Days ‘Ooh La Lolly’, China Glaze ‘Water You Waiting For’, and Sally Hansen Color Foil – 'Liquid Gold'

However, I wanted to do something a little different for the pond manicure, so I came up with the idea of irregular gold flakes visible through the layers of blue and teal jelly polish, as if they were small pieces of gold at the bottom of a river bed, being brought to the surface while panning for gold.  I used this concept for my index and middle fingers, using Essie jelly polishes 'Pen & Inky', and 'Ooh La Lolly', and then painted my other nails using 'Water You Waiting For', a gorgeous teal glitter from the China Glaze Cirque du Soleil 'Worlds Away' collection from Winter 2012. This polish was included in my 'Project Polish' list of polishes that I'm trying to use up soon(ish 😉). 

I finished the manicure by stamping a gold arabesque pattern over my ring finger as an accent, and then topping everything off with a quick dry, glossy top coat. The arabesque pattern was from the ÜberChic Beauty - 'Moroccan Delight' plate, while the gold flakes in the 'Pond' portion of the manicure were stamped from ÜberChic Beauty's Über Mini 'Texture-licious' plate 2. Below I have a collage featuring a few additional shots of the manicure.

Manicure featuring jelly polish 'pond' elements, teal glitter, and gold nail stamping. Polishes used: Essie Silk Watercolor ‘Pen & Inky’, Essie Glazed Days ‘Ooh La Lolly’, China Glaze ‘Water You Waiting For’, and Sally Hansen Color Foil – 'Liquid Gold'.  Stamping plates used:  ÜberChic Beauty – Moroccan Delight, and Über Mini: Texture-licious – Plate 2

I really like how this manicure turned out! It actually kind of reminds me of the 'Teal and Gold Crackle Sandwich' manicure I did years ago on this blog as part of my '2015 Crackle Polish Challenge'. 

I really love how the featured 'pond' portion of the mani turned out, but interestingly, this manicure has really revived my appreciation for the China Glaze glitter 'Water You Waiting For'. I've always loved the stunning, deep teal shade, but wearing it now, I see how well it works with my skin tone, and just how genuinely sparkly and beautiful it is!