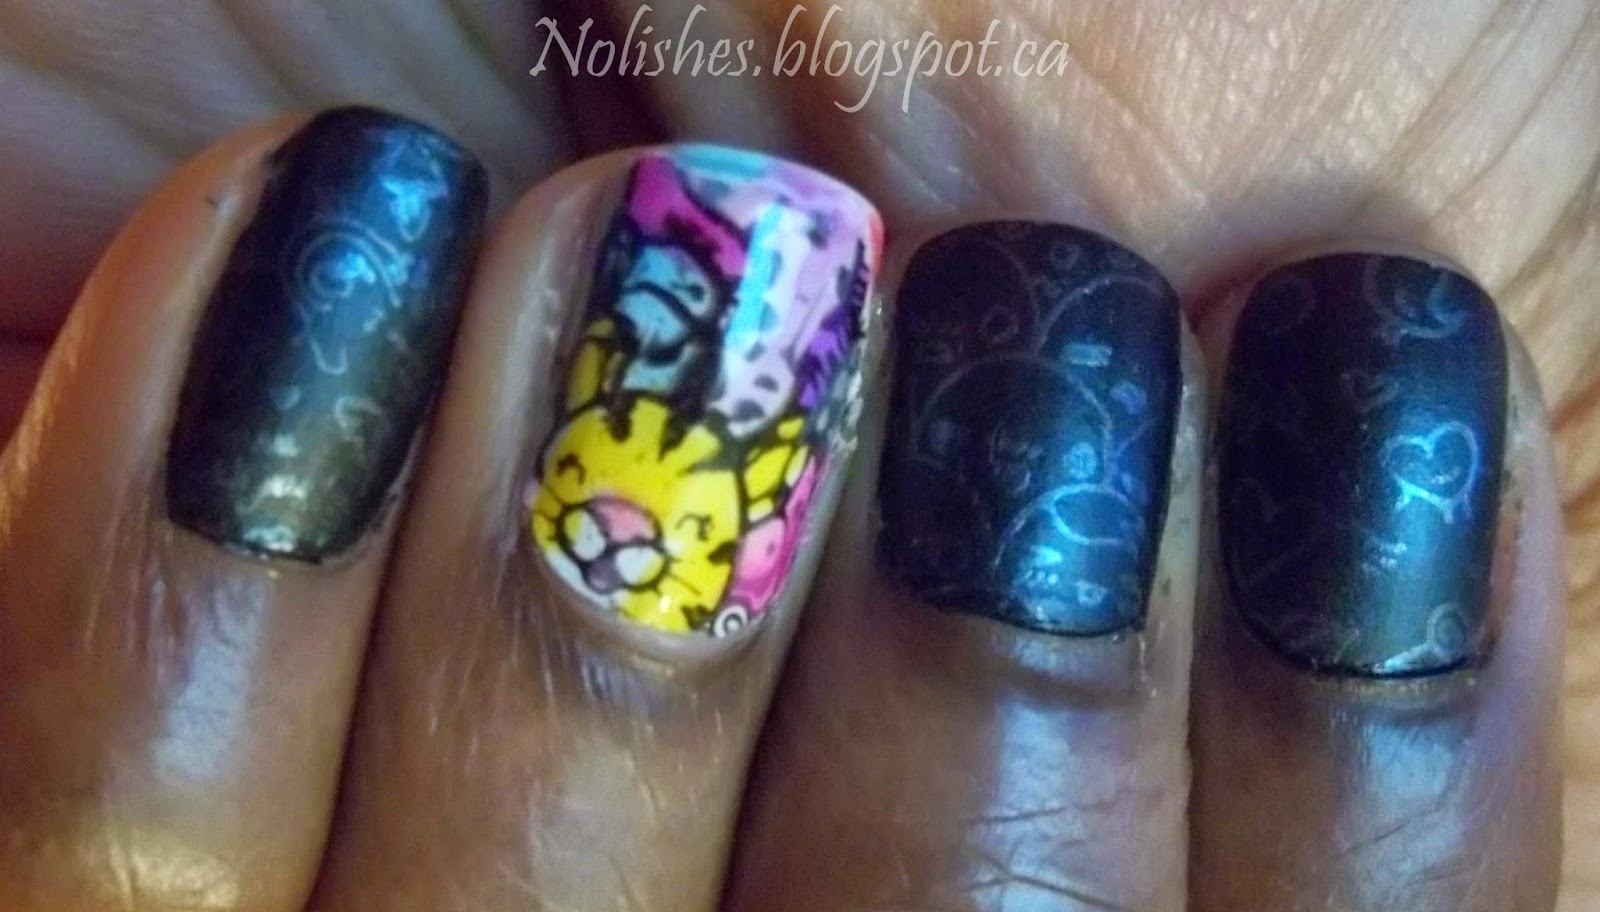
Showing posts with label Nfu Oh. Show all posts

Sunday, August 4, 2019

Jelly Polishes for Leadlight Manicures

I started writing this post on January 29 2015, and it has been in my Draft folder ever since! I wanted to go through my entire collection and compile a large list of my jelly polishes and take pictures so that I could catalogue them for easy retrieval when needed. I realize now that I'm probably never going to get around to doing that! With my previous post on the Essie 'Glazed Days' Collection, I thought I would finally just publish this post, even though it is not a comprehensive list, as the information may still be useful, since some of these polishes are still available.

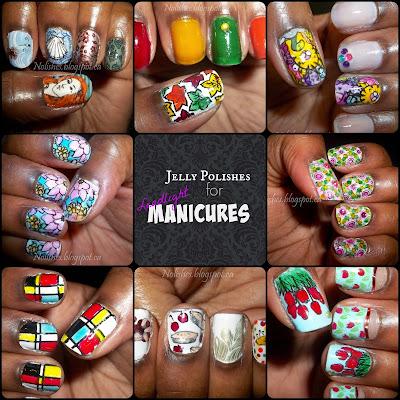
Collage featureing 8 different leadlight manicures that I have previously done on this blog

Today's post is all about polishes that can be used for Leadlight manicures. 'Leadlighting' is a nail stamping technique where coloured, translucent polishes (jellies, and tints) are painted over stamped outlines, usually in a dark colour, over a white or light coloured base. It allows for the creation of multi-coloured images on the nail. The pros of leadlighting are that compared to the decal method, the other popular method of creating multicoloured stamped images, it is much quicker, because the colours are applied directly to the nail, as opposed to a stamper.

I first learned this technique from a you-tube video posted by Messy Mansion in spring 2014. Back then, I only had a few jelly polishes in my collection.  I immediately started researching and store-hunting for a variety of jellies that I could use for this technique. Today, I want to share some of what I have found.

1) Create your own
A lot of people have shared that you can create jelly polishes by adding clear nail polish to other polishes already in your collection. They can be mixed as required by combining a few drops of each on a piece of saran wrap, plastic, or whatever un-needed flat surface you have handy. This way you do not have to mix up an entire bottle of jelly polish, if you only need a little bit for some nail art. I have never personally tried this technique, but I have seen it successfully done in manicure tutorials on-line.

2) OPI Sheer tints
This collection came out in spring or summer 2014, just as the leadlight technique was really catching on in the nail art community.  They are lightly pigmented, so although they work beautifully for the technique, the colours you get tend to be pastel shades.  You might be able to build the colour intensity with multiple coats, but, you may end up with a lumpy surface. The colours are 'I'm Never Aberrassed', 'Be Magentale with Me', 'Don't Violet Me Down', and 'I Can Teal You Like Me'.

3) NFU OH Jelly Syrup Series
I'm not sure exactly when, but a quick internet search leads me to believe that it was sometime in either late 2010 or early 2011, that Nfu Oh came out with an entire collection of jelly polishes, containing a whopping 45 shades of jelly awesomeness! From my experience with the polishes from this series that I have in my collection, these polishes are very pigmented, and are fantastic for use in the leadlight technique.

4) China Glaze Summer 2013 Sunsational Collection
This collection included 6 jelly polishes: 'You Drive Me Coconuts', 'Heat Index', 'Shell-O', 'Keepin' it Teal', 'Isle See You Later', and 'Are You Jelly?'. These are gorgeous, bright, fun shades. They are not perfectly translucent, as they have a translucent white base, but I've found that they still work well for leadlight manicures.

5) OPI Color Paints collection (Summer 2015)
I did a comprehensive review of these polishes in an earlier post. Click here to view it.

6) Essie Silk Watercolor collection (Summer 2015)
This was a collection of 8 jelly polishes and a white base. The colours were:
'Highest Bidder' - Crimson
'Blush Stroke' - Scarlet
'Love Sheen' - Rose
'Art New-Beau' - Orange
'Muse, Myself' - Citrus
'Pen & Inky' - Teal
'Point of Blue' - Blue
'No Shrinking Violet' - Violet
'White Page' - White base polish

7) Some examples of random Jelly Polishes sorted by colour:
Red:  Essie Jelly Apple Burgundy: China Glaze 'Ravishing, Dahling'
Orange: OPI Big Hair...Big Nails, OPI 'Y'all Come Back Ya Hear?'
Yellow: Deborah Lippmann 'Yellow Brick Road'
Turquoise: Zoya 'Frida'
Blue: China Glaze 'Ride the Waves', and 'Splish Splash'
Purple: Zoya 'Katherine', and China Glaze 'Creative Fantasy'
Pink: Misa 'Bed of Roses'
White: OPI 'Don't Touch My Tutu', and 'Funny Bunny'

8) Essie Glazed Days Collection, Summer 2019
I did a comprehensive review of these polishes in an earlier post. Click here to view it.
Saturday, August 29, 2015

Blue and Green Glitter Mani

Today I have a gorgeous glitter mani to share with you all:


Saturday, August 1, 2015

Pink and Blue Double Stamped Mani

Blue jelly polish base stamped with navy blue floral outline pattern, and then with a pink abstract heart pattern. Accent ring finger is covered with pink matte glitter instead of the second stamping of pink over the blue base.

Today's manicure is a reconfiguration of a manicure that I did earlier this year. During the 2015 Crackle Polish Challenge, I did a manicure called the 'Shattered Heart Mani'. It featured a crackle polish decal, glitter, and double stamping over a translucent polish base. Even though the main concept behind the manicure was to showcase the crackle polish decal, the feature that I ended up liking the most was the double stamped design that I used on my thumbnails. I even mentioned in that post that "I may have to do an entire mani like this!". Well, I finally ended up doing it!

Polishes Used
Plates Used
Nfu-Oh NFU JS30 (Royal Blue)
Bundle Monster Secret Garden Collection:
OPI ‘On Pinks & Needles’
BM-721
OPI ‘I Saw… U Saw… We Saw… Warsaw’
Pueen Love Elements Collection:
Sally Hansen Insta-Dri ‘Presto Pink’
PUEEN41

Nfu-Oh NFU JS30 (Royal Blue), OPI ‘On Pinks & Needles’, OPI ‘I Saw… U Saw… We Saw… Warsaw’, and Sally Hansen Insta-Dri ‘Presto Pink’

In order to switch things up a bit, I used a blue jelly polish from Nfu-Oh's Jelly Syrup Series as the base, and a dark blue polish ('I Saw...' from OPI's Spring 2013 Euro Centrale Collection) for the first layer of the stamping design. Also, for the first layer of stamping, I used a different stamping plate from the one I used the first time around. The polish and plate that I used for the top layer of stamping were the exact same as the original manicure.

I wanted to do something a little different for my ring finger, so instead of stamping the pink top layer over the blue base, I used an awesome pink matte glitter polish from OPI's Brights 2015 Collection called 'On Pinks and Needles'. The shade of pink of the glitters, and of the stamping polish are almost a perfect match!

I really love how this look turned out! I don't like to repeat looks, but I don't think I'm quite done with this particular style just yet. I would like to try a version with brighter colours, and perhaps experiment a bit more with different combinations of patterns that will work well together! 
Collage featuring extra shots of the manicure

Wednesday, November 26, 2014

Mondrian Mani 2 - Using Moyou London Artist Plate 16

Today I have another instalment of the Moyou London Artist Collection Design Challenge:

Nail stamping manicure inspired by the artwork or Piet Mondrian. Designed using Moyou London Artist collection plate 16, and white, black, red, blue, and yellow polishes from China Glaze, Essie, Konad, and Nfu Oh.Nail stamping manicure inspired by the artwork or Piet Mondrian. Designed using Moyou London Artist collection plate 16, and white, black, red, blue, and yellow polishes from China Glaze, Essie, Konad, and Nfu Oh.

This manicure was done using Plate 16 from the Moyou London Artist Collection, and is the second last manicure in my challenge!

When I did my original 'Mondrian Inspired Mani' a few months ago, I mentioned that I wanted to try it again with a darker blue jelly nail polish. I've since acquired China Glaze's 'Ride the Waves', a beautiful deep blue jelly, so I'm happy that I now have the opportunity to use it as I revisit the same theme with a different plate.

Polishes Used:
Essie 'Jelly Apple'
Nfu Oh NFU JS19
China Glaze 'Ride the Waves'
China Glaze 'White on White'
Konad Special Polish in Black

With this manicure, I used the decal method of nail stamping (aka advanced nail stamping technique) to colour in the multi-coloured accent nails. I decided to use the decal method because when I did the first version of this mani, I tried colouring with the 'leadlight' technique and found that it was hard to keep the highly pigmented jelly polishes from going over the black lines.

The black lines are supposed to be crisp, and clean, and they are an important part of the design. When they are partially obscured with polish, the look does not have the same visual impact.  You can see an example of this in the picture of my right hand, above. On my right ring finger, I had to leadlight the larger section of blue to correct a small boo-boo caused when I was applying the decal to my nail. The blue polish covers a bit of the black line, and takes a bit away from the look.

Now, these are things that are barely noticeable when wearing the manicure in real life, but of course they are a lot more noticeable in close-up still photos with flash! 

Another thing I changed this time around, was that I tried to tone the look down a bit by adding white and black nails. I actually like this version a lot better because of this simplification. The contrast between the multi-coloured, and neutral nails makes the look more interesting, and also helps the multi-coloured nails stand out more.

I really can't believe the challenge is almost over! Currently, there are a total of 17 plates in the Artist Collection. Right now, I own 14 of them: all except for plates 6, 8, and 15. This manicure based on plate 16 is the 14th manicure that I've completed for the challenge (I did two manicures using plate 4 because I wasn't fully satisfied with my first one - you can check out both versions here and here). My next post will be the 15th and final manicure in the challenge, using plate 17. Stay tuned!

Tuesday, October 14, 2014

Fall Colours Mani

Yesterday, I did a Thanksgiving manicure. Now that Thanksgiving is over, (and I've had enough turkey for the time being!), I wanted to neutralize the look to take all traces of the holiday out, while keeping some elements of the original manicure. So without further adieu, here is what I am now calling my 'Fall Colours' manicure:

Fall Colours Nail Stamping Manicure featuring China Glaze 'White on White', and 'Ravishing Dahling', Essie 'Capri', Nfu Oh Jelly Syrup Series polishes NFU JS20, NFU JS34, and NFU JS39 . Thumbnail is stamped using Bundle Monster Plate BM-H11
Fall Colours Manicure

I ended up keeping only the nail polish on my thumbs. My thumbnails had previously been stamped with a full nail leaf image from Bundle Monster plate BM-H11, and then each of the leaves had been coloured in with various jelly nail polishes. I decided to expand on the leaf concept, by using the rest of the fingers to complement the image on my thumbs.

I painted each of my remaining nails with one of the polishes used to colour the leaves on my thumbs. Then I added a caramel-coloured nail art rhinestone to my ring fingers.

Polishes Used:
Konad Special Polish in Black
China Glaze 'White on White'
China Glaze 'Ravishing, Dahling' (index finger)
Essie 'Capri' (pinky)
NFU JS20 (Egg Yolk Yellow)
NFU JS34 (Forest Green)
NFU JS39 (Caramel)

This was a relatively quick and easy update, which enabled me to get a little more use out of some detailed work used on a previous manicure.  I'm all for reusing elements of a previous mani if you can get away with it! Especially with the amount of time and energy it sometimes takes to create certain elements of a manicure. My philosophy is that if it still looks good, and I still like it - I'll keep it!

Monday, October 13, 2014

Thanksgiving Themed Skittles Mani

Today is Thanksgiving here in Canada, and to celebrate, I have a Thanksgiving-themed manicure to share with you!

Thanksgiving Themed Skittles Nail Stamping Manicure Using Konad Special Polish in Black, China Glaze 'White on White', China Glaze 'Ravishing, Dahling', Essie 'Capri', Nfu Oh Jelly Syrup Series polishes NFU JS20, NFU JS34, and NFU JS39, Sally Hansen Color Foil 'Yellow Gold', Sally Hansen Insta-Dri 'Silver Sweep', OPI 'Samoan Sand', and DRK Nails 'Metallic Brown'. Stamped using Bundle Monster Plates BM-H11, BM-H13, and Winstonia Plate W119
Thanksgiving Themed Skittles Mani

Polishes Used:
Konad Special Polish in Black
China Glaze 'White on White'
China Glaze 'Ravishing, Dahling'
Essie 'Capri'
NFU JS20 (Egg Yolk Yellow)
NFU JS34 (Forest Green)
NFU JS39 (Caramel)
Sally Hansen Color Foil 'Yellow Gold'
Sally Hansen Insta-Dri 'Silver Sweep'
OPI 'Samoan Sand'
DRK Nails 'Metallic Brown' Stamping Polish

Plates Used:
Bundle Monster BM-H11
Bundle Monster BM-H13
Winstonia W119

Thanksgiving Themed Nail Stamping Skittles Mani (Left Thumb), featuring 'Lead Light' stamping technique. Polishes Used: Konad Special Polish in Black, China Glaze 'White on White', China Glaze 'Ravishing, Dahling', Essie 'Capri', and Nfu Oh Jelly Syrup Series polishes NFU JS20 (Egg Yolk Yellow), NFU JS34 (Forest Green), and NFU JS39 (Caramel). Stamped Using Bundle Monster Plate BM-H11.Thanksgiving Themed Nail Stamping Skittles Mani (Right Thumb), featuring 'Lead Light' stamping technique. Polishes Used: Konad Special Polish in Black, China Glaze 'White on White', China Glaze 'Ravishing, Dahling', Essie 'Capri', and Nfu Oh Jelly Syrup Series polishes NFU JS20 (Egg Yolk Yellow), NFU JS34 (Forest Green), and NFU JS39 (Caramel). Stamped Using Bundle Monster Plate BM-H11.

I used mostly jelly polishes, since parts of the images were coloured using the leadlight technique. I tried to use fall colours for an earthy, autumnal feel, however I feel it still seems kind of bright, due to the white background!

I was a touch disappointed with my selection of Thanksgiving plates, because I hadn't realized until now that I didn't have anything that specifically said 'Happy Thanksgiving'. After doing a bit of research, I don't even think there is a readily available 'Happy Thanksgiving' plate on the market right now!? I did see a Messy Mansion plate with a collage of Thanksgiving related words, but that's the closest so far.

Thanksgiving Themed Skittles Nail Stamping Manicure Using Konad Special Polish in Black, China Glaze 'White on White', China Glaze 'Ravishing, Dahling', Essie 'Capri', NFU JS20, NFU JS34, NFU JS39, Sally Hansen Color Foil 'Yellow Gold', Sally Hansen Insta-Dri 'Silver Sweep', OPI 'Samoan Sand', and DRK Nails 'Metallic Brown'. Stamped using Bundle Monster Plates BM-H11, BM-H13, and Winstonia Plate W119
HAPPY THANKSGIVING!

Overall, I like how this manicure turned out. I especially love the grain of wheat on my ring finger! I'm going to have to see if I can work that into future, non-themed manicures! LOL!

Anyways, I want to wish a very happy Thanksgiving to all of those who are celebrating today! Enjoy your day!

Sunday, September 28, 2014

Black Jelly and Gold Mani - Using Moyou London Artist Plate 11

Today's manicure was designed using Moyou London Artist Collection Plate 11, and is the 6th official instalment of my Moyou London Artist Collection Design Series:

Black Jelly and Gold Manicure Using Moyou London Artist Collection Plate 11. Polishes used: OPI 'Wondrous Star', Nfu Oh Jelly Syrup Series NFU JS01, and Sally Hansen Color Foil in 'Yellow Gold'
Black Jelly and Gold Mani

The polishes that I used were:

OPI 'Wonderous Star' on my ring finger;
Nfu Oh's NFU JS01 from the Jelly Syrup Series as the base coat on all of my other fingers;
and Sally Hansen's Color Foil in 'Yellow Gold' as the stamping polish over the black jelly base coat.

I came up with the idea for this colour scheme by playing off of the one I used in my last post, 'White and Silver Cherub Mani'. I kind of did the inverse of those colours - a sheer black instead of the sheer white base I used last time, and gold instead of the silver that I used (I don't know if gold and silver are technically inverses, but I'm sure you catch my drift!).

I'm really liking how the 'Wonderous Star' glitter accent nail works with the rest of the mani.  The gold glitters in the polish are light, and more yellow toned rather than brassy so it works well with the Sally Hansen 'Yellow Gold' polish. Also, the little black glitters help tie in the Nfu Oh black jelly base polish. 

Moyou London Artist Collection Plate 11
Moyou London Artist Plate 11

This plate is one of the most beautiful ones that I own, but now that I've actually used it, I realize that one of my favorite elements on the plate, the skull-painted face of the lady, is pretty much impossible for me to use on my finger nails. My nails are usually short to medium length, so I most likely won't be able to fit the entire face on one of them. I think that even with a longer nail, a lot of the image would still be too wide for me to use. Perhaps I can get creative and find a way to juxtapose the image on two adjacent nails or something...  I'll have to play with it some more to see what I can come up with.

Tuesday, September 16, 2014

Birth of Venus Mani - Using Moyou London Artist Plate 05

Today's manicure was inspired from Sandro Botticelli's classic painting 'Nascita di Venere' or 'The Birth of Venus'.  This is the 3rd instalment of my design series using my Moyou London Artist Plates. Today's plate was Moyou London's Artist Plate 05, which is also inspired from the painting. I pulled colors and motifs from the original painting, and incorporated 5 images from different parts of the Moyou Plate. Here is the finished manicure:

Birth of Venus Nail Stamping Manicure - Using Moyou London Artist Plate 05, Moyou London Kitty Collection Plate 02, and Moyou London Sailor Collection Plate 01. Polishes Used: Maybelline New York Color Show 'Walk in the Park', Essie 'Sew Psyched', Sally Hansen Color Foil 'Rose Copper', DRK Nails 'Metallic Brown' Stamping Polish, Sally Hansen Xtreme Wear 'Breezy Blue', Revlon 'Urban', Rimmel 'Black Satin', Essie 'Rock the Boat', NYC 'French Tip White', Sally Hansen Complete Salon Manicure 'Almost Almond', OPI 'Y'all Come Back Ya Hear?', and NFU Oh Jelly Syrup Series NFU JS16.
Birth of Venus Mani

The pinky represents the tree canopy in the upper right quadrant of the painting, while the ring finger represents the robe that the handmaid is waiting to cover Venus with. The clamshell on the middle finger represents Venus' mode of transportation in the painting, and fittingly, it is stamped over wave images. The index finger represents the blowing winds and falling flowers to the left of Venus, and of course we have Venus' face on the thumb.

Here are the plates and polishes I used:
Plates:
Moyou artist collection plate 05, Moyou London Kitty Collection Plate 02 (flower image on index finger), Moyou London Sailor Collection Plate 01 (Clamshell image on middle finger).

Polishes:
Not including base and top coat, I used 12 different polishes to achieve this look. Here they are listed  by the finger on which the polish is one of the base or main colours:
Pinky: Maybelline New York Color Show 'Walk in the Park', and Essie 'Sew Psyched'
Ring Finger: Sally Hansen Color Foil 'Rose Copper', DRK Nails 'Metallic Brown' Stamping Polish
Middle finger: Sally Hansen Xtreme Wear 'Breezy Blue', Revlon 'Urban', and Rimmel 'Black Satin'
Index Finger: Essie 'Rock the Boat', and NYC 'French Tip White'
Thumb: Sally Hansen Complete Salon Manicure 'Almost Almond', OPI 'Y'all Come Back Ya Hear?', and NFU Oh Jelly Syrup Series NFU JS16.

Birth of Venus Nail Stamping Manicure - Using Moyou London Artist Plate 05, Moyou London Kitty Collection Plate 02, and Moyou London Sailor Collection Plate 01. Polishes Used: Maybelline New York Color Show 'Walk in the Park', Essie 'Sew Psyched', Sally Hansen Color Foil 'Rose Copper', DRK Nails 'Metallic Brown' Stamping Polish, Sally Hansen Xtreme Wear 'Breezy Blue', Revlon 'Urban', Rimmel 'Black Satin', Essie 'Rock the Boat', NYC 'French Tip White', Sally Hansen Complete Salon Manicure 'Almost Almond', OPI 'Y'all Come Back Ya Hear?', and NFU Oh Jelly Syrup Series NFU JS16.
Birth of Venus Mani

This manicure was very time-consuming. I used a lot of different materials and techniques to achieve the look, and I also had a lot of failed attempts and revisions of my original plan.

One of the techniques that I used was the decal method. This was done on the middle finger, where I made a stamped decal of a clamshell.This is the first time I've incorporated this technique into a manicure. All in all, it worked well, except for on my left hand where I had a slight problem when placing the decal over my freshly top-coated nail (which also had a stamped background image underneath). I ended up having to lift and reposition the decal, which caused the background to get a little smudged on that finger. Next time, I'm going to wait until the polish is completely dry before I place the decal.

I also want to point out that I really like the combination of 'Sew Psyched' with 'Walk in the Park' on my pinky.  I would love to do another manicure featuring these two colours - they look so good together!

Wednesday, August 6, 2014

Mondrian Inspired Mani

Today, I have a manicure inspired by the style of Dutch Painter Piet Mondrian:

Mondrian Inspired Nail Stamping Mani - Right, using Moyou London Artist Collection plate 01. Polishes Used: NYC 'French Tip White', Konad Black Special Polish, Essie 'Jelly Apple', Nfu Oh Jelly Syrup Series NFU JS19, and OPI Sheer Tints 'I Can Teal You Like Me'.
Mondrian Inspired Mani - Right

Mondrian Inspired Nail Stamping Mani - Left, using Moyou London Artist Collection plate 01. Polishes Used: NYC 'French Tip White', Konad Black Special Polish, Essie 'Jelly Apple', Nfu Oh Jelly Syrup Series NFU JS19, and OPI Sheer Tints 'I Can Teal You Like Me'.
Mondrian Inspired Mani - Left

To achieve this look, I started with a white base of NYC 'French Tip White'. Then, I used Konad Black Special Polish to stamp the grid pattern from Moyou London Artist Collection plate 01.
The nail polishes I used to fill in the blocks of colour were Essie 'Jelly Apple', Nfu Oh NFU JS19 (bright yellow), and OPI Sheer Tints 'I Can Teal You Like Me'.  

I was a little disappointed with the blue not being intense enough for the look I was going for, so I may have to try this again after I find the perfect 'true blue' jelly!

Wednesday, July 30, 2014

Colourful Cartoon Mani - Version 2.0

I had to touch up some wear and tear on my 'Colourful Cartoon Mani', so I used the opportunity to revise it a bit to give it a different look. I had a tiny bit of tip wear, and I lost one of the gems I had placed on my middle finger. So I decided to repaint the worn tips on my accent nails with random splotches of colour, and to change the neutral nail polish shade for black polish.

Colourful Cartoon Nail Stamping Manicure using Lead Light Technique, and Moyou London Princess Collection Plate 11. Polishes used include: Misa 'Bed of Roses'; Nfu OH Jelly Syrup Series Polishes NFU JS20, NFU JS18, NFU JS17, NFU JS12; China Glaze 'Creative Fantasy'; OPI '4 in the Morning'; NYC 'French White Tip', and Rimmel 'Black Satin'
Colourful Cartoon Mani - Version 2.0

The black polish I used was OPI's '4 in the Morning' from their Gwen Stefani collection.  This was my first time using this particular polish.  I was on the fence about buying it for the longest time (truthfully, I had pretty much chosen to pass on it) until I decided on a whim yesterday to buy it to try it out with this manicure. This polish is really all about the formula. The semi-matte finish reminds me of black rubber! In the picture above, my index and middle fingers look slightly shinier than the polish looks in real life, because I had just applied some cuticle oil prior to taking the shot.  The pinky finger gives a more accurate depiction of how the polish actually looks.
  
After the first 2 changes, I decided the manicure needed a little something extra to tie it all together. I went ahead and stamped some other cartoon/doodle themed images, which were from the same image plate that I used for the accent nails (Moyou London Princess collection 11).  I used another polish I bought yesterday, China Glaze's 'Kiss my Glass'.  I was going for a subtle, monochromatic look in order to add a little more visual interest, but to not compete with the super colourful accent fingers. 

Colourful Cartoon Nail Stamping Manicure using Lead Light Technique, and Moyou London Princess Collection Plate 11. Polishes used include: Misa 'Bed of Roses'; Nfu OH Jelly Syrup Series Polishes NFU JS20, NFU JS18, NFU JS17, NFU JS12; China Glaze 'Creative Fantasy'; OPI '4 in the Morning'; NYC 'French White Tip', and Rimmel 'Black Satin'
Colourful Cartoon Mani - Version 2.0 (Closeup of Additional Stamping)

Because of how subtle the stamping was, it was really hard to get a picture that showed the stamping well enough! The photo above is the best I could do to show the gunmetal on black stamping, and the photo below is a photo of the entire look.

Colourful Cartoon Nail Stamping Manicure using Lead Light Technique, and Moyou London Princess Collection Plate 11. Polishes used include: Misa 'Bed of Roses'; Nfu OH Jelly Syrup Series Polishes NFU JS20, NFU JS18, NFU JS17, NFU JS12; China Glaze 'Creative Fantasy'; OPI '4 in the Morning'; NYC 'French White Tip', and Rimmel 'Black Satin'
Colourful Cartoon Mani - Version 2.0 (Additional Stamping)


Sunday, July 27, 2014

Colourful Cartoon Mani

Today I'm sharing another manicure using the 'leadlight' technique:

Colourful Cartoon Nail Stamping Manicure using Lead Light Technique, and Moyou London Princess Collection Plate 11. Polishes used include: Misa 'Bed of Roses'; Nfu OH Jelly Syrup Series Polishes NFU JS20, NFU JS18, NFU JS17, NFU JS12; China Glaze polishes 'Creative Fantasy' and 'Inner Beauty'; NYC 'French White Tip', and Rimmel 'Black Satin'
Colourful Cartoon Mani

I used several jelly polishes from the Nfu Oh 'Jelly Syrup' series, China Glaze, OPI, and Misa.  I don't remember exactly which ones because I didn't plan out the colours before I used them. I just laid out all of my jelly nail polishes, and grabbed whichever one I felt like using when filling in different parts of the image.  It was so much fun - just like a tiny colouring book!

Here are pictures of the 4 stamped fingers:

Colourful Cartoon Nail Stamping Manicure using Lead Light Technique, and Moyou London Princess Collection Plate 11. Polishes used include: Misa 'Bed of Roses'; Nfu OH Jelly Syrup Series Polishes NFU JS20, NFU JS18, NFU JS17, NFU JS12; China Glaze polishes 'Creative Fantasy' and 'Inner Beauty'; NYC 'French White Tip', and Rimmel 'Black Satin'
Close-Up of Accent Nails
Despite the haphazard manner I used for selecting colours, a few elements in the images stayed constant from finger to finger.  I tried to use the same colours for the Cat, the Snake, and the Giraffe-like creature.

For the cat I used Misa 'Bed of Roses' for the nose, and NFU JS20 for the fur. The snake in front of the cat was coloured using NFU JS18  for the face, and NFU JS17 for the body. The giraffe thingy behind the cat was coloured using NFU JS12 for the body, Misa 'Bed of Roses' for the snout, and China Glaze 'Creative Fantasy' for the neck fur fringe. I also used a white base of NYC 'French White Tip' , and Rimmel 'Black Satin' for the stamping. The image I used was from Moyou London Princess collection plate 11

The neutral nails were painted with China Glaze 'Inner Beauty'. I also used some purple, teal, and fuchsia nail art rhinestones on my middle fingers.

Overall, I really like the way this manicure turned out. This cartoon image was one of the main reasons that I bought this Moyou London plate.  That was way before I even knew about the leadlight technique - I love the way that this method of adding colour really brought this image to life. 

Monday, July 21, 2014

Tulip Themed Half-Moon Manicure

Tulip Themed Half-Moon Nail Stamping Manicure using Moyou London Pro Collection Plates 07 and 08. Polishes used: Sally Hansen Complete Salon Manicure in 'Barracuda', Essie 'Jelly Apple', NYC Quick Dry Nail Polish in 'High Line Green', Nfu OH Jelly Syrup Series JS34, and Rimmel 'Black Satin'
Tulip Themed Half-Moon Manicure
This is my first attempt at a half-moon manicure. For the most part, I like how it turned out. Originally, I wasn't going to 'frame' the half moon with any sort of border, but it just looked unfinished. I added the red art nail tape as an afterthought a full day after I originally did my nails. As a result, it was really difficult to add the tape to the completely dry nail, especially since I had to try to curve it to follow the crescent of the half moon. Luckily, the tape placement issues are way less noticeable in real life than they are in the photo!

I used the following nail polishes to create this look:
Sally Hansen Complete Salon Manicure in 'Barracuda'
Essie 'Jelly Apple'
NYC In a New York Minute Quick Dry Nail Polish in 'High Line Green'
Nfu OH JS34
Rimmel 'Black Satin'

The stamping images I used were from Moyou London Pro Collection plates 07 and 08. I also used a few yellow rhinestones, and of course, the aforementioned red nail art tape. 

Monday, July 14, 2014

Pink and Green Mani using Leadlight Technique

Today's nail art was time-consuming, but worth the effort.

Pink and Green Nail Stamping Manicure using Leadlight Technique. Stamped with Pueen Plate PUEEN24. Polishes Used: NYC 'French Tip White', Rimmel 'Black Satin', Nfu Oh Jelly Syrup series polishes NFU JS17 (pistachio green), NFU JS24 (fuchsia), NFU JS34 (forest green), NFU JS36 (olive green), and OPI Be Magentale With Me


Some time ago, I watched a YouTube video by Messy Mansion on how to do the leadlight technique, and have been obsessed ever since! This is only my second ever manicure using the technique, so it's not perfect, but I still love how it turned out. I love being able to incorporate multiple colours into my stamping. 

I used the following polishes to achieve this look:

Base of the mani:
NYC French Tip White stamped with Rimmel Black Satin (using Pueen24)
Leadlighting effect:
Nfu Oh Jelly Syrup series polishes NFU JS17 (pistachio green), NFU JS24 (fuchsia), NFU JS34 (forest green), NFU JS36 (olive green), and OPI Be Magentale With Me
Base coat and top coat:
Pro-FX Protein enriched base coat and revitalizer, and Pro-FX Quick dry high gloss top coat.

I also used some fuchsia nail art rhinestones.

The part that took the longest was filling in all of the little dots with a dotting tool.  I doubt that I'll ever do a repeat of this mani, just because of how long it took.  Maybe I'd use this pattern for an accent nail or two, but at this point, I'm not looking forward to colouring hundreds of little dots on all 10 nails ever again! LOL!