Showing posts with label Double Stamping. Show all posts

Tuesday, September 7, 2021

Grey, Red and Black Abstract Mani

I wanted to do a fun abstract pattern to go with a black, white and grey tie-dye dress that I wore today. This is what I came up with:

Grey, Red, and Black Abstract Mani

For this manicure, I used Nubar Citadel, a light gray creme polish, as the base for the stamped fingers. I then stamped an abstract texture pattern over it using a dark gray creme polish, OPI's "Liv" in the Gray.  The texture patters used were from ÜberChic Beauty Über Mini plates 'Texture-licious', and 'Texture-licious 3'. The two accent nails are painted red with OPI 'Let Your Love Shine'. I also added some cute red heart decals over my stamped index and pinky fingers, to tie the look together.

I also did a slight modification of the mani on my other hand: 

Grey, Red and Black Abstract Mani

It's essentially the same design, but I double-stamped the nail stamped fingers with another texture pattern in black - Bundle Monster 'Straight Up Black' stamping polish. The texture pattern I used to top the design was from ÜberChic Beauty Über Mini plates 'Texture-licious' 4. This design more closely resembled the tie-dyed dress that I used as inspiration, but I liked both versions and couldn't bring myself to just pick one! 😄

Grey, Red and Black Abstract Mani - Polishes Used


I really enjoyed creating this manicure! It was a lot of fun to design, and a lot of fun to wear!

Thursday, September 5, 2019

Verdigris Mani 3.0


Polishes Used
Stamping Plates Used
China Glaze ‘Too Yacht to Handle’
Lina Nail Art Supplies:
Essie ‘Lady Godiva’
          - Make Your Mark Plate 02
Essie ‘Say it ain’t Soho’
          - You’re a Damasque! Plate 02
KB Shimmer 'Funky Cold Patina'


In my last post on KB Shimmer's 'Funky Cold Patina', I mentioned that I had plans to do a look inspired by that polish. 'Funky Cold Patina' got me thinking about some manicures I had done in the past based on copper patinas. Now, I typically don't like to repeat the exact same nail art manicure more than once, but for today's look I have decided to do the third incarnation of one of my favourite manicures ever - the 'Verdigris Mani'. I'll include a link to a post where I talk about the two previous versions that I did, and give a little more background on the manicure, right here.

This time around, I wanted to do a copper relief effect for the base copper parts of the manicure, and then put little spotches of light teal over it, to simulate copper relief art that has just started to develop a patina. To make the copper relief effect, I stamped a damasque pattern from Lina Nail Art Supplies 'You're a Damasque!' plate 02 using a chocolate brown polish, 'Lady Godiva', over an amazing copper polish, 'Say it Ain't Soho'.  I then double stamped a texture image from Lina Nail Art Supplies 'Make Your Mark', plate 02 in light turquoise to create the verdigris effect. The other nails are painted with 'Funky Cold Patina'.


I really like how the manicure turned out, but if I could do it again, I would find a way to incorporate some of the copper polish onto some or all of the turquoise nails: perhaps making the ring finger an accent nail that incorporated both looks on one nail, or even just having 3 copper/effect nails by painting the pinky finger the same as the index and middle fingers... Below, I've included a couple additional shots of this manicure.

Sunday, January 13, 2019

Pink Camouflage Mani

Today I have a fun pink camouflage manicure to share:

Pink Camouflage Mani
Unfortunately, I forgot to take a picture of the polishes I used, so I don't remember exactly which ones I used for this look. I'm pretty sure the light pink is 'Excuse Me, Sur' from Essie's spring 2017 'B'aha Moment' collection, which I used as the base of the manicure. I'm also think that the silver I used was (what's left of my rapidly depleting bottle of) Sally Hansen Insta-Dri 'Silver Sweep'.  I'm guessing this because, as I mentioned several times before on this blog, that is my go-to silver stamping polish. My bottle is almost done, and is getting quite gloopy, so that will probably be featured in an 'Empties' post sometime later this year!  I'm also pretty sure that the stamping plate that I used was Moyou London Trend Hunter 22.


I really like the colours and concept of the manicure, but I think next time I would do a little less stamping, as the end result is a bit too busy.  I think it doesn't read as clearly as camouflage print as it could because there are too many camo splotches, seeing as I stamped a few times with full nail images. The camo plate I used has individual camo splotches as well as full nail camo patterns, so next time around I want to try placing the splotches one by one with the individual splotch patterns to ensure a more balanced result.


Sunday, October 14, 2018

Red, White, Blue and Gold Plaid Manicure

This manicure was my attempt at recreating more of a traditional plaid using Red, White, Navy Blue, and Gold polishes:


In the past, I've done pink plaid in my 'Pink and White Pink Ribbon Mani', and yellow plaid in my 'Clueless Inspired Manicure'. I really liked those manicures, but since I have never done a plaid manicure using more traditional colours, I decided to give that a try.

For this manicure, I used the following polishes:

OPI 'Incognito in Sausalito', Sally Hansen Color Foil 'Liquid Gold', OPI 'Dutch Tulips', and Konad Special Nail Polish - White
Polishes Used

Polishes Used
Stamping Plates Used
OPI 'Incognito in Sausalito'
Moyou London Hipster Collection - 05
Sally Hansen Color Foil 'Liquid Gold'
Moyou London Hipster Collection - 06
OPI 'Dutch Tulips'
Clear Jelly Stamper Stamping Plate:
Konad Special Nail Polish - White
             'Got Plaid?' Plate CjS-56

The stamping on my index finger came out a little wonky, but overall, I really like the way the manicure turned out! In addition to the polishes mentioned, I also topped the look off with a matte topcoat (Essie's 'Matte about You') in order to make the finished result appear a bit more fabric like.

Saturday, August 1, 2015

Pink and Blue Double Stamped Mani

Blue jelly polish base stamped with navy blue floral outline pattern, and then with a pink abstract heart pattern. Accent ring finger is covered with pink matte glitter instead of the second stamping of pink over the blue base.

Today's manicure is a reconfiguration of a manicure that I did earlier this year. During the 2015 Crackle Polish Challenge, I did a manicure called the 'Shattered Heart Mani'. It featured a crackle polish decal, glitter, and double stamping over a translucent polish base. Even though the main concept behind the manicure was to showcase the crackle polish decal, the feature that I ended up liking the most was the double stamped design that I used on my thumbnails. I even mentioned in that post that "I may have to do an entire mani like this!". Well, I finally ended up doing it!

Polishes Used
Plates Used
Nfu-Oh NFU JS30 (Royal Blue)
Bundle Monster Secret Garden Collection:
OPI ‘On Pinks & Needles’
BM-721
OPI ‘I Saw… U Saw… We Saw… Warsaw’
Pueen Love Elements Collection:
Sally Hansen Insta-Dri ‘Presto Pink’
PUEEN41

Nfu-Oh NFU JS30 (Royal Blue), OPI ‘On Pinks & Needles’, OPI ‘I Saw… U Saw… We Saw… Warsaw’, and Sally Hansen Insta-Dri ‘Presto Pink’

In order to switch things up a bit, I used a blue jelly polish from Nfu-Oh's Jelly Syrup Series as the base, and a dark blue polish ('I Saw...' from OPI's Spring 2013 Euro Centrale Collection) for the first layer of the stamping design. Also, for the first layer of stamping, I used a different stamping plate from the one I used the first time around. The polish and plate that I used for the top layer of stamping were the exact same as the original manicure.

I wanted to do something a little different for my ring finger, so instead of stamping the pink top layer over the blue base, I used an awesome pink matte glitter polish from OPI's Brights 2015 Collection called 'On Pinks and Needles'. The shade of pink of the glitters, and of the stamping polish are almost a perfect match!

I really love how this look turned out! I don't like to repeat looks, but I don't think I'm quite done with this particular style just yet. I would like to try a version with brighter colours, and perhaps experiment a bit more with different combinations of patterns that will work well together! 
Collage featuring extra shots of the manicure

Wednesday, February 11, 2015

Crackle Polish Challenge #9 - Negative Space Stamping over Pink on Pink Shatter

2015 Crackle Polish Challenge Manicure #9

Featured crackle application:
Stamping a negative space image over a background of crackle polish so that the objects created by the stamped image end up crackle patterned.

Featured crackle polish:
China Glaze's Crackle Glaze in 'Broken Hearted'

Nail stamping manicure featuring small, light pink hearts with medium pink crackle texture, evenly interspersed over a black background
Negative Space Stamping over Pink on Pink Shatter

Polishes Used:
China Glaze Crackle Glaze 'Broken Hearted'
OPI 'Pink Friday'
Konad Special Polish in Black

Plate Used:
PUEEN55

I really like the finished look of this mani. This manicure also gave me some new insight on how to take better advantage of the negative space etched images in my stamping plate collection. I usually don't use those images on my plates, because previously, I never really clued in to the advantages of stamping the background colour polish over most of the foreground colour polish except for the design you want, when usually you could just as easily stamp the design in the foreground colour over the background colour. 

Now, I finally get it! Negative space stamping gives you more possibilities, because it allows you to use a pattern or texture as your base coat, or maybe even a sheer colour, (or anything else that is difficult to stamp over another colour), and have that ultimately be the pattern/texture/colour of the design. For example, if I wanted to get the same look of today's mani, without negative space stamping, I would have to stamp crackled hearts over a black background. To do this, I would have to first make sure that the light pink polish was opaque enough that the black won't show through it, (or use multiple coats of the light pink, which would present even more of a technical challenge), stamp light pink hearts over the black, and then apply the crackle polish individually to each heart. That would be way more time consuming, and might not even work without the right light pink polish!

Another interesting technical thing I did with this mani, was using thin, short strokes when I applied the crackle polish, so the cracks would be finer. This way, the smaller cracks would look more proportional on the small hearts. 

Here's a variation of this manicure that I did on my left hand:

Nail stamping manicure featuring small, light pink hearts with medium pink crackle texture, evenly interspersed over a black background, on the thumb, ring finger and pinky. The Index and middle fingers feature the same pink hearts interspersed over a silver background, and then stamped with a interlocking heart outline pattern
Negative Space Stamping over Pink on Pink Shatter - Variation

Originally, I didn't want to have a lot of contrast in my final design, so instead of using black polish, I tried to stamp a silver polish, China Glaze 'I'd Melt for You', over the pink on pink crackle base. That didn't quite work out, because there was not enough contrast! In order to salvage the design (I really didn't want to have to start all over again) I ended up stamping a heart outline image from plate PUEEN41 over it. By the way, this is what I call a 'peace sign' mani, because the index and middle fingers, the fingers used to make a peace sign, are different than the rest of the nails - now, I'm not sure if anyone else uses this term, but that's how I think about it!

OPI 'Pink Friday', China Glaze 'Broken Hearted', China Glaze 'I'd Melt for You', and Konad Special Polish in Black
Polishes Used

Saturday, February 7, 2015

Crackle Polish Challenge #7 - Shattered Heart Mani

2015 Crackle Polish Challenge Manicure #7

Featured crackle application:
Using crackle polish to make a decal

Featured crackle polish:
Sally Hansen's Crackle Overcoat in 'Fuchsia Shock'

A 5 picture collage showing a black and pink nail stamping manicure. All 5 nails were painted with a translucent, dark grey base. The thumbnail was then double stamped with 2 images, one in black and the next in pink. The pointer and pinky are just stamped with black, with a pink nail art rhinestone added. Middle finger: pink shard glitter. Ring finger: Lt pink heart decal with medium pink shatter polish over it.

Polishes Used:
Sally Hansen Crackle Overcoat in 'Fuchsia Shock'
Sally Hansen 'Big Smoky Topcoat'
Sally Hansen Xtreme Wear 'Rouge Rush'
Sally Hansen Insta-Dri 'Presto Pink'
China Glaze 'Feel the Breeze'

Plate Used:
Pueen Celebration Collection 'Fireworks Festival'
PUEEN41

Today's crackle technique involved making a stamping decal out of dried crackle polish.  To do this, I started by painting a couple coats of my base polish, 'Feel the Breeze', a light pink creme polish, over a stamper. When that was fully dry, I painted a layer of 'Fuchsia Shock' over it, and allowed that to dry.  When the stamper was completely dry, I carefully peeled off the polish, and then cut two heart shapes out of the dried polish.

After painting my nails with the sheer black polish, 'Big Smoky Top Coat', I placed the decals over the slightly wet nails, and then added a layer of topcoat in order to get the decal to adhere to my nail. I finished up with a little stamping, glitter, and rhinestones on my other nails.

On the bottom right corner of the collage, you can see a variation of the decal that I did on my right hand. Not only is the heart decorated with shatter nail polish, but this heart is also cracked into three pieces, and slightly separated to reinforce the shattered heart theme. I really like this variation because it takes advantage of one of the special features of decals - you can manipulate their shape, and placement.

All in all, I really like how this mani turned out. I love how the shards of 'Rouge Rush' glitter echo the 'shattered' theme, as well as how awesome-looking the double stamping on my thumb turned out - I may have to do an entire mani like this! I also think that this use of shatter polish really does add something special to the overall look of the mani.

Monday, December 29, 2014

Red, Green, and Gold Ornament Mani

Today I have yet another Christmas Mani to share with you.

Nail stamping manicure with red and dark green horizontal striped nails. The ring finger accent nail has 3 images of Christmas ornaments stamped in gold.
Red, Green, and Gold Ornament Mani

Polishes Used:
China Glaze 'Tip Your Hat'
Sally Hansen Complete Salon Manicure 'On Pines and Needles'
Sally Hansen Color Foil 'Liquid Gold'

Plates Used:
Moyou London Pro Collection XL - 01
Moyou London Festive Collection - 18

China Glaze 'Tip Your Hat', Sally Hansen Complete Salon Manicure 'On Pines and Needles', and Sally Hansen Color Foil 'Liquid Gold'
Polishes Used
I'm pleased that the stripes came out cleanly in this mani. I used a squishy stamper, and the 'press' technique (as opposed to rolling the image on my nails). I also learned that with the stripe images on the pro collection plate, it helps to scrape parallel to the lines in order to fill the grooves of the plate more consistently.

When I used this same plate to do the stripes for my 'Blue Striped Movember Mani', I didn't do any of these things: I used a hard stamper, I rolled the image, and I scraped in a direction perpendicular to the lines on the image plate. You can see a major difference in the cleanliness of the lines! Although in the Movember Mani, the lines didn't look quite so bad in real life (no close-ups!), I'm really impressed that for this new mani, the results look great both near and far!

Sunday, December 21, 2014

Snowy Pine Forest Mani

Today I have another holiday themed manicure to share.

nail stamping manicure featuring forest green pine trees over white background with silver snowflakes - left handnail stamping manicure featuring forest green pine trees over white background with silver snowflakes - right hand

Polishes Used:
China Glaze 'White on White'
China Glaze 'I'd Melt for You' (2014 Holiday Twinkle Collection)
China Glaze 'The Outer Edge' (Limited Edition 'The Giver' Collection)
Maybelline Color Show 'Walk in the Park'

Plate Used:
Cheeky Jumbo Plate 6 'Happy Holidays'

China Glaze 'White on White', China Glaze 'I'd Melt for You', China Glaze 'The Outer Edge', and Maybelline Color Show 'Walk in the Park'
Polishes Used
This look was inspired by a beautifully decorated Christmas tree I saw in a mall I visited recently. It was covered in large spherical ornaments, some in solid white and the rest in solid silver. They also had these gorgeous silver-coloured sculptures of grazing reindeer circled all around it. The entire scene was so elegant - I really wish I had taken a picture!

I really like how this manicure turned out. However, I do have one small regret with my left thumb. I put a coat of 'The Outer Edge', a silver and white micro-glitter, over the finished nail, before I realized that the accent nails look better without it. I also used way too much, not realizing how dense the glitter particles were.  It ended up almost completely obscuring the tree! I was in no mood to start all over again, so I tried to carefully double stamp another tree directly on top of the old one. It seemed to turn out alright, so I just went with it. I ended up getting a couple of compliments on this manicure, (which is always nice!) so I guess the boo-boo wasn't that big of a deal after all.

This is the first time that I used 'I'd Melt for You', a silver metallic polish from China Glaze's recent holiday line. I love it!!!  This might be a new replacement for Sally Hansen Insta-Dri 'Silver Sweep' as my go-to silver!  Ever since Sally Hansen changed the formula of 'Silver Sweep' I was really worried about finding a replacement - and my last bottle of the old formula 'Silver Sweep' is about two-thirds empty. So I'm really glad this polish came along when it did.

I do have other silver polishes, but what I really love about 'Silver Sweep' (and now also 'I'd Melt for You') is that they don't dry lightning fast like some other metallic silver polishes. With some of my highly reflective silver polishes, you have to work really quickly, so the polish doesn't dry in the grooves of the image plate, before you get a chance to pick it up with your stamper!

I ended up wearing this manicure way longer than I wanted to - I wore it for 5 days! I love the mani, but I have so many ideas that I'd like to get in before Christmas, that I probably shouldn't have worn this more than a couple days! I had a really hectic week, and most evenings, I honestly didn't feel like doing my nails.

Anyways, I'm gaining even more inspiration and motivation to crank out holiday manicures now that we're getting even closer to Christmas, so stay tuned to see what I come up with!

Monday, November 10, 2014

Blue Striped Movember Mani

As promised during my last post, here is my revised Movember Manicure:

Blue Striped Movember Manicure using Essie 'I'm Addicted', and China Glaze polishes 'Scandalous Shenanigans', 'New Birth', and 'Five Rules'. Stamped with Moyou London Pro XL plates 01, and 08
Blue Striped Movember Manicure
The inspiration for the blue stripes came from the logo for 'Prostate Cancer Canada', one of the Canadian beneficiary partners of the Movember campaign. Their logo is a tie that is striped in 2 shades of blue. You can check out the logo for yourself, and learn a bit more about the Movember campaign on their website.

The background of my accent finger was reused from the previous version of the manicure 'Muted Movember Mani', I simply stamped the moustache decal over it.

Polishes Used:
China Glaze 'The Giver' Collection: 'New Birth', and 'Five Rules'
Konad Special Polish in Black
Essie 'I'm Addicted'
China Glaze 'Scandalous Shenanigans'

Stamping Plates Used:
Moyou London Pro XL Collection 01 (stripes)
Moyou London Pro XL Collection 18 (background pattern on ring finger)
Moyou London Rebel Collection 05 (moustache)

I really like how this manicure turned out. The bold stripes in vivid blue shades were a really fun look, and I even got a few compliments on the manicure!

Saturday, November 8, 2014

Muted Movember Mani

Today's mani was inspired by the start of 'Movember' - a public awareness and fundraising campaign where men across the globe grow moustaches during the month of November in support of Men's Health issues.

Muted Movember Nail Stamping Manicure using China Glaze 'Five Rules' and 'New Birth'
Muted Movember Mani

Polishes Used:
China Glaze 'The Giver' Collection: 'New Birth', and 'Five Rules'
DRK stamping polish in 'Metallic Brown'

I chose to make the background stamping very subtle for this manicure. I used muted colours, with very little contrast between them. This allows the moustache accent to really stand out.

Stamping Plates Used:
Moyou London Pro XL Collection 01
Moyou London Pro XL Collection 18
Winstonia Plate W109

Nail Stamped with China Glaze 'Five Rules' and 'New Birth'
China Glaze 'New Birth' (left) and 'Five Rules' (right)

Overall, I like how the manicure turned out, but it's a little too tame compared to my usual tastes. I ended up revising the mani the next day to add a bit more colour. Stay tuned for the revised version of this mani, during my next post!

Friday, October 31, 2014

Halloween Skittles Mani

I'm so happy that I was able to create another Halloween-themed manicure to share with you today! Here is the finished mani:

Halloween Themed Nail Stamping Manicure using Orange, Black, Silver, White and Yellow Nail Polishes (Right Hand)Halloween Themed Nail Stamping Manicure using Orange, Black, Silver, White and Yellow Nail Polishes (Left Hand)

The polishes I used were:
Sally Hansen Insta-Dri in 'Lightening' and 'Silver Sweep'
Konad Special Polish in both black and white
Sinful Colours 'Citrine'
NYC 'Black Lace Creme'
China Glaze 'White on White'

I wanted to use traditional Halloween colours, so I chose orange, yellow, black, white and silver. Overall, I'm happy with the colour choices. However, I feel that the yellow background on my right thumb stands a bit too much apart from the rest of the look.  I really wanted to have yellow inside the pumpkins to represent the glow from a burning candle, but now I really wish I had used black as the base, and perhaps used advanced stamping technique to fill the pumpkin's eyes, nose and mouth with the yellow.

The stamping plates I used were:
Bundle Monster plates BM-H06, BM-H07, and BMH08
Cheeky Jumbo Plate 6 'Happy Holidays'
Konad plate M13

Halloween Themed Nail Stamping Manicure using Orange, Black, and Yellow Nail Polishes (Thumb Only)
Halloween Skittles Mani - Left Thumb

I`m quite pleased with how this manicure turned out. There is no shortage of Halloween themed plates in the world of nail stamping, so there are many cute, fun, and spooky images to choose from. I still have a few more plates that I didn't get a chance to use, so if I have the time, I just might do one more Halloween mani for the weekend. If not, the plates will just have to wait until next year!

Halloween Themed Nail Stamping Manicure using Orange, Black, Silver, White and Yellow Nail Polishes (Right Fingers)
HAPPY HALLOWEEN!!!

Monday, October 27, 2014

Pink and White Pink Ribbon Mani

A few posts ago, I did a 'Navy Pink Ribbon Mani' in support of Breast Cancer Awareness Month. In that post, I mentioned that I wanted to do yet another, more traditional, pink ribbon mani later in the month. Well, I finally got around to doing it!

Here is the finished manicure:

Pink and White Pink Ribbon Nail Stamping Manicure using OPI 'Mod About You' and 'The Power of Pink', stamped with Bundle Monster BM-321, Vivid Lacquer VL 001, and Moyou London Hipster Collection Plates 05 and 06
Pink and White Pink Ribbon Mani

The polishes I used were:
OPI polishes 'Mod About You', and 'The Power of Pink' from the 'Pink of Hearts' 2014 Duo
Sally Hansen Insta-Dri in 'Presto Pink'
China Glaze 'White on White'
Konad Special Polish in White

OPI 'Pink of Hearts' 2014 Duo (boxed) containing OPI 'Mod About You', and 'The Power of Pink'
OPI 'Pink of Hearts' 2014 Duo
The image plates I used were:
Bundle Monster plate BM-321 (full nail design on my thumb)
Vivid Lacquer plate VL 001 (pink ribbon on my middle finger)
Moyou London Hipster Collection plates 05 and 06 (plaid print on index and pinky fingers)

I also used a few nail art rhinestones in various shades of pink on my thumb

Pink and White Pink Ribbon Nail Stamping Manicure (Thumb Only) using Sally Hansen Insta-Dri 'Presto Pink' and China Glaze 'White on White' stamped with Bundle Monster BM-321. Also featuring a few nail art rhinestones in various shades of pink
Pink and White Pink Ribbon Mani - Left Thumb

I really like how this manicure turned out. I especially like the pink plaid! I followed the same double stamping technique that I used for the 'Clueless Inspired' yellow plaid manicure that I did a couple months ago. I'm totally enamoured with the plaid designs on the Moyou London Hipster plates, and I can see myself using these quite often as parts of future 'skittles' manicures.

As for what's coming up on the horizon, I'm going to postpone the Moyou London Artist Collection Design Series for a bit, as I have a few Halloween ideas I'd like to do before October is through. I may only be able to do one Halloween manicure, as there are only 5 days left in the month, and really like the mani I just created, so I hope to wear it for at least a day or two! We'll see what I can squeeze in. Since Halloween is on a Friday this year, I guess I can sort of count the weekend as part of it, which gives me a full week to work with!

Monday, October 6, 2014

Halloween Themed Test Mani

Today, I have a test mani to share.  There are a lot of really great Halloween collections and plates out right now, so most of my latest purchases have a bit of a Halloween theme.

I was wearing my Red and Black Tree Mani from my last post, and decided to do some test stamps over it using my newly purchased Bunny Nails plate, HD - C.

The stamping colours I used were Konad special polish in black and white, and Sally Hansen Insta-Dri in 'Silver Sweep'. The base colour is China Glaze's 'I Love Your Guts' from their Halloween 2014 collection, and I tested a bit of a glitter polish I just bought from Sinful Colors' 2014 Halloween Collection called 'Cauldron Couture' (it's on my right middle finger). The tree image was from my previous mani, and was stamped using Bunny Nails plate BuNa-A.

Halloween Themed Nail Stamping Test Mani, using Bunny Nails Stamping Plates BuNa-A, and HD-C. Polishes Used: China Glaze 'I Love Your Guts', and Konad special polish in 'black' and 'white'.Halloween Themed Nail Stamping Test Mani, using Bunny Nails Stamping Plates BuNa-A, and HD-C. Polishes Used: China Glaze 'I Love Your Guts', Sally Hansen 'Silver Sweep', and Konad special polish in 'Black'.

Halloween Themed Nail Stamping Test Mani, using Bunny Nails Stamping Plates BuNa-A, and HD-C. Polishes Used: China Glaze 'I Love Your Guts', Sally Hansen 'Silver Sweep', Sinful Colors 'Cauldron Couture', and Konad special polish in 'black' and 'white'.
Halloween Themed Test Mani -  Right
Halloween Themed Nail Stamping Test Mani, using Bunny Nails Stamping Plates BuNa-A, and HD-C. Polishes Used: China Glaze 'I Love Your Guts', Sally Hansen 'Silver Sweep', and Konad special polish in 'black' and 'white'.
Halloween Themed Test Mani -  Left
I really love this plate! There's such a great mix of amazing images that I feel may have to do a week's worth of Halloween manicures this year, instead of just one!

Tuesday, September 16, 2014

Birth of Venus Mani - Using Moyou London Artist Plate 05

Today's manicure was inspired from Sandro Botticelli's classic painting 'Nascita di Venere' or 'The Birth of Venus'.  This is the 3rd instalment of my design series using my Moyou London Artist Plates. Today's plate was Moyou London's Artist Plate 05, which is also inspired from the painting. I pulled colors and motifs from the original painting, and incorporated 5 images from different parts of the Moyou Plate. Here is the finished manicure:

Birth of Venus Nail Stamping Manicure - Using Moyou London Artist Plate 05, Moyou London Kitty Collection Plate 02, and Moyou London Sailor Collection Plate 01. Polishes Used: Maybelline New York Color Show 'Walk in the Park', Essie 'Sew Psyched', Sally Hansen Color Foil 'Rose Copper', DRK Nails 'Metallic Brown' Stamping Polish, Sally Hansen Xtreme Wear 'Breezy Blue', Revlon 'Urban', Rimmel 'Black Satin', Essie 'Rock the Boat', NYC 'French Tip White', Sally Hansen Complete Salon Manicure 'Almost Almond', OPI 'Y'all Come Back Ya Hear?', and NFU Oh Jelly Syrup Series NFU JS16.
Birth of Venus Mani

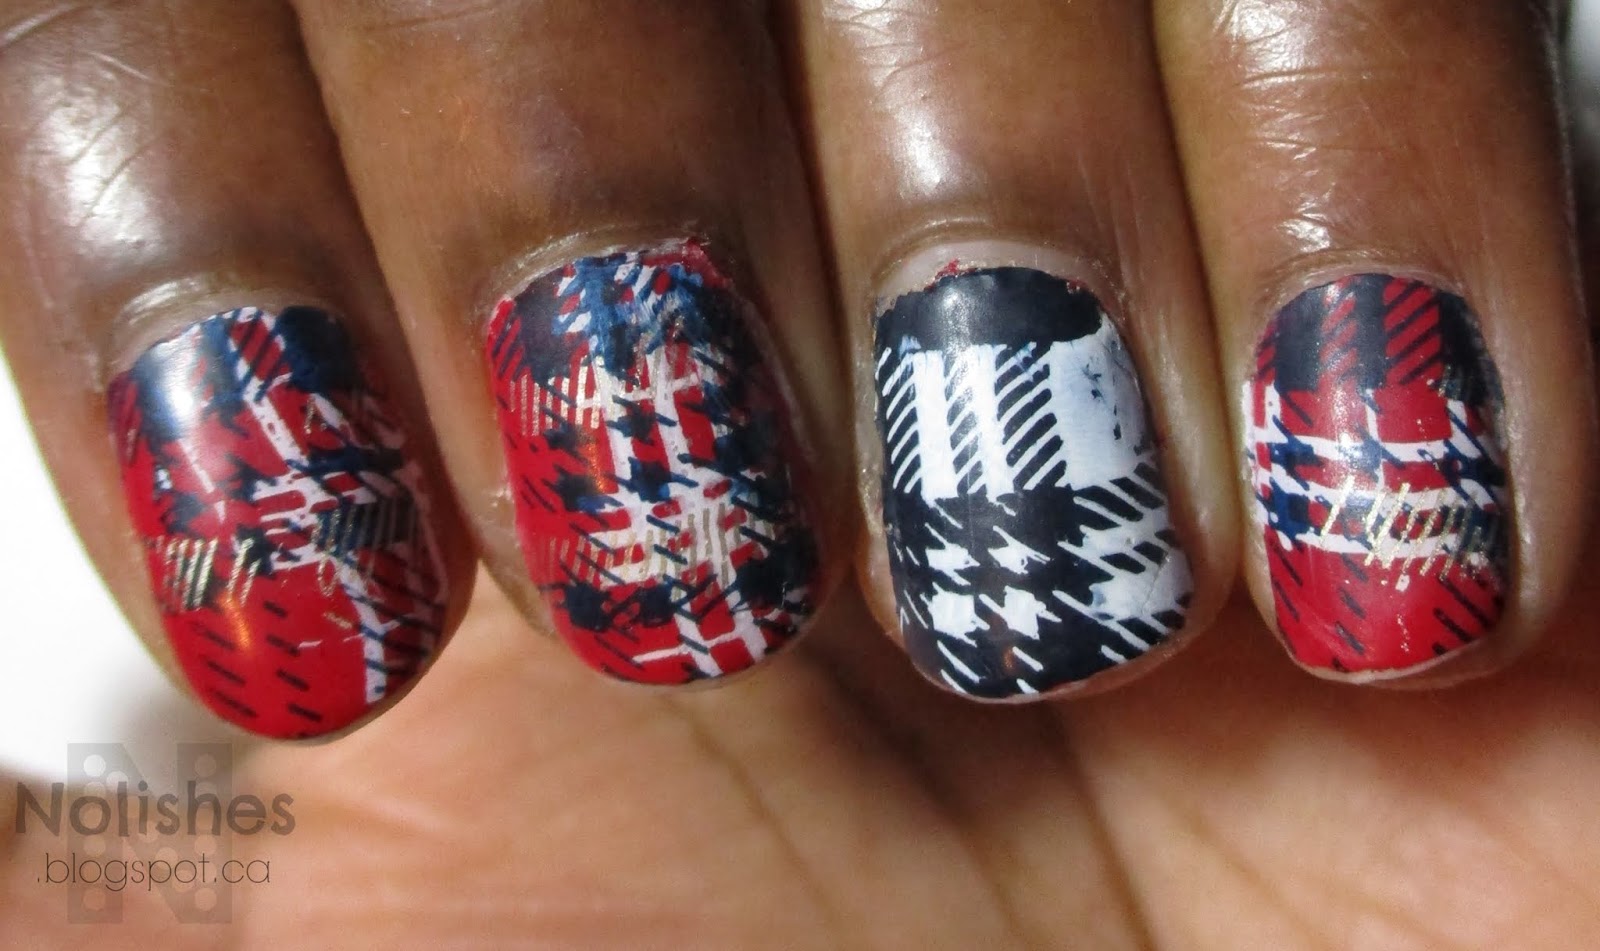
The pinky represents the tree canopy in the upper right quadrant of the painting, while the ring finger represents the robe that the handmaid is waiting to cover Venus with. The clamshell on the middle finger represents Venus' mode of transportation in the painting, and fittingly, it is stamped over wave images. The index finger represents the blowing winds and falling flowers to the left of Venus, and of course we have Venus' face on the thumb.

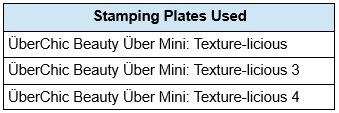
Here are the plates and polishes I used:
Plates:
Moyou artist collection plate 05, Moyou London Kitty Collection Plate 02 (flower image on index finger), Moyou London Sailor Collection Plate 01 (Clamshell image on middle finger).

Polishes:
Not including base and top coat, I used 12 different polishes to achieve this look. Here they are listed  by the finger on which the polish is one of the base or main colours:
Pinky: Maybelline New York Color Show 'Walk in the Park', and Essie 'Sew Psyched'
Ring Finger: Sally Hansen Color Foil 'Rose Copper', DRK Nails 'Metallic Brown' Stamping Polish
Middle finger: Sally Hansen Xtreme Wear 'Breezy Blue', Revlon 'Urban', and Rimmel 'Black Satin'
Index Finger: Essie 'Rock the Boat', and NYC 'French Tip White'
Thumb: Sally Hansen Complete Salon Manicure 'Almost Almond', OPI 'Y'all Come Back Ya Hear?', and NFU Oh Jelly Syrup Series NFU JS16.

Birth of Venus Nail Stamping Manicure - Using Moyou London Artist Plate 05, Moyou London Kitty Collection Plate 02, and Moyou London Sailor Collection Plate 01. Polishes Used: Maybelline New York Color Show 'Walk in the Park', Essie 'Sew Psyched', Sally Hansen Color Foil 'Rose Copper', DRK Nails 'Metallic Brown' Stamping Polish, Sally Hansen Xtreme Wear 'Breezy Blue', Revlon 'Urban', Rimmel 'Black Satin', Essie 'Rock the Boat', NYC 'French Tip White', Sally Hansen Complete Salon Manicure 'Almost Almond', OPI 'Y'all Come Back Ya Hear?', and NFU Oh Jelly Syrup Series NFU JS16.
Birth of Venus Mani

This manicure was very time-consuming. I used a lot of different materials and techniques to achieve the look, and I also had a lot of failed attempts and revisions of my original plan.

One of the techniques that I used was the decal method. This was done on the middle finger, where I made a stamped decal of a clamshell.This is the first time I've incorporated this technique into a manicure. All in all, it worked well, except for on my left hand where I had a slight problem when placing the decal over my freshly top-coated nail (which also had a stamped background image underneath). I ended up having to lift and reposition the decal, which caused the background to get a little smudged on that finger. Next time, I'm going to wait until the polish is completely dry before I place the decal.

I also want to point out that I really like the combination of 'Sew Psyched' with 'Walk in the Park' on my pinky.  I would love to do another manicure featuring these two colours - they look so good together!

Sunday, August 24, 2014

Flamingo Themed Mani - 2nd Attempt

Since I wasn't fully satisfied with the execution of my last flamingo manicure, I decided to try again. This time, I had the idea to use the cover of the Moyou London Tropical Collection image plates as the inspiration for the mani. Here's a picture of the cover:

Moyou London Tropical Collection Sleeve
And here's the finished manicure:

Flamingo Themed Nail Stamping Manicure Version 2 - Left Hand. Polishes Used: Essie 'Turquoise and Caicos', Sally Hansen Xtreme Wear 'Mint Sorbet', DRK nails Metallic Brown stamping polish, China Glaze's 'Flip Flop Fantasy', and a dark green nail polish. Plates Used: Moyou London Plates:  Sailor Collection 04, Tropical collection 02 and 06, Time Traveller Collection: Back to the 80's 04; and Winstonia plate W210.
Flamingo Themed Mani Version 2 - Left Hand

Flamingo Themed Nail Stamping Manicure Version 2 - Right Hand. Polishes Used: Essie 'Turquoise and Caicos', Sally Hansen Xtreme Wear 'Mint Sorbet', DRK nails Metallic Brown stamping polish, China Glaze's 'Flip Flop Fantasy', and a dark green nail polish. Plates Used: Moyou London Plates:  Sailor Collection 04, Tropical collection 02 and 06, Time Traveller Collection: Back to the 80's 04; and Winstonia plate W210.
Flamingo Themed Manicure Version 2 - Right Hand

I used a lot of materials for this mani - a total of 5 image plates, and 5 nail polishes (not including base and top coat). For the base colour, I used Essie's 'Turquoise and Caicos'. All fingers except for my middle fingers were stamped with Sally Hansen Xtreme Wear in 'Mint Sorbet', using a wave image from Moyou London's Sailor Collection plate 04. I stamped my middle fingers with the flamingo pattern image from Moyou London's Tropical collection plate 06, using China Glaze's 'Flip Flop Fantasy'.

On my thumbs, I used the flamingo decal image from Winstonia plate W210, as well as one of the palm trees from Moyou London's Time Traveller Collection: Back to the 80's plate 04. On my ring fingers, I used the same flamingo decal from W210, but this time paired it with a tropical leaf image which was a part of one of the full nail images from Moyou London's Tropical collection - 02. I used DRK nails Metallic Brown stamping polish to colour the palm tree trunk, and coconut details on my thumbs and ring fingers.

***Edit: I realized well after publishing this post, that I forgot to include the name of the dark green polish I used for the palm leaves.  Unfortunately, I no longer remember which polish I used.***

Here are some images of the final result paired with the original piece it was inspired from:

Moyou London Tropical Collection Sleeve and the Manicured Thumbs they inspired

Moyou London Tropical Collection Sleeve and Manicured Thumb it inspired

I'm finally satisfied with my flamingo manicure! It took me a couple tries, but I'm glad I persevered.

Sunday, August 17, 2014

Pink, White and Silver Mani

This manicure is the end result of one of those times when I knew I had to do my nails, but I had no idea what I wanted to do with them! I ended up taking a look at some of my untried polishes for inspiration. I eventually decided I wanted to use one of my pink untrieds, as well as an OPI 'liquid sand' polish that I had just purchased. So here's what I came up with:

Pink, White, and Silver Nail Stamping Manicure, stamped with Pueen Plate PUEEN04, and Moyou London Explorer Collection 22. Polishes Used: China Glaze 'White on White' and 'Flip Flop Fantasy'; OPI 'It's Frosty Outside'; and Sally Hansen 'Silver Sweep'.
Pink, White and Silver Mani

I used China glaze 'White on White' for the base polish on all fingers except for my ring finger. I also used OPI's Liquid Sand 'It's Frosty Outside' on my ring finger. I used China Glaze's 'Flip Flop Fantasy' (new formula) and Sally Hansen Insta-Dri in 'Silver Sweep' to do the stamping and dotting over the white nails.  The stamping plates I used were PUEEN04, and Moyou London's Explorer Collection 22.  I also used one nail art rhinestone for my thumb.

This was my first experience with an OPI Liquid Sand polish. Personally, I'm not a big fan of textured nail polishes, so initially, I had decided to pass on these polishes. But then I saw a picture of a manicure someone did using 'It's Frosty Outside' and thought it looked so sparkly and opulent! That swayed me into buying one to try it out.

Now that I've tried it, I think that in real life, this polish seems a little more dull on the hand than it does in pictures. In pictures, it looks like a layer of crushed sparkly diamonds, but in real life it seems kind of like light gray sandpaper with pieces of silver glitter throughout. From the name, I guess that is what they were going for, and it is actually an interesting look, but it's just not as shiny and blingy as I hoped. I'm tempted to try a layer of topcoat, even though the tag on the bottle says not to.

As for the other (previously) untried polish, Flip Flop Fantasy, I'm very pleased with how bright and fun the color is. In fact, it has inspired a great idea for my next manicure, ensuring that for my next mani I won't be in the same predicament I found myself in when I started this one! Stay tuned...

Wednesday, August 13, 2014

'Clueless' Inspired Manicure

Recently, the 90's cult classic movie 'Clueless' has been brought back to the public consciousness. The music video for one of summer 2014's hit songs, 'Fancy' by Iggy Azalea featuring Charli XCX, paid homage to the movie by recreating some of it's most memorable scenes. Fashion played a major role in the movie, and one of the movie's most unforgettable pieces of wardrobe was prominently featured in the music video - lead character Cher's iconic yellow plaid skirt suit. I remember being amazed at how awesome that outfit was, the first time I saw the film! Seeing it again in the music video brought back so many memories. All hopped up on nostalgia, I was inspired to create this manicure based on that outfit.

'Clueless' Inspired Nail Stamping Manicure - Left. Polishes used: Sinful Colors 'Chick Chick', Konad Special Polishes in white, and black, and Claire's Cosmetics 'Splatter Paint'. Stamped with Moyou London Hipster Collection plate 05.
'Clueless' Inspired Manicure - Left
  
'Clueless' Inspired Nail Stamping Manicure - Right. Polishes used: Sinful Colors 'Chick Chick', Konad Special Polishes in white, and black, and Claire's Cosmetics 'Splatter Paint'. Stamped with Moyou London Hipster Collection plate 05.
'Clueless' Inspired Manicure - Right

 I really liked the way this turned out. It's a bright and fun twist on a traditional plaid.  I used Sinful Colors 'Chick Chick' as the base colour for the manicure.  I used three different plaid images from Moyou London's Hipster Collection Plate 05. I double stamped all of my nails, except for my ring fingers, with Konad Special polish in both white and black. On my ring finger, I applied a splatter effect top coat. The one I used was from Claire's Cosmetics, called 'Splatter Paint'.   I topped everything off with a high gloss topcoat.  I was tempted to go matte with this one, to make it more reminiscent of fabric. I was also thinking about trying to incorporate the jacket's silver buttons into the manicure as well, however I decided against both ideas in order to keep things simple.

This look was pretty quick and easy to do. Also, it would work with pretty much any base colour. I think I will definitely be trying this out with different colour combinations sometime in the future!