I couldn't possibly choose any other polish today...
Showing posts with label Occasion. Show all posts
Showing posts with label Occasion. Show all posts
Monday, September 19, 2022
Sunday, December 26, 2021
Christmas Glitter Mani 2021
I fell behind with posting, but I really wanted to get this Christmas Mani up on the blog (even though there are a few older manis that I have yet to post! 😅), as it's becoming a bit of a tradition for me to do this same mani at Christmas-time:
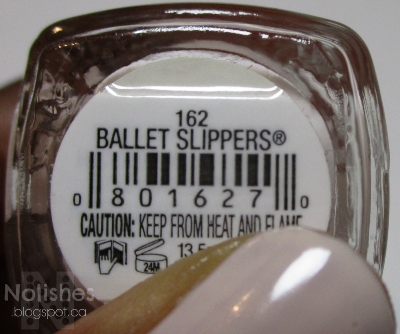
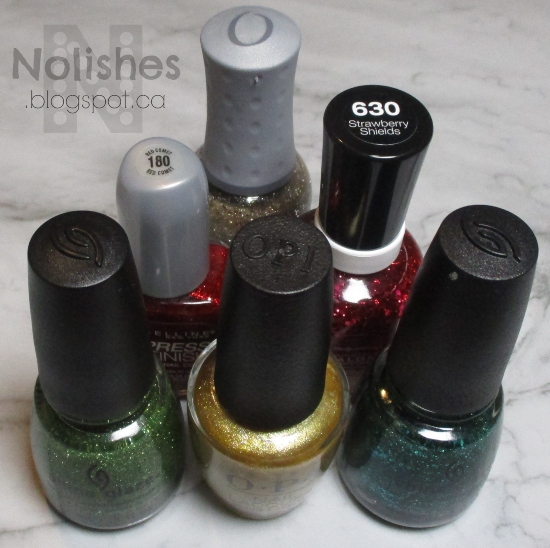
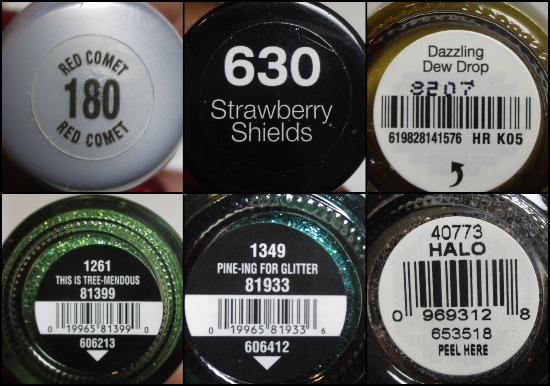
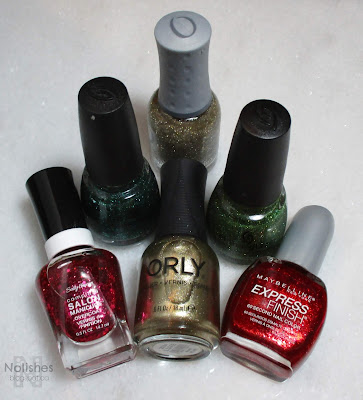
One change that I made from the original version, is that I am using a different gold base polish for my middle finger. In the first two versions I used Orly 'Luxe' as the base coat, which is a bit more of a true gold colour. This year (and I think last year too), I started using OPI 'Dazzling Dew Drop', which is a bit more of a brassy, yellow-toned gold. I think that this shade of gold works a little better with this bright, playful look. For both versions, I used Orly 'Halo' as the glitter topper over the gold polishes.
Once again, I love how it turned out! This manicure was so much fun to wear, as it instantly put me in a festive mood!
Happy Holidays to all!
Labels:
China Glaze,
glitter,
gold,
green,
Maybelline,
Occasion,
OPI,
Orly,
red,
Sally Hansen,
skittles mani
Sunday, March 21, 2021
OPI 'Envy the Adventure'
St. Patrick's day has recently passed, but I was still in a green mood! Today I have a quick mani to share using OPI's 'Envy the Adventure', and Rimmel's 'Dazzle':
For this mani, I started with a base of 'Envy the Adventure', and then added a few simple star embellishments that I made by using a star-shaped hole punch on a dried sheet of gold nail polish, 'Dazzle'. It was super quick and easy, and made for a fun mani!
Materials Used:
Thursday, December 24, 2020
Quick Christmas Manicure
Today, I have a quickly done Christmas skittles mani to share:
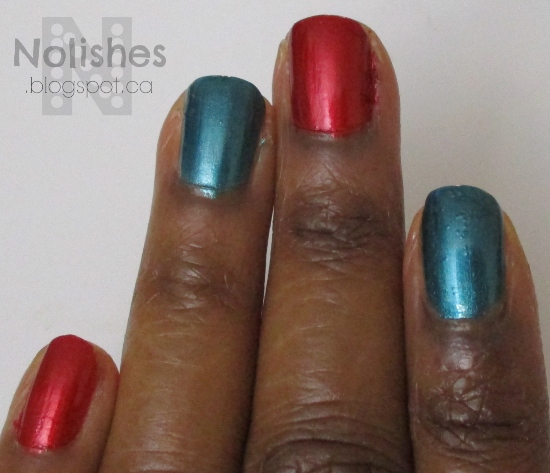
For this manicure, I used two polishes from the L'Oréal Paris 'Vernis a l'Huile' line of polishes. The polishes were colour B34 'Déjà Blue', and colour B22 'Moulin Nights'. I did a simple 2 alternating colour skittle manicure. I thought briefly about covering everything with gold glitter, but decided against the idea solely because I want to do another manicure for Christmas Day, and want this mani to be easy to remove!
I actually did a full manicure with Déjà Blue for my previous manicure (I didn't get a picture of it, so there's no corresponding post 😞). When I noticed that the 'blue' is actually more of a turquoise that leans toward evergreen, I thought it would look really good with red as part of a Christmas mani.
Wednesday, March 11, 2020
Deep Emerald Green Glitter Mani
Today's manicure is a blinged-up version of yesterday's swatch of Nubar's 'Greener'. This look is truly serving up all kinds of pre-St Patrick's Day sparkly green greatness! 😉
This has been such a fun manicure to wear! There's just something about an in-your-face glitter mani that just instantly puts me in a great mood! And then combined with all of this gorgeous greenness... It's almost too much to handle!
Above, is a shot of the polishes that I used to create this look. The base polish is Nubar 'Greener', and the glitter is L.A. Girl Glitter Addict 'Purge'. The L.A. Girl polish was from a glitter collection they released with about 14 different shades of metallic glitter polishes. I managed to get all but one or two shades from the glitter collection several years ago, and they are still going strong! These are actually the only polishes that I own from this brand.
Below, I've included a few additional shots of the manicure. Enjoy!
Sunday, December 23, 2018
Red Metallic Christmas Mani
Today I have an impromptu holiday-themed manicure to share.
I did this manicure very quickly. I didn't have time to remove my old polish and start from scratch, but I also didn't want to continue with my old manicure since it had started to show some wear and tear. I ended up painting right over my old manicure. As a result, you can see the bumpiness of the glitter I was wearing underneath the red metallic polish on my index and pinky fingers.
Unfortunately, I don't recall which polishes I used right now, because I was in such a rush that I didn't even think about taking a picture of the polishes. Basically I used three metallic polishes to create this look - a red, a green, and a gold.
On the middle finger, I made a Christmas Tree by using scotch tape to mask off the top corners of the nail, leaving an exposed triangle in the middle. Along the border of the exposed triangle, I used the edge of the tape cut by the metal teeth on the scotch tape holder. That edge was bordered with small triangles, similar to fabric cut with pinking shears. I thought that this was perfect to represent the jagged boughs of the Christmas tree. I then filled in the exposed area with a beautiful metallic green polish, and then dotted gold polish on top to represent ornaments and the star on the top of the tree.
My ring finger features an abstract design made using a dotting tool, and splotches of nail polish.
Overall, I really like the techniques that I used in this manicure, even though the execution was not perfect. Sometimes that's just the way it goes - necessity is the mother of invention, so this is one of those times when I had to come up some ideas really quickly to cover up an old chipping mani with something presentable. They turned out to be pretty cool ideas that I hope to use again in the future!
Labels:
Dotting,
Impromptu Mani,
Occasion,
red,
tape technique
Monday, December 3, 2018
Christmas Glitter Mani
Today's manicure represents one of the few times that I've recreated a manicure in the last few years. I've actually been planning to recreate this mani for almost one year now. I'll get in to that later, but first, here is the picture:
|
Polishes
Used
|
|
|
Sally
Hansen Complete Salon Manicure 'Strawberry Shields'
|
China
Glaze 'Pine-ing For Glitter'
|
|
Orly
'Halo'
|
Orly
'Luxe'
|
|
China
Glaze 'This is Tree-mendous'
|
Maybelline
Express Finish 'Red Comet'
|
I wore this look to my office holiday gathering last year, and received lots of compliments. At the time, I wasn't updating my blog and as a result, I didn't have all of my equipment ready to even take a picture that could be used for the blog at a later time. I hoped to get everything set up again so that I could post the mani, but of course, during the busy holiday season I didn't get a chance to do that.
So, I decided that I would try to recreate the mani at a later time and post it then. Originally I was hoping for right after Christmas, but then I was busy with all of the Boxing Week sales. By the time things settled down, it was too late to do a Christmas manicure that season! I decided to put the polishes aside, and wait until next Christmas to recreate and post the mani. So finally, after a year of anticipation - I've completed my mission! LOL!
Even though it is essentially a basic glitter mani, I really like how it turned out. It's fun and funky because of the colourful glitters, yet there's a classic charm to it as well due to the traditional Christmas colours.
As for the technical aspects of the mani, I used 3 coats of the dark green glitter 'Pine-ing For Glitter' on my pointer finger, one coat of orly 'Luxe' as a base and one coat of Orly 'Halo' on my middle finger, two coats of Maybelline 'Red Comet' as a base, and once coat of Sally Hansen -Strawberry Shields' on my thumb and ring fingers, and two coats of China Glaze 'This is Tree-mendous' on my pinky. I used a peel off base coat to aid with removal, and a glossy quick-dry top coat on top to smooth and shine the glitters.
Now that I've completed the mani, I can finally put the polishes away... but now that I've blogged about this and have the details here, I'm inspired to maybe try to make this my Christmas tradition mani going forward! We'll see how that works out, and how long the polishes last, but that definitely sounds like a fun tradition to start, especially after the quirky story of why I've worn the same manicure two Christmas seasons in a row!
Labels:
China Glaze,
Do-over,
glitter,
Maybelline,
multi-coloured,
Occasion,
Orly,
Sally Hansen
Sunday, November 11, 2018
Remembrance Day Manicure - 2018
Today is remembrance day in Canada. This remembrance day in particular is quite special, in that Novermber 11th, 2018 is the 100th anniversary since the end of the first world war. Today, I have a remembrance day manicure to share:
Polishes
Used
|
Stamping
Plates Used
|
OPI
'My Wishlist is You'
|
Messy
Mansion Plate MM78XL
|
Wet
n' Wild Wildshine
'Black Crème'
|
Clear
Jelly Stamper Stamping Plate:
|
Nicole
by OPI 'Scandal, Secrets...
|
'True
North Strong' Plate CjSLC-08
|
&
Sparkle'
|
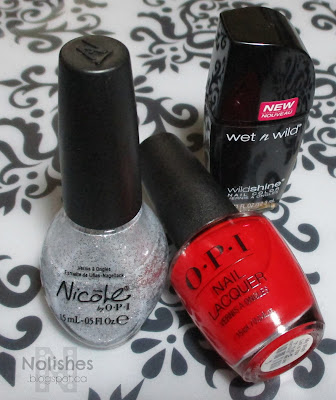
I really like the completed manicure. It is very understated, and tasteful. Here is a shot of the polishes that I used to create the manicure:
Here's a link to the last Remembrance day Manicure that I did, back in 2014. And below are additional shots of this years manicure.
Labels:
Advanced Stamping Technique,
Clear Jelly Stamper,
Decal Method,
Decals,
glitter,
Messy Mansion,
Nail Stamping,
Nicole by OPI,
Occasion,
OPI,
Project Polish,
Un-tried,
Wet n Wild,
white
Wednesday, October 31, 2018
Halloween Day Manicure featuring OPI 'Today I Accomplished Zero'
My manicure for Halloween was OK, but I was a little disappointed with it overall. I left everything to the last minute this year, so I didn't have much time to do my nails after getting everything ready, and packing my Halloween treat bags for shelling out. As a result, I had to rush through this manicure:
The manicure is cute, but I didn't have the time to re-do any wonky stamping image transfers, and/or fix any stamping errors. I also would have really liked to find a way to add some 'Wow! factor'.
- Polishes UsedKonad Special Polish - WhiteOPI 'Today I Accomplished Zero'
The featured polish in this manicure was OPI 'Today I Accomplished Zero' from the Summer 2014 'Coca Cola' collection. It's funny that I was able to use 2 different polishes from that collection for both of my Halloween manicures this year. Here's a link to my previous 'Sparkly Halloween Jack-o-Lantern Mani', featuring OPI's 'Orange You Fantastic!' from the same collection.
My favourite parts of the manicure were the adorable 'scary cute' images on the thumb nails. The ghost image is from Bunny Nails plate HD-C, and the mummy image if from Überchic Beauty plate Halloween-03. The remaining images from the manicure were stamped from Überchic Beauty Plate Halloween-04. Here's a close up shot of my thumb nails:
Have a safe and happy Halloween!!!
Labels:
Basic Stamping,
Bunny Nails,
Konad,
Nail Stamping,
Occasion,
OPI,
ÜberChic Beauty,
Un-tried
Sunday, October 28, 2018
Sparkly Halloween Jack-o-Lantern Mani
Today I have a Halloween Manicure to Share:
I really wanted to do a Jack-o-Lantern manicure, and at first, I thought I would use a typical creme orange polish, and an orange glitter. However, as I was looking through my collection for the orange glitter, I came across a glittery metallic coppery-orange polish that I thought would look amazing with the orange metallic glitter polish. I decided to use the two polishes for more of a Glam-o-Lantern look!
Here are the polishes I used:
The stamped image on my middle fingers was from Bunny Nails plate HD-C, and the stamped image on my ring fingers was from ÜberChic Beauty plate Halloween-03.
I really wanted to do a Jack-o-Lantern manicure, and at first, I thought I would use a typical creme orange polish, and an orange glitter. However, as I was looking through my collection for the orange glitter, I came across a glittery metallic coppery-orange polish that I thought would look amazing with the orange metallic glitter polish. I decided to use the two polishes for more of a Glam-o-Lantern look!
Here are the polishes I used:
 |
| Polishes Used |
Polishes
Used
|
OPI
'A Woman's Prague-ative'
|
Bundle
Monster 'Straight Up Black'
|
OPI
'Orange You Fantastic!'
|
The orange metallic foil polish, 'A Woman's Prague-ative' is from OPI's Euro Centrale Collection from Spring 2013. The orange glitter polish 'Orange You Fantastic' was from OPI's Summer 2014 Coca-Cola Collection. I really can't get over how nice they look paired together!
For this manicure, my thumb, middle and ring finger on both hands are painted with a layer of 'A Woman's Prague-ative', and then with 2 layers of the glitter polish. When looking at it in real life, the glittery combination would sparkle through the full nail jack-o-lantern images stamped in black over the middle and ring finger nails. Unfortunately, that doesn't quite translate in the picture, so I just thought I'd mention it.
Below, are rotated images of my thumbnails which provide a better view of the cute Jack-o-Lantern Faces I stamped from Moyou London's 'Festive Collection' - plate 29.
 |
| My 'Thumb-o-Lanterns' |
Stamping
Plates Used
|
Moyou
London Festive Collection - 29
|
ÜberChic
Beauty 'Halloween-03'
|
Bunny
Nails Plate HD-C
|
All in all, I absolutely love the way this manicure turned out. I normally try not to repeat manicures, but I could definitely see myself using this polish combination again to do another 'Glam-o-Lantern' manicure in the future!
Labels:
Basic Stamping,
Bundle Monster,
Bunny Nails,
MoYou London,
Occasion,
OPI,
orange,
ÜberChic Beauty,
Un-tried
Sunday, July 19, 2015
Modified Anniversary Mani
Today I have a modified version of my 'First Blog Anniversary' manicure from my last post:
I toned-down the manicure by changing the thumb, index, and middle fingers to a neutral polish, and then I stamped a design on the middle finger in gold, to tie the whole look together.
|
Polishes
Used
|
Plate
Used
|
|
Essie ‘Brides to Be’
|
Messy Mansion Leadlight Lacquer
|
|
Orly ‘Halo’
|
- Plate A01 |
|
Sally Hansen Color Foil ‘Liquid
Gold’
|
|
The neutral polish that I used was 'Brides to Be' from Essie's 2015 Bridal Collection. It's a beautiful creamy taupe colour, that looks like a lighter shade of the same colour of my natural nail bed. The glitter polish is Orly 'Halo' from their 2012 'Naughty or Nice' holiday collection. It contains a mix of gold and silver glitter particles. The metallic gold polish that I used for stamping is one of my most used polishes - Sally Hansen Color Foil 'Liquid Gold'.
Overall, I'm really happy with the way that this manicure turned out. It gives a nice 'muted bling' effect that looks both casual, and elegant all at once. Also, it's always nice to be able to get two looks out of one manicure!
Labels:
Basic Stamping,
Essie,
Messy Mansion,
Nail Stamping,
neutral,
Occasion,
Orly,
remix mani,
Sally Hansen
Tuesday, July 14, 2015
My First Blog Anniversary!
Today, I decided to do an extra sparkly manicure to celebrate the first anniversary of this blog!
 |
| First Anniversary Mani! |
The polish I used for this manicure was Orly's 'Halo'. I also added a rhinestone to accent my ring finger. It's a pretty simple look in terms of techniques and embellishments, but this polish delivers so much in the way of sparkle and shine, that the finished look is still really high impact. I absolutely love it!
 |
| Orly's 'Halo' |
I really can't believe that it's already been one year since I started chronicling my passion for nail polish and nail art! It has been so much fun to share something I really enjoy doing with all of you! Thanks so much to anyone who has ever dropped by to check this blog out - I hope that you have enjoyed reading it as much as I have enjoyed writing it!
Saturday, July 4, 2015
Independence Day Nails!
Happy Independence Day, to those of you in or from the USA!
Today, I have a 4th of July inspired manicure to share:
Polishes Used
|
Plates Used
|
Nicole by OPI ‘Make U
Smile’
|
|
OPI ‘Color so Hot it
Berns’
|
|
China Glaze ‘White on
White’
|
Bundle Monster BM-H25
|
Nicole by OPI ‘It’s up
to You’
|
|
Sally Hansen ‘Silver
Sweep’
|
I really like how this manicure turned out! I've really been trying to tone my designs down lately. I find that it's more of a challenge to communicate a theme with as few elements as possible, so it has been really fun trying to meet that challenge by keeping my stamping manicures more simple and streamlined.
Now, that's not to say that I will never again do manicures which use a lot of patterns, techniques, or colours - because those are certainly a lot of fun to do too! But for now, I'm enjoying this more edited approach.
Now, that's not to say that I will never again do manicures which use a lot of patterns, techniques, or colours - because those are certainly a lot of fun to do too! But for now, I'm enjoying this more edited approach.
Anyways, that's it for today. Thanks for stopping by!
Labels:
Bundle Monster,
China Glaze,
Nicole by OPI,
Occasion,
OPI,
Sally Hansen
Wednesday, July 1, 2015
Canada Day Nails!
It's Canada Day!!!
Today I have a Canada Day inspired manicure to share with you:
|
Polishes Used
|
Plates Used
|
|
OPI ‘Color so Hot it Berns’
|
|
|
China Glaze ‘White on White’
|
Bundle Monster BM-604
|
|
Sally Hansen ‘Silver Sweep’
|
Last year I did a maple leaf themed manicure with tons of filler patterns. You can see it in the picture below. The stamping isn't perfect, and the design is a little busy. At the time, I had only been nail stamping for a few months or so, and my skills were kind of shaky. Unfortunately, I no longer remember which polishes I used, as this was done just before I started the blog so I didn't really take note.
This year I wanted to simplify, and just use the colours of the Canadian flag as the inspiration. I chose a geometric design, and only stamped it on 2 fingers. I really love this low key interpretation!
Labels:
Bundle Monster,
China Glaze,
Occasion,
OPI,
red,
Sally Hansen
Tuesday, May 5, 2015
Cinco de Mayo Manicure 2015
Today I have a Cinco de Mayo manicure to share!
I kind of did this one in a rush, so there are so many things that I would change about it if I had to do it again! I do like the overall look though, and it also inspired another manicure idea which I hope to do shortly. Here are the polishes that I used to create this look:
The best thing about a manicure that doesn't turn out the way you had hoped, is that it is so easy to take what you learned and apply it to the next one!
 |
| Cinco de Mayo Manicure |
Polishes Used:
|
Plates Used:
|
China Glaze ‘White on White’
|
Cheeky Jumbo Plate 1 ‘Viva Mexico’
|
L.A. Girl Glitter Addict ‘Animate’
|
|
Konad Special Polish ‘White’
|
|
L.A. Girl Glitter Addict ‘Purge’
|
|
China Glaze ‘The Outer Edge’
|
|
Essie ‘Penny Talk’
|
 |
| Polishes Used |
I absolutely love this Cheeky Beauty 'Viva Mexico' plate! The designs are so bold and intricate, and they look fantastic stamped on the nail. I really love how the white and copper stamping of the full nail images from this plate turned out. However, I would have loved to be able to spend a little more time designing the accent nail.
I ended up using 'Penny Talk' as a copper base coat, and then topping it with three different glitters: 'The Outer Edge', a white and silver micro-glitter polish; 'Animate', a red glitter; and 'Purge', an emerald green glitter. I then covered everything with some top coat, and then stamped the script images. I like the idea of using the different glitters, but the way I used them, the individual glitter polishes get lost in the mix, and even worse, 'The Outer Edge', the most delicate glitter of the bunch, can barely be seen!
I realized after the fact that I could have done a three colour glitter gradient to help the glitters really stand out, and also to be a little more reminiscent of the Mexican Flag. Then I could have stamped over the white part in the centre with the writing in black. I also don't think I would go with the copper base if I had to do it again. Here are some close-up shots of the accent nails:
 |
| Accent Nails |
Labels:
Basic Stamping,
Cheeky Beauty,
China Glaze,
Essie,
Konad,
L.A. Girl,
Nail Stamping,
Occasion
Monday, May 4, 2015
'May the Fourth Be With You' Mani
In honour of May the 4th, I decided to rework my previous mani into a space themed galaxy manicure:
There is so much wear and tear on this manicure, that it's not even funny! The base for this manicure was only supposed to be an impromptu weekend manicure, that was hastily applied on top of the manicure I wore for most of last week - it's unbelievable how many layers of polish are on my nails right now! The plan was originally to do a new manicure on Sunday night, so that everything would be fresh for Monday morning, but then I came up with the idea to re-purpose the mani, since I already had the galaxy framework that I could build upon to create a May the Fourth Mani.
My previous mani featured a black base of Wet n Wild 'Black Crème', and a black, gold, and holographic glitter, Sally Hansen Complete Salon Manicure 'Midnight Glitz'. That combination already looked very 'spacey' so I just emphasized that by adding a cute spaceship from one of my Moyou London 'Sci Fi' plates, and some planets in orbit from my Messy Mansion 'Space Themed' plate. I made the rocket ship decal using advanced stamping technique.
Here are the details of the polishes and plates that I used to create this look:
 |
| May the Fourth be with Your Manicure! |
My previous mani featured a black base of Wet n Wild 'Black Crème', and a black, gold, and holographic glitter, Sally Hansen Complete Salon Manicure 'Midnight Glitz'. That combination already looked very 'spacey' so I just emphasized that by adding a cute spaceship from one of my Moyou London 'Sci Fi' plates, and some planets in orbit from my Messy Mansion 'Space Themed' plate. I made the rocket ship decal using advanced stamping technique.
Here are the details of the polishes and plates that I used to create this look:
Polishes Used:
|
Plates Used:
|
Wet n Wild Wild Shine ‘Black Crème’
|
|
OPI ‘Romantically Involved’
|
Messy Mansion ‘Space Themed’ MM33
|
Essie ‘No Place Like Chrome’
|
|
Sally Hansen C.S.M. ‘Midnight Glitz’
|
Moyou London Sci-Fi Collection - 03
|
OPI ‘Atomic Orange’
|
|
OPI ‘Embrace the Gray’
|
 |
| Polishes Used |
All in all, I think it is a super cute manicure (minus the tip wear, and bulky, multi-layered polish application!). I really like how the space-ship decal turned out, and how cool it looks floating on the background of the black and holo-glitter 'space'.
Labels:
Basic Stamping,
black,
Decal Method,
Decals,
Essie,
Impromptu Mani,
Messy Mansion,
MoYou London,
Nail Stamping,
Occasion,
OPI,
Sally Hansen,
Wet n Wild
Cinco de Mayo Manicure
Here's a manicure I did for Cinco de Mayo, 2014:
Unfortunately, I no longer remember exactly which polishes I used to create this look. I used black nail polish for the base colour on all of my fingers except for my ring fingers. I then stamped these fingers with gold nail polish using images from Cheeky's Jumbo Plate 1, 'Viva Mexico'. On my ring fingers, I used the same gold nail polish as the base colour. I then stamped the ring fingers with the Aztec print image from Moyou London's Pro XL Collection plate 06. I created a red, white, and green gradient by filling the engraving with a drop of each colour before swiping and picking up the image.
I really like this manicure, but I especially love how the accent nails turned out. You can barely recognize the Aztec print, instead, it looks like a distressed surface with bits of gold peaking through. So awesome! I definitely want to try this technique again!
 |
| Cinco de Mayo Manicure |
I really like this manicure, but I especially love how the accent nails turned out. You can barely recognize the Aztec print, instead, it looks like a distressed surface with bits of gold peaking through. So awesome! I definitely want to try this technique again!
Subscribe to:
Posts (Atom)
