Showing posts with label Wet n Wild. Show all posts

Friday, September 6, 2019

Glitter Mani Featuring 'Party of Five Glitters'

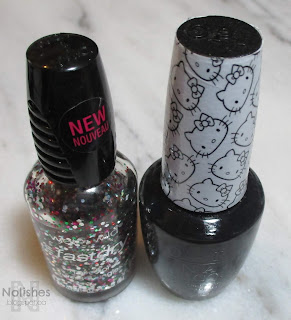
Glitter Manicure featuring a black base of OPI's 'Never Have Too Mani Friends', and glitter topper Wet n Wild Fastdry 'Party of Five Glitters'

Polishes Used
Wet n Wild Fastdry ‘Party of Five Glitters’
OPI ‘Never Have Too Mani Friends!’

Today I have a quick and easy glitter manicure to share featuring a Wet n Wild glitter called 'Party of Five Glitters'. I've had this glitter for several years now, and recently decided to try it out again. Honestly, I've been thinking of decluttering it, and wanted to see how it looked on my nails to help me decide.  I decided to wear it over a black polish since it really helped the glitter mix to stand out.

There are 5 different colours of glitter in this polish: red, green, purple, light blue, and silver. I remember this collection contained polishes with names inspired by various TV shows. So this polish was named after 'Party of Five', a prime-time drama series from the nineties. I used another polish from this collection 'Saved by the Blue' (Inspired by the teen comedy show 'Saved by the Bell'), in my 'Australian Aboriginal Art Themed Mani', which I blogged about here.

Sadly, I'm not a really big fan of 'Party of Five Glitters' anymore. I rarely get that excited about glitter polishes in general, nowadays, but this one in particular is really not my cup of tea right now. This is mainly because I don't particularly care for  the mix of colours. 

Funnily enough, I remember being really excited about the polish back when I bought it, as multi-coloured 'glitter bomb' polishes like Deborah Lippmann's 'Happy Birthday', and OPI's 'Rainbow Connection' were all the rage at the time. At the time, this seemed like an affordable, comparable version of that look.  You can even see that there is quite a low fill line - the bottle is about one quarter empty! This really goes to show how one's tastes can change a lot over the years...  

I think I may try one more look with the polish, before making any decisions: I want to try the polish on it's own, with as many coats as it takes to get full coverage.  Perhaps it might look nicer as a solid block of multi-coloured glitter, as opposed to being used as a glitter topper.
Wet n Wild Fastdry 'Party of Five Glitters', and OPI 'Never Have Too Mani Friends!'

Sunday, November 11, 2018

Remembrance Day Manicure - 2018

Today is remembrance day in Canada. This remembrance day in particular is quite special, in that Novermber 11th, 2018 is the 100th anniversary since the end of the first world war. Today, I have a remembrance day manicure to share:

red white and black poppy themed manicure for remembrance day


Polishes Used
Stamping Plates Used
OPI 'My Wishlist is You'
Messy Mansion Plate MM78XL
Wet n' Wild Wildshine 'Black Crème'
Clear Jelly Stamper Stamping Plate:
Nicole by OPI 'Scandal, Secrets...
   'True North Strong' Plate CjSLC-08
          & Sparkle'


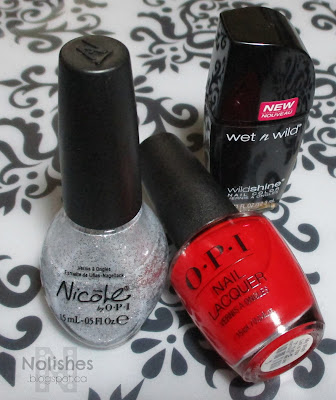
I really like the completed manicure. It is very understated, and tasteful. Here is a shot of the polishes that I used to create the manicure:

opi 'My Wishlist is You', Nicole by OPI 'Scandals, Secrets, and Sparkle', Wet and Wild Wildshine 'Black Creme'


Here's a link to the last Remembrance day Manicure that I did, back in 2014.  And below are additional shots of this years manicure.

red white and black manicure

Monday, May 4, 2015

'May the Fourth Be With You' Mani

In honour of May the 4th, I decided to rework my previous mani into a space themed galaxy manicure:

Space themed manicure featuring  black nails with gold and holographic glitter, stamped with orbiting planets in silver on the thumb, and a grey and silver rocket ship with red and orange flames trailing it is stamped on the ring finger.
May the Fourth be with Your Manicure!
There is so much wear and tear on this manicure, that it's not even funny! The base for this manicure was only supposed to be an impromptu weekend manicure, that was hastily applied on top of the manicure I wore for most of last week - it's unbelievable how many layers of polish are on my nails right now! The plan was originally to do a new manicure on Sunday night, so that everything would be fresh for Monday morning, but then I came up with the idea to re-purpose the mani, since I already had the galaxy framework that I could build upon to create a May the Fourth Mani.

My previous mani featured a black base of Wet n Wild 'Black Crème', and a black, gold, and holographic glitter, Sally Hansen Complete Salon Manicure 'Midnight Glitz'. That combination already looked very 'spacey' so I just emphasized that by adding a cute spaceship from one of my Moyou London 'Sci Fi' plates, and some planets in orbit from my Messy Mansion 'Space Themed' plate. I made the rocket ship decal using advanced stamping technique.

Here are the details of the polishes and plates that I used to create this look:

Polishes Used:
Plates Used:
Wet n Wild Wild Shine ‘Black Crème’

OPI ‘Romantically Involved’
Messy Mansion ‘Space Themed’ MM33
Essie ‘No Place Like Chrome’

Sally Hansen C.S.M. ‘Midnight Glitz’
Moyou London Sci-Fi Collection - 03
OPI ‘Atomic Orange’

OPI ‘Embrace the Gray’


Wet n Wild Wild Shine ‘Black Crème’, OPI ‘Romantically Involved’, Essie ‘No Place Like Chrome’, Sally Hansen Complete Salon Manicure ‘Midnight Glitz’, OPI ‘Atomic Orange’, and OPI ‘Embrace the Gray’
Polishes Used
All in all, I think it is a super cute manicure (minus the tip wear, and bulky, multi-layered polish application!). I really like how the space-ship decal turned out, and how cool it looks floating on the background of the black and holo-glitter 'space'.

Saturday, May 2, 2015

Black, Gold, and Holo Glitter Mani

Today I have a quick and easy weekend mani to share:

Glitter Manicure featuring black polish, covered with a gold and holographic glitter mix, and a nail stamped quatrefoil lattice pattern stamped in gold on the ring finger.
Black, Gold, and Holo Glitter Mani

Polishes Used:
Plate Used:
Wet n Wild Wild Shine ‘Black Crème’

Sally Hansen Complete Salon Manicure
                    ‘Midnight Glitz’
Moyou London Time Traveller Collection:
                   Back to the 60’s – Plate 04
Essie ‘Good as Gold’


Wet n Wild Wild Shine ‘Black Crème’, Sally Hansen Complete Salon Manicure ‘Midnight Glitz’, and Essie ‘Good as Gold’
Polishes Used
I got bored of my previous manicure, and decided to do a quick polish change for the weekend. I decided to do a simple glitter mani, but just as I finished, I had the idea to add a little stamping on my ring finger as an accent. I decided to use this quatrefoil stamping image that I originally intended to use a couple manicures ago, but didn't after changing my mind at the last minute.

I like this manicure - it's simple, and edgy. It's been a while since I wore a holographic glitter, so it was a lot of fun watching it sparkle, and reflect beautiful flashes of colour! I think that the next time I try this glitter, I would like to put it over a gold, sheer black, or dark blue base. There are black glitter particles in 'Midnight Glitz', so even though the holographic particles look really good on a black background, the black glitters get completely lost, so a black base probably isn't the best choice. I'll have to do a little more experimenting with this.

The base polish I used for this manicure was Wet n Wild 'Black Crème'. I did a review on the newly revamped Wet n Wild Wild Shine Polishes recently, and at the time, I didn't own this polish. After reviewing and liking the previous polishes I picked up, I went out and bought the black and white polishes to add to the set. So far I'm really liking 'Black Crème' too. I only used one thick coat of it for this mani, and I ended up with full coverage - and I was still wearing yesterday's manicure underneath, so that's saying a lot!

Saturday, April 25, 2015

Wet n Wild Wild Shine Nail Colour

I dropped in to the pharmacy earlier this week, and as usual went browsing in the nail polish aisle. I was really excited to see that not only did they have the new Wet n Wild Wild Shine Nail Polishes, but they were also on sale for $1.50 (down from $1.99). I had heard about these polishes from various nail vloggers on YouTube, but I wasn't sure if they were available in Canada yet, so I was really excited to find them! There were a lot of bright, fun colours available, and for the price, I couldn't resist purchasing 12 of the polishes! So today, I'm doing a review on these polishes.

‘Red Red’, ‘Lavender Crème’, ‘Tickled Pink’, ‘Blazed’, ‘Nuclear War’, ‘D’oh!’, ‘Be More Pacific’, ‘Putting on Airs’, ‘Who is Ultra Violet?’, ‘Grape Minds Think Alike’, ‘Ready to Propose’, and ‘Yo Soy’
Wet n Wild Wild Shine Nail Polishes
Here are the colour names of the polishes (listed left to right):

Upper Row: Warm Colours
Lower Row: Cool Colours & Neutrals
‘Red Red’
‘Be More Pacific’
‘Lavender Crème’
‘Putting on Airs’
‘Tickled Pink’
‘Who is Ultra Violet?’
‘Blazed’
‘Grape Minds Think Alike’
‘Nuclear War’
‘Ready to Propose’
‘D’oh!’
‘Yo Soy’

First off, I really like the look of the packaging. They are so modern, and fun! The only problem I had with the packaging is that when I was swatching the polishes on my nail wheel, I had an incident where the black top of one of the polishes separated from the brush that was supposed to be attached to it, leaving the brush in the bottle. It wasn't that difficult to reattach - I had to lift the brush out of the bottle, place it back in (but not pushed all the way back down), and then place the lid over it and screw them both back into the bottle (see graphic below). It was a little inconvenient, but was easily fixed, and something I can overlook for a budget brand of polish.

Lift brush out of bottle, lower brush but not all the way, lightly place cap over brush, screw shut
How to Reattach Cap to Nail Polish Brush
As for the actual polish. I was quite pleased with the application. The polish was a little on the thick side, but not so much as to pose a problem. Actually, the thickness may have turned out to be a really good thing - all of the swatches below were done with only one thick coat of polish! The only one that really could've used an extra coat was the coral shade 'Blazed'. It's the fourth from the left in the swatch wheel below. In the picture, you can see how it looks a little sheer, and there's a bit of patchiness. In addition to the swatches, I also used one of the the colours for a full manicure. 'Putting on Airs' was used during my 'Earth Day Mani', and I had a similar experience to the test swatches.

‘Red Red’, ‘Lavender Crème’, ‘Tickled Pink’, ‘Blazed’, ‘Nuclear War’, ‘D’oh!’, ‘Putting on Airs’, ‘Be More Pacific’, ‘Who is Ultra Violet?’, ‘Grape Minds Think Alike’,  ‘Yo Soy’, and ‘Ready to Propose’

One thing that I was slightly disappointed with, is that I don't know if all of the colours are widely available here in Canada - or perhaps the drug store chain where I found them does not carry all of the colours. I later went to another location looking to see if they had more shades, but was out of luck. I counted 20 slots on the display at the stores I went to, but I recall seeing at least 24 polishes in the line on YouTube. I did a little googling, and from what I found, it looks like there may be as many as 27 different shades. 

I really wanted this beautiful kelly green shade I had seen called 'Do Pass Go', but couldn't find it in both stores I went to.  Some others I wanted but couldn't find were 'Dreamy Poppy', 'Grasping at Strawberries', and 'She Sells'. I'll keep an eye out for them at different drug stores. Hopefully I'll be able to find them eventually.

All in all, I'm quite satisfied with my purchase, and am looking forward to creating beautiful nail art with these new budget-friendly additions to my collection!

Thursday, April 23, 2015

Happy Belated Earth Day!

Yesterday, I didn't get a chance to put up an earth day manicure, because I really wanted to try out my new peel-off base coat. So today, I have a belated Earth Day mani to share with you!

Earth Day inspired manicure made using a light blue base polish, stamped with black map imagery on the pinky, middle and index fingers. The thumb and ring finger are stamped with green continent images.
Earth Day Mani

Polishes Used
Plate Used
Wet n Wild Wildshine ‘Putting on Airs’
Moyou London Scholar Collection - 07
Konad Special Polish in Black

Sally Hansen Insta-Dri 'I-rush Luck'


Wet n Wild Wildshine 'Putting on Airs', Sally Hansen Insta-Dri 'I-rush Luck', and Konad Special Polish in Black
Polishes Used

I really like how this manicure turned out! The colours are perfect, and I love the images from the Moyou Scholar plate. I honestly couldn't stop staring at my nails all day! I love how the map imagery on the pinky, middle and index fingers look exactly like a page out of an atlas, while the thumb and ring fingers look exactly like little globes. I love when a manicure is both quick and easy to do, but the end result is so cute, and memorable!

This is also my first time using one of the new reformulated and redesigned Wet n Wild Wildshine polishes. I really like the look of the new bottles - such a great improvement! I was also pretty happy with the formula of this polish. It was just a touch on the thick side, but not to the point where it caused any problems. In fact, I'm hoping that the thickness would make these polishes good for stamping!

Monday, February 16, 2015

Crackle Polish Challenge #13 - Dragonfly Double Crackle Mani

2015 Crackle Polish Challenge Manicure #13

Featured crackle application:
Layering a crackle decal over a crackle background to achieve a 'crackle on crackle' effect

Featured crackle polish:
Sally Hansen Crackle Overcoat 'Vintage Violet'

Skittles Manicure. The thumb and ring finger feature custom purple and iridescent teal dragon fly decals over a metallic green and gold crackle base. The middle finger has a purple, gold, green and blue chunky holographic glitter. The pinky and pointer fingers are covered in a shimmery purple polish with a subtle blue glass fleck.
Dragonfly Double Crackle Mani
Polishes Used
    Crackle Decal:
        Sally Hansen Crackle Overcoat 'Vintage Violet'
        Wet n Wild Wild Shine 'Bijou Blue' (also used as base coat under glitter)
    Glitter:
        Finger Paints 'Daubigny's Garden'
    Crackle Background:
        Sally Hansen Color Foil 'Minted Metal'
        Nicole by OPI 'Gold Texture'
    Solid Nails:
        Nicole by OPI 'Canadian Star', from the Justin Bieber Collection

I chose dragonfly themed colours for this manicure. They are are a combination of cool, shimmery and iridescent polishes. Here's a picture of the bottles.

Sally Hansen Crackle Overcoat 'Vintage Violet', Nicole by OPI 'Canadian Star', Wet n Wild Wild Shine 'Bijou Blue', Finger Paints 'Daubigny's Garden', Nicole by OPI 'Gold Texture', and Sally Hansen Color Foil 'Minted Metal'
Polishes Used
This was quite an elaborate manicure to do. The most time consuming part was making the nail polish decals.  To do this, I spread a large swath of (an inexpensive) nail polish over a flat piece of plastic. I used one of the flat sides from one those annoyingly difficult to open transparent rigid plastic packages that pretty much everything you buy these days seems to come encased in. It was great to find a use for them other than accidentally cutting myself, and frustrating me to no end! LOL!

After the polish was completely dry, I put a few different crackle polishes over the swath. When that was completely dry, I attempted to remove the polish from the plastic. At first, I was trying to peel the polish away from the plastic. I had a little difficulty with this method, so I added a layer of topcoat, to try to make it a bit more pliable. I was then able to peel and lift the polish when it dried.

I actually made two crackle sheets, using different base polishes. Due to all of the problems I had with the first sheet, I tried a different removal method for the second sheet. For that one, I tried bending the plastic backwards, along the edge of the dried polish. It worked like a charm - the polish lifted easily and cleanly without topcoat.

The next step was to cut the dried polish into shapes using hole punches. I made heart shapes, and dragon fly shapes since those are the 2 decorative punches that I have. After that, the decals were ready to be applied. I also have a bunch left over, for future manicures.

I've included a pictorial tutorial below:

Visual tutorial showing how the nail polish decals were made

Here is another collage showing different pictures of the manicure. The thumb close up shots give a better view of the green and gold crackle background, under the decal.

Collage showing base polishes before embellishments, close up of thumbs, and alternate view of the fingers.

This manicure was a lot of fun to do, and I really like how it turned out! So far, this is one of my favourites from the challenge!

Sunday, August 10, 2014

From the Vault: 'Breakfast at Tiffany's' Inspired Mani

Here's another manicure that I did a few months back. In fact, I happen to remember that I did this manicure on May 4, 2014. The Google Doodle that day was a tribute to Audrey Hepburn, for what would be her 85th birthday. I was inspired to do this 'Breakfast at Tiffany's' themed mani to mark the occasion:

'Breakfast at Tiffany's' Inspired Nail Stamping Manicure - Right. Polishes Used: China Glaze 'For Audrey', Wet'n'Wild 'Break the Ice', Rimmel 'Black Satin', NYC 'French Tip White', Silver Glitter. Plates Used: Konad M79, and Bundle Monster BM-317.
'Breakfast at Tiffany's' Inspired Mani - Right

Naturally, I used China Glaze's 'For Audrey' as the base of the manicure. On my thumbs I did a colour-blocking effect by painting half the nail with Wet'n'Wild Megalast 'Break the Ice'.  I stamped my ring fingers with Rimmel's 'Black Satin' using an image from Moyou London's Rebel Plate 02. The white stamps on my middle and pinky fingers were done using images from Konad plate M79 and BM-317 (respectively) stamped with NYC's 'French Tip White'.  I used a silver glitter as a topcoat on my index fingers, however, I no longer remember which one I used. I also used some silver nail art tape, and some rhinestones to finish the look.

'Breakfast at Tiffany's' Inspired Nail Stamping Manicure - Left. Polishes Used: China Glaze 'For Audrey', Wet'n'Wild 'Break the Ice', Rimmel 'Black Satin', NYC 'French Tip White', Silver Glitter. Plates Used: Konad M79, and Bundle Monster BM-317.
'Breakfast at Tiffany's' Inspired Mani - Left

Overall, I like the manicure. This was my first time trying the colour-blocking effect separated by nail art tape, so it was fun to try out a new technique.  I remember that it took a long time to do since I had to wait for each colour to completely dry in order to be able to tape it off to do the other colour on the other side. I'm really impatient when it comes to waiting for my nails to dry in the middle of a nail art project (I just want to get it over with - while I'm still in the zone!) so it's no wonder that I haven't yet repeated this technique!

Monday, July 14, 2014

From the Vault: Australian Aboriginal Art Themed Mani

I did this manicure a couple months ago.  It was done on a whim with polishes I just happened to have in reach. Virtually no forethought or planning went into this one - and it came out beautifully!

Australian Aboriginal Art Themed Nail Stamping Manicure - Left, using Moyou London Explorer Collection Plate 20. Polishes used: Wet n Wild Fastdry 'Saved by the Blue', and Sally Hansen 'Silver Sweep'
Australian Aboriginal Art Themed Mani - Left Hand

Australian Aboriginal Art Themed Nail Stamping Manicure - Right, using Moyou London Explorer Collection Plate 20. Polishes used: Wet n Wild Fastdry 'Saved by the Blue', and Sally Hansen 'Silver Sweep'
Australian Aboriginal Art Themed Mani - Right Hand


For this mani, I used Wet n Wild Fastdry 'Saved by the Blue' as the base colour, and Sally Hansen Insta-Dri 'Silver Sweep' to stamp with.  The stamping images are all from Moyou London Explorer Collection - 20.

This mani was so quick and easy to do, that there really isn't that much to say about it...  I'll have to make this post quick and easy, to match!  : D