Polishes Used
|
Polishes Used
|
Essie ‘Highest Bidder’
|
Essie
‘Point of Blue’
|
Essie ‘Love Sheen’
|
Essie
‘No Shrinking Violet’
|
Essie ‘Blush Stroke’
|
Essie
‘White Page’
|
Essie ‘Art New-Beau’
|
Maniology
‘Straight Up Black’
|
Essie ‘Muse, Myself’
|
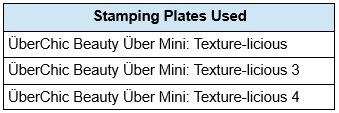
Stamping Plate Used
|
Essie ‘Pen & Inky’
|
Moyou
London Trend Hunter - 01
|
After reviewing my purchase of Essie's
'Glazed Days' collection which was released earlier this year, I decided to go back and do a manicure using Essie's 'Silk Watercolor' collection that I purchased back when it was released in 2015.
 |
| Essie 'Silk Watercolor' Collection |
I never did a complete review of the 'Silk Watercolor' collection when I purchased it. However, I did feature one of the shades in a blog post. It was the pink shade, 'Blush Stroke', which I used for a 'Pond' manicure. Here's a
link to that post.
For today's manicure, I decided to use all of the shades from the collection to create a cute, colourful look. I started with 'White Page' as my white base colour, and then stamped two different floral images on my thumbs, and ring fingers. The images were from Moyou London stamping plate 'Trend Hunter - 01', and the black stamping polish I used was Maniology's 'Straight Up Black'. I also stamped the cross pattern on my middle fingers from a portion of one of the images on the same plate using the same polish.
Next, I coloured in the flower portions of the images with each of the colours from the 'Silk Watercolor' collection using the '
leadlight technique', which involves using a dotting tool (or any other tool or brush that can transfer polish) to place the transparent jelly polishes over different parts of the image. After this, I embellished the image on my middle finger with some black dots, and then added multi coloured dots on the bottom portion of my index, and pinky fingers. The multi-coloured dots were also made with the 'Silk Watercolor' collection. I completed the look by using a quick dry, glossy top coat in order to smoothe everything out, and add shine.
Below, is a collage with a few additional shots of the manicure:

Here are some of my thoughts about the 'Silk Watercolor' collection. I'm quite pleased with the colour saturation from the jelly polishes in the collection. The jellies look great over the white polish even with only one coat, which is really important for leadlighting. The white polish is pretty much your standard white polish. It performs well, but if you already have a white polish that you like, I don't see a specific need to get this one.
I also really like the colour range. There are more warm shades in the collection than cool shades, and I find that a lot of the colours are sort of 'in-between' shades, as opposed to 'true' shades ie 'pinky-red' as opposed to 'true' red. This works well for me, as I already have jelly polishes that are more classic shades, so these polishes are a great addition to my collection.
The 'Silk Watercolor' formula is really good as well. The jelly polishes are on the slightly thinner side, and have enough pigment to perform well for leadlighting, as well as on their own, as seen in my
'pond' manicure. Of course, I haven't used all of the jellies on their own yet, so I'm estimating the performance based on 'Blush Stroke', the one I've used (sort of) on it's own, as well as my experience with using all of the polishes in this manicure.
All in all, really like these polishes. I really enjoyed creating this look, and I love how it turned out. I even got a couple compliments on this manicure!