Showing posts with label Essie. Show all posts

Sunday, October 16, 2022

Red, Black and Gold Glitter Mani

Now that the summer is over and I've been spending less time in the garden, I managed to get some nail art done! 

Red, Black and Gold Glitter Mani

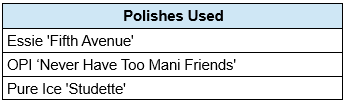
The inspiration for this mani all started with me wanting really bright red nails.  After scouring my collection for the brightest reds, I finally settled on Essie's 'Fifth Avenue'.  I then came across Pure Ice 'Studette', a gold glitter polish with small amounts of red glitter mixed in.  I decided to pair the two by making a gold glitter decal in a fun shape, and applying it over the red polish on my ring finger to accent the nail... I really just wanted to do a simple look after not having done a lot of nail art for a couple months!

I decided to go with a thin gold glitter triangle that stretched from the tip to the base of the nail. I executed the design perfectly, and was in awe at the stunning accent! Unfortunately, I would only be able to enjoy the design for a few minutes - while it was drying, I accidentally smudged my nail while reaching for something!  I was so disappointed! I decided to try to salvage what I could, and to take the opportunity to push the design further. 

Luckily, the decal itself wasn't ruined, just the red portion on one side of the decal was smudged. I carefully removed the red polish from that side, and masked the (now dry) unblemished portion of the nail. Then I added a black polish, 'Never Have Too Mani Friends!' from the original OPI 'Hello Kitty' collection. It worked, and looked even better than the original design! I'm glad I didn't give up! Inspired by the new improved accent, I then went on to add more black and gold accents to the rest of the nails to tie everything together. In the end, I am so pleased with how the final look turned out!

Red, Black and Gold Glitter Mani - Polishes


The final look reminds me of the face cards in a deck of cards - it's all of the bold geometric shapes and the combination of red, black and gold. This mani would be a great look for a poker tournament! If I wanted to run with the playing card theme, a matte topcoat, and maybe a club, diamond, heart or spade nail stamp on the thumb instead of the gold and black circle would have been a nice touch... Wow, looks like once those creative juices start flowing, they never want to stop - here I am still designing the mani, after it's already complete! 😂  

Above, I have a collage of the polishes used, and below, I have a collage with some additional shots of the manicure.

Red, Black and Gold Glitter Mani

Monday, September 19, 2022

Essie 'Ballet Slippers'

Essie 'Ballet Slippers'

I couldn't possibly choose any other polish today...

Essie 'Ballet Slippers'

Tuesday, April 27, 2021

Let Them Eat Cake Mani

For today's post, I have a manicure themed around an 'oldie but goodie' indie nail polish, NCLA's 'Let Them Eat Cake':

NCLA 'Let Them Eat Cake' Mani

For this Manicure I used NCLA's 'Let Them Eat Cake', a gorgeous lavender glitter crelly polish from NCLA's 'Duchess of L.A.' collection, which I believe came out in 2014. I added two metallic glitter accent nails, one in lavender (Essie's 'Stroke of Brilliance'), and another in plum (L.A Girl's Glitter Addict 'Provocative'). These glitters closely match two of the colours in the metallic glitter mix used in 'Let Them Eat Cake'

Polishes Used: NCLA 'Let Them Eat Cake', Essie 'Stroke of Brilliance', LA Girl 'Provacative'.

'Let Them Eat Cake' would probably be one of my favourite polishes, If I really had to try and pick favourites! I've always loved the colour scheme, and even after all of these years, the formula is still impeccable! 

Sunday, April 18, 2021

Essie 'Cupid's Beau'

Today's swatch is 'Cupid's Beau', from Essie's Valentine's Day 2021 Collection:

Essie 'Cupid's Beau'

'Cupid's Beau' is a vibrant, shimmery, reddish-orange polish with a metallic finish. It's not the typical type of shade you would expect from a Valentine's day collection, but it's a beautiful polish nonetheless. It's also really versatile, as it will be great to wear this bright, shimmery shade right into spring and summer, and since the orange leans more red than yellow, this darker orange shade will even work for fall!

The packaging was a little different for the 2021 Valentine's day collection than it had been the last couple of years, as Essie has steered clear of the Valentine's Day themed decorative bottle wraps that they had been using. I actually really liked those bottle wraps, as they made the bottle stand out, and they added an air of celebration, and festive fun to the collection - the bottles were dressed for the occasion! They were also really easy to remove, for those who prefer to be able to easily see the polish in the bottle at a quick glance. For the 2021 Valentine's Day collection, the bottle decoration was just limited to the bottle caps. I actually miss the wraps!

All in all, 'Cupid's Beau' is a lovely, eye-catching polish, and I enjoyed wearing it!

Sunday, August 16, 2020

Essie A-List... Possibly My Perfect Shade of Red?!

 I'm not quite certain, but I think I may possibly have found a strong contender for my perfect shade of red! The polish is Essie 'A-List', and she's a real beauty:

Essie A'List'

Essie's web-site describes the A-List as an "award-winning, classic creamy red polish". The polish is a cool-toned, slightly deep shade of red that will likely flatter a variety of skin tones. It also applies really well, and dries to smooth, shiny finish.

Label Shot: Essie 'A-List'

I find 'A-List' to be really chic and elegant, and I could see myself using this as kind of a manicure wardrobe staple for those times when you want to look polished, and put together, without too much fuss. What I really love about the polish is that I'm always looking for deeper reds that read as red (as opposed to burgundy), and don't give off brown undertones - so far, A-List seems to fit the bill! The real test is seeing how it looks under fluorescent lighting, but I haven't gotten a chance to do that yet.

All in all, I'm completely smitten with this polish, and look forward to using it again!

Tuesday, August 11, 2020

'Shades of Coral' Manicure

 Shades of Coral Skittles Mani

For today's mani, I decided to a skittles manicure using a dark, medium, and light shade of coral. I used three polishes from Essie's Gel Couture line to accomplish this look: 'Sizzling Hot', 'Signature Smile', and 'Couture Curator'. I'm calling it my 'Shades of Coral' mani! 

'Shades of Coral' Mani: Polishes Used


I actually really enjoyed this look. It's fun and summery, but also sweet, and playful! For some reason, it kind of reminds me of 'Strawberry Shortcake' - the cartoon, not the dessert! Perhaps little green and white accents would complete that look... hmmmn... that could be a fun mani idea for the future!

Friday, July 3, 2020

Essie 'Red Nouveau'

classic red nails, Essie 'Red Nouveau'

Today I have a swatch of Essie's 'Red Nouveau', a bright crimson red creme polish. This is a classic, summery red shade with a warm, orange undertone. In the swatch, I've used two coats of the polish. 

It's such a classic look that there's not really much to say about it other than: if you are in the mood for red nails - this is a wonderful candidate!

label shot, Essie 'Red Nouveau'

Sunday, March 22, 2020

Essie 'Bordeaux'


Today's manicure is a classic polish - Essie's 'Bordeaux'.  Fun fact: this polish was part of the original release of 12 polishes when the Essie brand was launched in 1981! It is a deep red wine jelly polish, that gives a vampy, sophisticated look on the nails. I think this polish is absolutely gorgeous. Next to metallic reds, I would say that jelly reds are probably my next favourite way to wear red nails. 

I really like my deep reds to read as red, as opposed to brown, so I like using as few coats as possible to keep the polish as light as possible. On the swatch above, I used only one coat of bordeaux, and one coat of glossy top coat to amplify the shine. However, the nails appear somewhat lighter in the photo than they do in real life, due to the strong lights I use for my pictures. 

Label shot of Essie Bordeaux

Thursday, February 27, 2020

Essie Gel Couture 'Rock the Runway'

Swatch of Essie Gel Couture 'Rock the Runway' on dark skin

Today, I wanted to share a swatch of my current manicure, Essie Gel Couture 'Rock the Runway'. I recently purchased this polish after being mesmerized with the bright, cheerful shade while passing it by on a few occasions in the drug store!  I was pretty certain that I didn't really need another red polish, until I realized that everytime I saw this particular shade in the bottle in the store, I was instantly drawn to it!

I finally gave in, and purchased it on-line about a week ago. 'Rock the Runway' is a classic, true red creme polish with neutral undertones. Essie describes it on their website like this:

"gorgeous. striking. untamed. the pulsing beat of this longwear, fierce scarlet red creates instant fashion pandemonium"

LOVE!!! They hit the nail on the head with that description - the polish truly is gorgeous and striking! Now, I change my nails way too frequently to typically ever be concerned about long wear, but I can definitely vouch for how beautiful the colour is!  

The swatch above is 2 coats of the polish followed by a coat of quick-drying glossy top coat. The finish of the polish was quite shiny on its own, but I smudged my nails and had to salvage the mani with top-coat!

Label shot of Essie Gel Couture 'Rock the Runway'

Sunday, September 15, 2019

Burgundy and Gold Stamped Mani


Burgundy and Gold stamping manicure using Essie Gel Couture 'Spiked with Style', and Sally Hansen Color Foil 'Liquid Gold', and UberChic Beauty stamping plate Love and Marriage 02.

Polishes Used
Essie ‘Spiked with Style’
Sally Hansen Color Foil ‘Liquid Gold’
Stamping Plate Used
ÜberChic Beauty Love and Marriage – Plate 02

Today I have a really quick and easy manicure to share. It was created using a base of a gorgeous burgundy creme polish from Essie's Gel Couture line called 'Spiked with Style'. I then embelished my thumbs, middle and ring fingers with some images from ÜberChic Beauty plate 'Love and Marriage - 02', which I stamped in one my favourite gold polish for stamping, Sally Hansen's 'Liquid Gold' from the limited edition Color Foil line. I reviewed this line for my first ever post on this blog, back in July, 2014.  Aaaah, the memories!

Essie Gel Couture 'Spiked with Style', and Sally Hansen Color Foil 'Liquid Gold'

My favourite part of this manicure is the elegant negative space heart with filigree background image that is stamped on the thumbnail...  it is so precious! The image is designed so beautifully - I just love it! I think that the colours I chose work really well with the design, and I'm also really impressed that I managed to centre the image quite nicely on the nail (well, at least I did on the hand that I photographed!  😉).  

Below I have a few additional shots of the manicure, arranged into a photo collage... Enjoy!

Collage of photos featuring Burgundy and Gold stamping manicure using Essie Gel Couture 'Spiked with Style', and Sally Hansen Color Foil 'Liquid Gold', and UberChic Beauty stamping plate Love and Marriage 02.

Thursday, September 5, 2019

Verdigris Mani 3.0


Polishes Used
Stamping Plates Used
China Glaze ‘Too Yacht to Handle’
Lina Nail Art Supplies:
Essie ‘Lady Godiva’
          - Make Your Mark Plate 02
Essie ‘Say it ain’t Soho’
          - You’re a Damasque! Plate 02
KB Shimmer 'Funky Cold Patina'


In my last post on KB Shimmer's 'Funky Cold Patina', I mentioned that I had plans to do a look inspired by that polish. 'Funky Cold Patina' got me thinking about some manicures I had done in the past based on copper patinas. Now, I typically don't like to repeat the exact same nail art manicure more than once, but for today's look I have decided to do the third incarnation of one of my favourite manicures ever - the 'Verdigris Mani'. I'll include a link to a post where I talk about the two previous versions that I did, and give a little more background on the manicure, right here.

This time around, I wanted to do a copper relief effect for the base copper parts of the manicure, and then put little spotches of light teal over it, to simulate copper relief art that has just started to develop a patina. To make the copper relief effect, I stamped a damasque pattern from Lina Nail Art Supplies 'You're a Damasque!' plate 02 using a chocolate brown polish, 'Lady Godiva', over an amazing copper polish, 'Say it Ain't Soho'.  I then double stamped a texture image from Lina Nail Art Supplies 'Make Your Mark', plate 02 in light turquoise to create the verdigris effect. The other nails are painted with 'Funky Cold Patina'.


I really like how the manicure turned out, but if I could do it again, I would find a way to incorporate some of the copper polish onto some or all of the turquoise nails: perhaps making the ring finger an accent nail that incorporated both looks on one nail, or even just having 3 copper/effect nails by painting the pinky finger the same as the index and middle fingers... Below, I've included a couple additional shots of this manicure.

Sunday, August 18, 2019

'Panning for Gold' Stamped Glitter and Pond Manicure

Manicure featuring jelly polish 'pond' elements, teal glitter, and gold nail stamping. Polishes used: Essie Silk Watercolor ‘Pen & Inky’, Essie Glazed Days ‘Ooh La Lolly’, China Glaze ‘Water You Waiting For’, and Sally Hansen Color Foil – 'Liquid Gold'.  Stamping plates used:  ÜberChic Beauty – Moroccan Delight, and Über Mini: Texture-licious – Plate 2

Today's manicure is a water-themed look centred around the idea of panning for gold. I wanted to do a pond manicure using the Essie jelly polish collections that I've been playing around with for the last few posts, the 'Silk Watercolor' collection from 2015, and the new 'Glazed Days' collection released earlier this year.  

Polishes Used
Stamping Plates Used
Essie Silk Watercolor ‘Pen & Inky’
ÜberChic Beauty – Moroccan Delight
Essie Glazed Days ‘Ooh La Lolly’
Über Mini: Texture-licious – Plate 2
China Glaze ‘Water You Waiting For’

Sally Hansen Color Foil – 'Liquid Gold'


Teal, blue and gold glitter and 'Pond' stamped manicure featuring Essie Silk Watercolor ‘Pen & Inky’, Essie Glazed Days ‘Ooh La Lolly’, China Glaze ‘Water You Waiting For’, and Sally Hansen Color Foil – 'Liquid Gold'

However, I wanted to do something a little different for the pond manicure, so I came up with the idea of irregular gold flakes visible through the layers of blue and teal jelly polish, as if they were small pieces of gold at the bottom of a river bed, being brought to the surface while panning for gold.  I used this concept for my index and middle fingers, using Essie jelly polishes 'Pen & Inky', and 'Ooh La Lolly', and then painted my other nails using 'Water You Waiting For', a gorgeous teal glitter from the China Glaze Cirque du Soleil 'Worlds Away' collection from Winter 2012. This polish was included in my 'Project Polish' list of polishes that I'm trying to use up soon(ish 😉). 

I finished the manicure by stamping a gold arabesque pattern over my ring finger as an accent, and then topping everything off with a quick dry, glossy top coat. The arabesque pattern was from the ÜberChic Beauty - 'Moroccan Delight' plate, while the gold flakes in the 'Pond' portion of the manicure were stamped from ÜberChic Beauty's Über Mini 'Texture-licious' plate 2. Below I have a collage featuring a few additional shots of the manicure.

Manicure featuring jelly polish 'pond' elements, teal glitter, and gold nail stamping. Polishes used: Essie Silk Watercolor ‘Pen & Inky’, Essie Glazed Days ‘Ooh La Lolly’, China Glaze ‘Water You Waiting For’, and Sally Hansen Color Foil – 'Liquid Gold'.  Stamping plates used:  ÜberChic Beauty – Moroccan Delight, and Über Mini: Texture-licious – Plate 2

I really like how this manicure turned out! It actually kind of reminds me of the 'Teal and Gold Crackle Sandwich' manicure I did years ago on this blog as part of my '2015 Crackle Polish Challenge'. 

I really love how the featured 'pond' portion of the mani turned out, but interestingly, this manicure has really revived my appreciation for the China Glaze glitter 'Water You Waiting For'. I've always loved the stunning, deep teal shade, but wearing it now, I see how well it works with my skin tone, and just how genuinely sparkly and beautiful it is!

Thursday, August 15, 2019

Essie 'Silk Watercolors' and 'Glazed Days' Collections Comparison

Essie 'Silk Watercolor' collection: Essie ‘Highest Bidder’, Essie ‘Point of Blue’, Essie ‘Love Sheen’, Essie ‘No Shrinking Violet’, Essie ‘Blush Stroke’, Essie ‘White Page’, Essie ‘Art New-Beau’, Essie ‘Muse, Myself', Essie ‘Pen & Inky’.  Essie 'Glazed Days' collection: 'Glazed Days' (red), 'Confection Affection' (orange), 'Sweet Supply' (yellow), 'But First, Candy' (green), 'Ooh La Lolly' (blue), and 'Sweet not Sour' (purple)

For today's post, I wanted to do a quick comparison between the two iterations of Essie's Jelly Polish collections: Essie's 'Silk Watercolors' collection from 2015, and Essie's 'Glazed Days' collection from 2019. To see reviews on the collections separately, you can click the links on the collection names in the previous sentence.

Overall, I really like both collections, and think that they actually complement eachother really well. Because of the different formulas, and hues, I'm happy to have both sets in my collection.  

I noticed that the silk watercolor collection has a slightly thinner, and slightly less vibrant formula, which lends itself a bit better to blending and layering applications. For example, blending a watercolour-type abstract pattern on the nails, or layering designs between coats of the jelly polish, as is done with 'pond' manicures.

By contrast, the 'Glazed Days' Collection seems to be more vibrant and the formula is a bit thicker, which lends itself a bit better to nail art applications where more full coverage is important, like 'leadlighting'.  None of the shades are exact dupes of eachother, so combined, the 2 collections provide a total of 14 rainbow shades!

Below I have samples of nail art that use all of the polishes in both collections. On the 'Glazed Days' portion of the collage, the polishes are layered over a silver background (Sally Hansen's 'Silver Sweep').

Essie 'Silk Watercolor' collection: Essie ‘Highest Bidder’, Essie ‘Point of Blue’, Essie ‘Love Sheen’, Essie ‘No Shrinking Violet’, Essie ‘Blush Stroke’, Essie ‘White Page’, Essie ‘Art New-Beau’, Essie ‘Muse, Myself', Essie ‘Pen & Inky’.  Essie 'Glazed Days' collection: 'Glazed Days' (red), 'Confection Affection' (orange), 'Sweet Supply' (yellow), 'But First, Candy' (green), 'Ooh La Lolly' (blue), and 'Sweet not Sour' (purple)

Wednesday, August 14, 2019

Leadlighting Manicure featuring Essie's Silk Watercolor Collection

Manicure featuring Essie's Silk Watercolor Collection: Essie ‘Highest Bidder’, Essie ‘Point of Blue’, Essie ‘Love Sheen’, Essie ‘No Shrinking Violet’, Essie ‘Blush Stroke’, Essie ‘White Page’, Essie ‘Art New-Beau’, Maniology ‘Straight Up Black’, Essie ‘Muse, Myself’, Essie ‘Pen & Inky’, and stamping plate Moyou London Trend Hunter - 01

Polishes Used
Polishes Used
Essie ‘Highest Bidder’
Essie ‘Point of Blue’
Essie ‘Love Sheen’
Essie ‘No Shrinking Violet’
Essie ‘Blush Stroke’
Essie ‘White Page’
Essie ‘Art New-Beau’
Maniology ‘Straight Up Black’
Essie ‘Muse, Myself’
Stamping Plate Used
Essie ‘Pen & Inky’
Moyou London Trend Hunter - 01

Manicure featuring Essie's Silk Watercolor Collection: Essie ‘Highest Bidder’, Essie ‘Point of Blue’, Essie ‘Love Sheen’, Essie ‘No Shrinking Violet’, Essie ‘Blush Stroke’, Essie ‘White Page’, Essie ‘Art New-Beau’, Maniology ‘Straight Up Black’, Essie ‘Muse, Myself’, Essie ‘Pen & Inky’, and stamping plate Moyou London Trend Hunter - 01

After reviewing my purchase of Essie's 'Glazed Days' collection which was released earlier this year, I decided to go back and do a manicure using Essie's 'Silk Watercolor' collection that I purchased back when it was released in 2015. 

Essie's Silk Watercolor Collection: Essie ‘Highest Bidder’, Essie ‘Point of Blue’, Essie ‘Love Sheen’, Essie ‘No Shrinking Violet’, Essie ‘Blush Stroke’, Essie ‘White Page’, Essie ‘Art New-Beau’, Essie ‘Muse, Myself’, and Essie ‘Pen & Inky’
Essie 'Silk Watercolor' Collection
I never did a complete review of the 'Silk Watercolor' collection when I purchased it. However, I did feature one of the shades in a blog post. It was the pink shade, 'Blush Stroke', which I used for a 'Pond' manicure. Here's a link to that post. 

For today's manicure, I decided to use all of the shades from the collection to create a cute, colourful look. I started with 'White Page' as my white base colour, and then stamped two different floral images on my thumbs, and ring fingers. The images were from Moyou London stamping plate 'Trend Hunter - 01', and the black stamping polish I used was Maniology's 'Straight Up Black'. I also stamped the cross pattern on my middle fingers from a portion of one of the images on the same plate using the same polish. 

Next, I coloured in the flower portions of the images with each of the colours from the 'Silk Watercolor' collection using the 'leadlight technique', which involves using a dotting tool (or any other tool or brush that can transfer polish) to place the transparent jelly polishes over different parts of the image. After this, I embellished the image on my middle finger with some black dots, and then added multi coloured dots on the bottom portion of my index, and pinky fingers. The multi-coloured dots were also made with the 'Silk Watercolor' collection. I completed the look by using a quick dry, glossy top coat in order to smoothe everything out, and add shine.

Below, is a collage with a few additional shots of the manicure:

Manicure featuring Essie's Silk Watercolor Collection: Essie ‘Highest Bidder’, Essie ‘Point of Blue’, Essie ‘Love Sheen’, Essie ‘No Shrinking Violet’, Essie ‘Blush Stroke’, Essie ‘White Page’, Essie ‘Art New-Beau’, Maniology ‘Straight Up Black’, Essie ‘Muse, Myself’, Essie ‘Pen & Inky’, and stamping plate Moyou London Trend Hunter - 01

Here are some of my thoughts about the 'Silk Watercolor' collection. I'm quite pleased with the colour saturation from the jelly polishes in the collection. The jellies look great over the white polish even with only one coat, which is really important for leadlighting. The white polish is pretty much your standard white polish. It performs well, but if you already have a white polish that you like, I don't see a specific need to get this one.

I also really like the colour range. There are more warm shades in the collection than cool shades, and I find that a lot of the colours are sort of 'in-between' shades, as opposed to 'true' shades ie 'pinky-red' as opposed to 'true' red. This works well for me, as I already have jelly polishes that are more classic shades, so these polishes are a great addition to my collection.

The 'Silk Watercolor' formula is really good as well. The jelly polishes are on the slightly thinner side, and have enough pigment to perform well for leadlighting, as well as on their own, as seen in my 'pond' manicure. Of course, I haven't used all of the jellies on their own yet, so I'm estimating the performance based on 'Blush Stroke', the one I've used (sort of) on it's own, as well as my experience with using all of the polishes in this manicure. 

All in all, really like these polishes. I really enjoyed creating this look, and I love how it turned out. I even got a couple compliments on this manicure! 

Sunday, August 11, 2019

Water-Marble Style Leadlighting Mani 2 featuring Essie's 'Glazed Days' Collection

Manicure created using polishes from Essie's 'Glazed Days' collection: Essie ‘Glazed Days’,  Essie ‘Sweet Not Sour’,  Essie ‘Confection Affection’,  Sally Hansen Insta-Dri ‘Silver Sweep’ (new formula),  Essie ‘Sweet Supply’,  Maniology ‘Straight Up Black’,  Essie ‘But First, Candy’, Essie ‘Ooh La Lolly’, and What’s Up Nails stamping plate B002

Today I have another leadlighting manicure created using Essie's Glazed Days Collection, and my water-marble stamping plate B002 from What's Up Nails.

Polishes Used
Polishes Used
Essie ‘Glazed Days’
Essie ‘Sweet Not Sour’
Essie ‘Confection Affection’
Sally Hansen Insta-Dri ‘Silver Sweep’*
Essie ‘Sweet Supply’
Maniology ‘Straight Up Black’
Essie ‘But First, Candy’
Stamping Plates Used
Essie ‘Ooh La Lolly’
What’s Up Nails plate B002
                                                                                                                      *new formula

Essie ‘Glazed Days’,  Essie ‘Sweet Not Sour’,  Essie ‘Confection Affection’,  Sally Hansen Insta-Dri ‘Silver Sweep’ (new formula),  Essie ‘Sweet Supply’,  Maniology ‘Straight Up Black’,  Essie ‘But First, Candy’, Essie ‘Ooh La Lolly’, and What’s Up Nails stamping plate B002

Basically, the steps I took to create this manicure were the same as for the manicure I described in my last post. The main difference is that I used different stamping images from the stamping plate. The middle finger accent nail was also featured in an earlier post in which I did a quick review on the Essie 'Glazed Days' collection. You can click here to see that post.

Overall, I was really pleased with how this manicure turned out as well (even with the small smudge on my thumb!). I really like how these jelly polishes look over a silver base. Below, I've included a few additional close-up shots of my fingernails.

close up shots of manicure created using polishes from Essie's 'Glazed Days' collection: Essie ‘Glazed Days’,  Essie ‘Sweet Not Sour’,  Essie ‘Confection Affection’,  Sally Hansen Insta-Dri ‘Silver Sweep’ (new formula),  Essie ‘Sweet Supply’,  Maniology ‘Straight Up Black’,  Essie ‘But First, Candy’, Essie ‘Ooh La Lolly’, and What’s Up Nails stamping plate B002

Wednesday, August 7, 2019

Water-Marble Style Leadlighting Mani featuring Essie's 'Glazed Days' Collection

Essie ‘Glazed Days’,  Essie ‘Sweet Not Sour’,  Essie ‘Confection Affection’,  Sally Hansen Insta-Dri ‘Silver Sweep’ (new formula),  Essie ‘Sweet Supply’,  Maniology ‘Straight Up Black’,  Essie ‘But First, Candy’, Essie ‘Ooh La Lolly’, and What’s Up Nails stamping plate B002

Polishes Used
Polishes Used
Essie ‘Glazed Days’
Essie ‘Sweet Not Sour’
Essie ‘Confection Affection’
Sally Hansen Insta-Dri ‘Silver Sweep’*
Essie ‘Sweet Supply’
Maniology ‘Straight Up Black’
Essie ‘But First, Candy’
Stamping Plates Used
Essie ‘Ooh La Lolly’
What’s Up Nails plate B002
* New Formula                

Today, I have a manicure to share using the Essie 'Glazed Days' collection realeased for Summer 2019. This collection of very saturated jelly polishes lends itself quite well to a variety of nail art applications. It's been a while since I posted some nail art on my blog, so when I purchased the set, I was so excited to be able to get back to playing with polishes to create some beautiful manicures! 

For this mani, I used the Leadlighting technique, to create a look similar to a stained glass window. I started out with a silver base. I then stamped over the base with a black stamping polish, using one of the water-marble images from What's Up Nails plate B002.  Afterwards, I coloured over the silver portions between the black lines using different colours of polish from the 'Glazed Days' collection.

Below, is a picture of the materials I used to create the look:

Essie ‘Glazed Days’,  Essie ‘Sweet Not Sour’,  Essie ‘Confection Affection’,  Sally Hansen Insta-Dri ‘Silver Sweep’ (new formula),  Essie ‘Sweet Supply’,  Maniology ‘Straight Up Black’,  Essie ‘But First, Candy’, Essie ‘Ooh La Lolly’, and What’s Up Nails stamping plate B002

It was so much fun creating this manicure. I really love how it turned out - I even got a really nice compliment on my nails! Below, I've included a collage of some additional shots of the manicure:

Essie ‘Glazed Days’,  Essie ‘Sweet Not Sour’,  Essie ‘Confection Affection’,  Sally Hansen Insta-Dri ‘Silver Sweep’ (new formula),  Essie ‘Sweet Supply’,  Maniology ‘Straight Up Black’,  Essie ‘But First, Candy’, Essie ‘Ooh La Lolly’, and What’s Up Nails stamping plate B002