Sunday, November 24, 2019
Glitter Mani: 'Cherries in the Snow' and 'Flashing Lights'
Today I have a quick post to share. It's a simple glitter manicure using Revlon's 'Cherries in the Snow', and Claire's Cosmetics Splatter 'Flashing Lights'. I've been struggling to find base polishes that would look good with this glitter topper from my 'Project Polish'. I think that this red, white and blue combo worked out quite nicely!
Truthfully, I am really over this glitter topper... I don't really enjoy glitter polishes as much as I used to, and this one in particular has a very limiting colourway, so there's not as many polishes that it can be used with. I'm really not sure if I'm going to be able to finish the entire bottle - this polish is most likely bound for the giveaway pile.
Labels:
Claire's Cosmetics,
glitter,
Project Polish,
red,
Revlon
Thursday, November 7, 2019
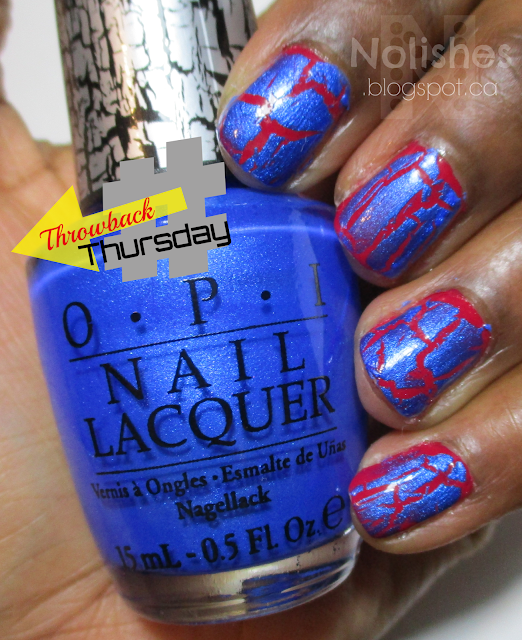
Throwback Thursday: Blue Shatter Mani with Red Base
For today's post, in the spirit of 'Throwback Thursday', I'm sharing a red and blue shatter manicure (Shattercure?!) featuring OPI's 'Blue Shatter', and Revlon's 'Cherries in the Snow'. The nostalgia game is strong with this one! Blue shatter came out in OPI's Summer 2011 Shatter Collection, and 'Cherries in the Snow' nail polish was first introduced by Revlon in 1953! Enjoy the throwback vibes!
Sunday, October 20, 2019
China Glaze 'Drastic'
Today I have a quick post to share another nail polish swatch. This polish is China Glaze's 'Drastic', a deep red jelly polish that is absolutely stunning! I love the candy-like translucence and shine, and the deep cool-toned shade of red is so gorgeous!
Sunday, October 13, 2019
Morgan Taylor - Tickle My Keys
Today I have a swatch of 'Tickle My Keys' from the Summer 2019 Morgan Taylor Rocketman collection. It's a gorgeous, super bright pink polish that is just so much fun to wear! I recently picked this polish up on clearance. I really love how vibrant this polish is. It looked so amazing in the bottle that I just had to put it on my nails now - even though it's fall!
The polish not only looks great, but it has a wonderful formula that spreads evenly, dries relatively quickly, and gives full coverage in 2 coats. All in all, I'm really happy with this polish, and look forward to wearing it both on its own, as well as featuring it in nail art in the future!
Sunday, September 29, 2019
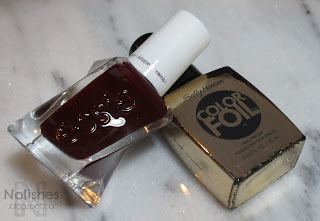
Essie 'Gel Couture' 'Bubbles Only' Swatch
Today I have a swatch of Essie Gel Couture 'Bubbles Only' to share. I really love this shade of red. It's deep enough to look sophisticated and elegant, but light enough to not read as burgundy. I also really liked the formula on this polish. It applied smoothly, dried quickly, and didn't chip for the few days that I wore it... I'm very pleased!
I think this polish looks stunning under most lighting conditions, but I noticed that under fluorescent lights, it starts to take on a bit of a brownish tone. Of course that's not really the polish's fault, but it is something I'll keep in mind for future use... I'll probably avoid wearing this one to the office in the future, because that's the main place in my life where I encounter fluorescent lighting!
Sunday, September 22, 2019
Blue and Silver Stamped Manicure featuring China Glaze 'Dorothy Who'
Polishes Used
|
China Glaze ‘Dorothy Who?’
|
Sally Hansen Color Foil ‘Sterling Silver’
|
Stamping Plate Used
|
Maniology/Bundle Monster ‘Chic
Peek’ BM-XL476
|
ÜberChic Beauty Love and
Marriage – Plate 02
|
Here's a little mani that I threw together with a glitter polish that I had handy, and some nearby stamping plates! This is the first time that I've used my bottle of China Glaze's 'Dorothy Who', so I'm glad I was able to take this one off the untried list... It truly is a lovely shade of blue!
After painting my nails with the polish, I wanted to jazz the look up a bit with a little stamping. I had used the ÜberChic Beauty Love and Marriage 02 plate for my last manicure, the Burgundy and Gold Stamped Mani, and had not put the plate away yet, so I decided to use it again for this manicure. The negative space heart stamped image on my middle finger is from that plate. On my ring finger, I stamped a textural image from my Bundle Monster Chic Peek BM-SL476 plate.
Labels:
Basic Stamping,
blue,
Bundle Monster/Maniology,
China Glaze,
glitter,
Impromptu Mani,
Sally Hansen,
ÜberChic Beauty,
untried
Sunday, September 15, 2019
Burgundy and Gold Stamped Mani
Polishes Used
|
Essie ‘Spiked with Style’
|
Sally Hansen Color Foil ‘Liquid Gold’
|
Stamping Plate Used
|
ÜberChic Beauty Love and
Marriage – Plate 02
|
Today I have a really quick and easy manicure to share. It was created using a base of a gorgeous burgundy creme polish from Essie's Gel Couture line called 'Spiked with Style'. I then embelished my thumbs, middle and ring fingers with some images from ÜberChic Beauty plate 'Love and Marriage - 02', which I stamped in one my favourite gold polish for stamping, Sally Hansen's 'Liquid Gold' from the limited edition Color Foil line. I reviewed this line for my first ever post on this blog, back in July, 2014. Aaaah, the memories!
My favourite part of this manicure is the elegant negative space heart with filigree background image that is stamped on the thumbnail... it is so precious! The image is designed so beautifully - I just love it! I think that the colours I chose work really well with the design, and I'm also really impressed that I managed to centre the image quite nicely on the nail (well, at least I did on the hand that I photographed! 😉).
Below I have a few additional shots of the manicure, arranged into a photo collage... Enjoy!
Labels:
Basic Stamping,
Essie,
red,
Sally Hansen,
ÜberChic Beauty
Friday, September 6, 2019
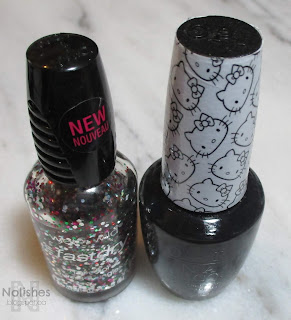
Glitter Mani Featuring 'Party of Five Glitters'
Polishes Used
|
Wet n Wild Fastdry ‘Party of
Five Glitters’
|
OPI ‘Never Have Too Mani Friends!’
|
Today I have a quick and easy glitter manicure to share featuring a Wet n Wild glitter called 'Party of Five Glitters'. I've had this glitter for several years now, and recently decided to try it out again. Honestly, I've been thinking of decluttering it, and wanted to see how it looked on my nails to help me decide. I decided to wear it over a black polish since it really helped the glitter mix to stand out.
There are 5 different colours of glitter in this polish: red, green, purple, light blue, and silver. I remember this collection contained polishes with names inspired by various TV shows. So this polish was named after 'Party of Five', a prime-time drama series from the nineties. I used another polish from this collection 'Saved by the Blue' (Inspired by the teen comedy show 'Saved by the Bell'), in my 'Australian Aboriginal Art Themed Mani', which I blogged about here.
Sadly, I'm not a really big fan of 'Party of Five Glitters' anymore. I rarely get that excited about glitter polishes in general, nowadays, but this one in particular is really not my cup of tea right now. This is mainly because I don't particularly care for the mix of colours.
Funnily enough, I remember being really excited about the polish back when I bought it, as multi-coloured 'glitter bomb' polishes like Deborah Lippmann's 'Happy Birthday', and OPI's 'Rainbow Connection' were all the rage at the time. At the time, this seemed like an affordable, comparable version of that look. You can even see that there is quite a low fill line - the bottle is about one quarter empty! This really goes to show how one's tastes can change a lot over the years...
I think I may try one more look with the polish, before making any decisions: I want to try the polish on it's own, with as many coats as it takes to get full coverage. Perhaps it might look nicer as a solid block of multi-coloured glitter, as opposed to being used as a glitter topper.
Thursday, September 5, 2019
Verdigris Mani 3.0
Polishes Used
|
Stamping Plates Used
|
China Glaze ‘Too Yacht to Handle’
|
Lina Nail Art Supplies:
|
Essie ‘Lady Godiva’
|
- Make Your Mark Plate 02
|
Essie ‘Say it ain’t Soho’
|
- You’re a Damasque! Plate 02
|
KB Shimmer 'Funky Cold Patina'
|
In my last post on KB Shimmer's 'Funky Cold Patina', I mentioned that I had plans to do a look inspired by that polish. 'Funky Cold Patina' got me thinking about some manicures I had done in the past based on copper patinas. Now, I typically don't like to repeat the exact same nail art manicure more than once, but for today's look I have decided to do the third incarnation of one of my favourite manicures ever - the 'Verdigris Mani'. I'll include a link to a post where I talk about the two previous versions that I did, and give a little more background on the manicure, right here.
This time around, I wanted to do a copper relief effect for the base copper parts of the manicure, and then put little spotches of light teal over it, to simulate copper relief art that has just started to develop a patina. To make the copper relief effect, I stamped a damasque pattern from Lina Nail Art Supplies 'You're a Damasque!' plate 02 using a chocolate brown polish, 'Lady Godiva', over an amazing copper polish, 'Say it Ain't Soho'. I then double stamped a texture image from Lina Nail Art Supplies 'Make Your Mark', plate 02 in light turquoise to create the verdigris effect. The other nails are painted with 'Funky Cold Patina'.
I really like how the manicure turned out, but if I could do it again, I would find a way to incorporate some of the copper polish onto some or all of the turquoise nails: perhaps making the ring finger an accent nail that incorporated both looks on one nail, or even just having 3 copper/effect nails by painting the pinky finger the same as the index and middle fingers... Below, I've included a couple additional shots of this manicure.
Labels:
Basic Stamping,
China Glaze,
crelly,
Double Stamping,
Essie,
KB Shimmer,
Lina Nail Art Supplies
Tuesday, September 3, 2019
KB Shimmer 'Funky Cold Patina'
Today I have a swatch and brief review to share of a fun polish from the indie brand KB Shimmer. The polish is called 'Funky Cold Patina', and it is a turquoise crelly polish with copper, shades of blue, and purple hexagonal metallic glitters of various sizes. It was initially released in the KB Shimmer Spring 2015 collection.
First of all - I love the name! As a punny play on the title of the 1980's Tone Loc song 'Funky Cold Medina', in my head, I can't help but say the name of the polish in the same cadence Tone Loc uses when he says the verse in the song!
Second, I love the concept. The polish is clearly inspired by the patina formed by copper oxidation: verdigris. I've done a couple verdigris manicures in the past, and my next post will be another version of a verdigris manicure, featuring and inspired by this polish.
As for the polish itself, it applies beautifully, has a great formula, and is absolutely gorgeous. I also really like how this shade of turquoise looks on me. In addition, I've noticed that the polish has held up really well over the few years that I had it, with no bleeding of the glitter colour into the base, and the polish consistency remaining perfect for smooth application. To me, this appears to be a great testament to the quality of the materials being used by the brand!
All in all, I'm really happy with this polish, and I can't wait to play with it in the next look that I create... stay tuned!
Sunday, August 25, 2019
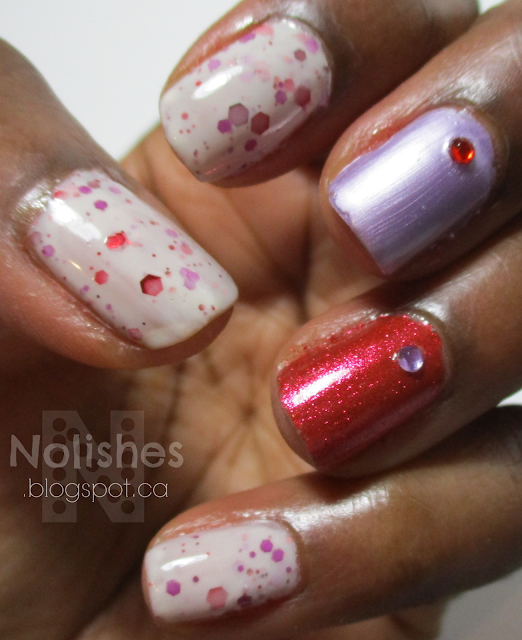
Red, White, and Purple Mani featuring KB Shimmer 'Falling for Hue'
Today I have a quick and easy manicure I did using a crelly glitter polish and matching metallic polishes:
Polishes Used
|
ILNP ‘Love Me Not’
|
China Glaze ‘Ah Ah Ah-mazing!’
|
KB Shimmer ‘Falling for Hue’
|
The KB Shimmer white crelly glitter has suspended red and purple metalic glitters of various sizes, and is called 'Falling for Hue'. I decided to do two accent nails, one in a metallic red shade from ILNP which is similar to the red glitter in the crelly, called 'Love Me Not', and the other accent nail is in a metallic lavender polish called 'Ah Ah Ah-mazing!'.
'Ah Ah Ah-mazing!' is from the China Glaze summer 2019 Sesame Street: You Do Hue collection, and I recently purchased it on clearance at one of my favourite beauty supply stores. Since it coordinated with the glitters in the crelly, I decided to try it out for the first time in this manicure. The soft metallic lavender shade is very beautiful, but the formula is a little tricky to work with. If you are not careful, it's really easy to to get noticeable brushstrokes.
Below, I have a photo collage showing some additional shots of the manicure:
Thursday, August 22, 2019
Metallic Red and Silver Stamped Mani
Polishes Used
|
Stamping Plate Used
|
OPI ‘A Little Guilt Under the Kilt’
|
Über Mini: Texture-licious – Plate 3
|
Sally Hansen ‘Silver Sweep’*
|
*Original formula
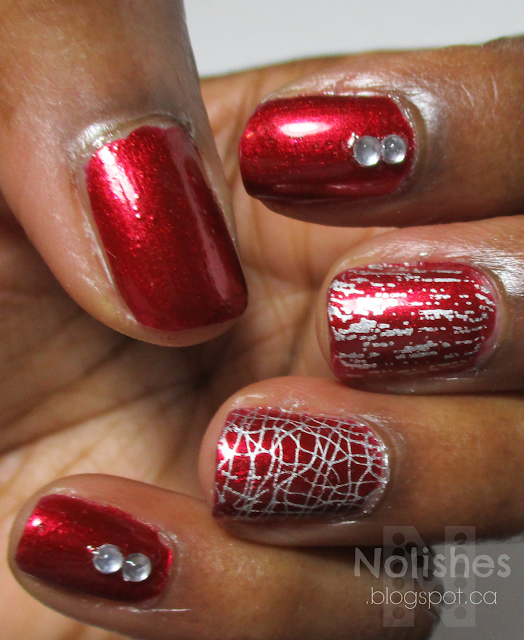
I created this manicure by starting off with a base of metallic red nail polish, OPI's 'A Little Guilt Under the Kilt'. Next, I stamped 2 separate textural images from ÜberChic Beauty's ÜberMini 'Texture-licious' plate 3 on both my ring and middle fingers. I used a metallic silver polish for the stamping, my quickly depleting bottle of original formula Sally Hansen's 'Silver Sweep'. I completed the look by placing 2 colourless nail art jewels each, on my pinky and index fingers.
I did this manicure during the middle of the work week, so I didn't really have a lot of time for planning and execution. Typically in these situations, I would do a traditional manicure using just one shade of polish on all of my nails. However, I've been trying to get back into the habit of doing nail art regularly, so I decided to go a step further and do some basic nail stamping and add some embellishments. I'm really pleased with how the look turned out, and it has served as a reminder for me that a manicure does not have to be complicated or time-consuming to be beautiful. In fact, sometimes simpler is better, since I don't end up going over-board and doing way too much! 😄
Below, I've included a few additional pictures of the manicure:
Labels:
Basic Stamping,
Nail Stamping,
OPI,
red,
Sally Hansen,
ÜberChic Beauty
Wednesday, August 21, 2019
'A Little Guilt Under the Kilt' - OPI Scotland Collection for Fall 2019
Today I have a swatch of a new polish I recently purchased. It's from OPI's 'Scotland' collection for fall 2019. The shade is called 'A Little Guilt Under the Kilt' and it is a gorgeous metallic red with slightly warm, rusty undertones. This shade was the standout for me from this fall's OPI collection, mainly because lately I've developed a penchant for red polishes, and metallic red is my favourite way to wear red nails. It's also a truly stunning shade of blood red, that is perfect for fall!
This polish has a wonderful formula. It was easy to apply, self-leveling, and dried reasonably fast. It also applied smoothly, with no brush-strokes. However, I noticed that similar to many other metallic polishes, since the formula does apply so smoothly, it does not cover the the slight ridges and imperfections in my nail as much as a creme polish would. This is pretty insignificant in most real life situations, but becomes just barely noticeable when viewing your nails in close-up photos! It's also pretty easy to fix by remembering to lightly buff my nails before applying metallic polishes. Truthfully though, I'm generally not really concerned about it, so I usually don't take the time to buff before applying metallics.
Below, I've included a comparison photo in which I've selected 12 metallic red polishes from my collection (including 'A Little Guilt Under the Kilt') and placed swatches of them in a line-up (you should be able to click on the photo to enlarge it). I don't have any exact matches for 'A Little Guilt Under the Kilt' in my collection, as it is a lot lighter than most of my warm metallic reds, but putting these subtle variations in undertones aside, as you can see, I do have some polishes that are somewhat similar in hue.
The names of the polishes in the comparison line-up photo above are:
1) China Glaze - Mommy Kissing Santa
2) OPI - I'm Not Really a Waitress
3) Zoya - Isla
4) China Glaze - Long Kiss
5) Cover Girl - Forever Festive
6) Orly – Torrid
7) A England - Perceval
8) OPI - An Affair in Red Square
9) OPI - A Little Guilt Under the Kilt
10) China Glaze -
Cranberry Splash
11) China Glaze - Just
Be-Claws
12) Sinful Colors - Sugar SugarAll in all, I really love this nail polish, and I'm happy to have it in my collection!
Sunday, August 18, 2019
'Panning for Gold' Stamped Glitter and Pond Manicure
Today's manicure is a water-themed look centred around the idea of panning for gold. I wanted to do a pond manicure using the Essie jelly polish collections that I've been playing around with for the last few posts, the 'Silk Watercolor' collection from 2015, and the new 'Glazed Days' collection released earlier this year.
Polishes Used
|
Stamping Plates Used
|
Essie Silk Watercolor ‘Pen
& Inky’
|
ÜberChic Beauty – Moroccan Delight
|
Essie Glazed Days ‘Ooh La Lolly’
|
Über Mini: Texture-licious – Plate 2
|
China Glaze ‘Water You Waiting For’
|
|
Sally Hansen Color Foil – 'Liquid
Gold'
|
However, I wanted to do something a little different for the pond manicure, so I came up with the idea of irregular gold flakes visible through the layers of blue and teal jelly polish, as if they were small pieces of gold at the bottom of a river bed, being brought to the surface while panning for gold. I used this concept for my index and middle fingers, using Essie jelly polishes 'Pen & Inky', and 'Ooh La Lolly', and then painted my other nails using 'Water You Waiting For', a gorgeous teal glitter from the China Glaze Cirque du Soleil 'Worlds Away' collection from Winter 2012. This polish was included in my 'Project Polish' list of polishes that I'm trying to use up soon(ish 😉).
I finished the manicure by stamping a gold arabesque pattern over my ring finger as an accent, and then topping everything off with a quick dry, glossy top coat. The arabesque pattern was from the ÜberChic Beauty - 'Moroccan Delight' plate, while the gold flakes in the 'Pond' portion of the manicure were stamped from ÜberChic Beauty's Über Mini 'Texture-licious' plate 2. Below I have a collage featuring a few additional shots of the manicure.
I really like how this manicure turned out! It actually kind of reminds me of the 'Teal and Gold Crackle Sandwich' manicure I did years ago on this blog as part of my '2015 Crackle Polish Challenge'.
I really love how the featured 'pond' portion of the mani turned out, but interestingly, this manicure has really revived my appreciation for the China Glaze glitter 'Water You Waiting For'. I've always loved the stunning, deep teal shade, but wearing it now, I see how well it works with my skin tone, and just how genuinely sparkly and beautiful it is!
Labels:
Basic Stamping,
blue,
China Glaze,
Essie,
glitter,
Jelly Polish,
Project Polish,
Sally Hansen,
ÜberChic Beauty
Thursday, August 15, 2019
Essie 'Silk Watercolors' and 'Glazed Days' Collections Comparison
For today's post, I wanted to do a quick comparison between the two iterations of Essie's Jelly Polish collections: Essie's 'Silk Watercolors' collection from 2015, and Essie's 'Glazed Days' collection from 2019. To see reviews on the collections separately, you can click the links on the collection names in the previous sentence.
Overall, I really like both collections, and think that they actually complement eachother really well. Because of the different formulas, and hues, I'm happy to have both sets in my collection.
I noticed that the silk watercolor collection has a slightly thinner, and slightly less vibrant formula, which lends itself a bit better to blending and layering applications. For example, blending a watercolour-type abstract pattern on the nails, or layering designs between coats of the jelly polish, as is done with 'pond' manicures.
By contrast, the 'Glazed Days' Collection seems to be more vibrant and the formula is a bit thicker, which lends itself a bit better to nail art applications where more full coverage is important, like 'leadlighting'. None of the shades are exact dupes of eachother, so combined, the 2 collections provide a total of 14 rainbow shades!
Below I have samples of nail art that use all of the polishes in both collections. On the 'Glazed Days' portion of the collage, the polishes are layered over a silver background (Sally Hansen's 'Silver Sweep').
Below I have samples of nail art that use all of the polishes in both collections. On the 'Glazed Days' portion of the collage, the polishes are layered over a silver background (Sally Hansen's 'Silver Sweep').
Labels:
Bundle Monster/Maniology,
Essie,
Jelly Polish,
Leadlight Technique,
Nail Stamping,
review,
Sally Hansen
Wednesday, August 14, 2019
Leadlighting Manicure featuring Essie's Silk Watercolor Collection
Polishes Used
|
Polishes Used
|
Essie ‘Highest Bidder’
|
Essie
‘Point of Blue’
|
Essie ‘Love Sheen’
|
Essie
‘No Shrinking Violet’
|
Essie ‘Blush Stroke’
|
Essie
‘White Page’
|
Essie ‘Art New-Beau’
|
Maniology
‘Straight Up Black’
|
Essie ‘Muse, Myself’
|
Stamping Plate Used
|
Essie ‘Pen & Inky’
|
Moyou
London Trend Hunter - 01
|
After reviewing my purchase of Essie's 'Glazed Days' collection which was released earlier this year, I decided to go back and do a manicure using Essie's 'Silk Watercolor' collection that I purchased back when it was released in 2015.
 |
| Essie 'Silk Watercolor' Collection |
I never did a complete review of the 'Silk Watercolor' collection when I purchased it. However, I did feature one of the shades in a blog post. It was the pink shade, 'Blush Stroke', which I used for a 'Pond' manicure. Here's a link to that post.
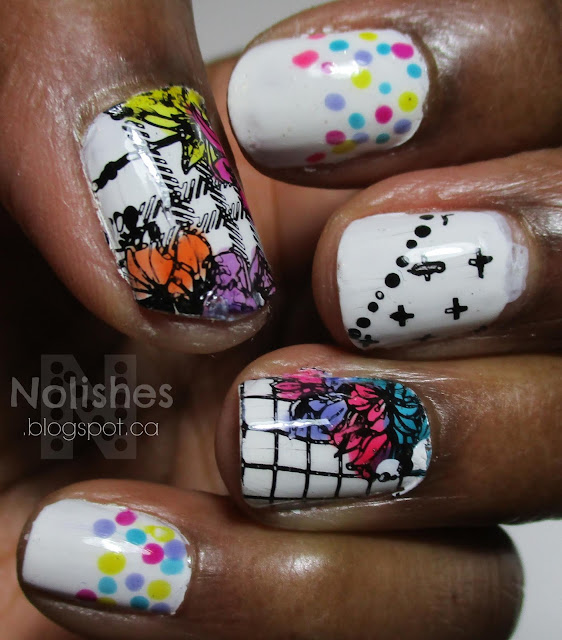
For today's manicure, I decided to use all of the shades from the collection to create a cute, colourful look. I started with 'White Page' as my white base colour, and then stamped two different floral images on my thumbs, and ring fingers. The images were from Moyou London stamping plate 'Trend Hunter - 01', and the black stamping polish I used was Maniology's 'Straight Up Black'. I also stamped the cross pattern on my middle fingers from a portion of one of the images on the same plate using the same polish.
Next, I coloured in the flower portions of the images with each of the colours from the 'Silk Watercolor' collection using the 'leadlight technique', which involves using a dotting tool (or any other tool or brush that can transfer polish) to place the transparent jelly polishes over different parts of the image. After this, I embellished the image on my middle finger with some black dots, and then added multi coloured dots on the bottom portion of my index, and pinky fingers. The multi-coloured dots were also made with the 'Silk Watercolor' collection. I completed the look by using a quick dry, glossy top coat in order to smoothe everything out, and add shine.
Below, is a collage with a few additional shots of the manicure:
Here are some of my thoughts about the 'Silk Watercolor' collection. I'm quite pleased with the colour saturation from the jelly polishes in the collection. The jellies look great over the white polish even with only one coat, which is really important for leadlighting. The white polish is pretty much your standard white polish. It performs well, but if you already have a white polish that you like, I don't see a specific need to get this one.
I also really like the colour range. There are more warm shades in the collection than cool shades, and I find that a lot of the colours are sort of 'in-between' shades, as opposed to 'true' shades ie 'pinky-red' as opposed to 'true' red. This works well for me, as I already have jelly polishes that are more classic shades, so these polishes are a great addition to my collection.
The 'Silk Watercolor' formula is really good as well. The jelly polishes are on the slightly thinner side, and have enough pigment to perform well for leadlighting, as well as on their own, as seen in my 'pond' manicure. Of course, I haven't used all of the jellies on their own yet, so I'm estimating the performance based on 'Blush Stroke', the one I've used (sort of) on it's own, as well as my experience with using all of the polishes in this manicure.
All in all, really like these polishes. I really enjoyed creating this look, and I love how it turned out. I even got a couple compliments on this manicure!
Labels:
Bundle Monster/Maniology,
Dotting,
Essie,
Jelly Polish,
Leadlight Technique,
MoYou London,
Nail Stamping,
white
Sunday, August 11, 2019
Water-Marble Style Leadlighting Mani 2 featuring Essie's 'Glazed Days' Collection
Today I have another leadlighting manicure created using Essie's Glazed Days Collection, and my water-marble stamping plate B002 from What's Up Nails.
Polishes Used
|
Polishes Used
|
Essie ‘Glazed Days’
|
Essie
‘Sweet Not Sour’
|
Essie ‘Confection Affection’
|
Sally
Hansen Insta-Dri ‘Silver Sweep’*
|
Essie ‘Sweet Supply’
|
Maniology
‘Straight Up Black’
|
Essie ‘But First, Candy’
|
Stamping Plates Used
|
Essie ‘Ooh La Lolly’
|
What’s
Up Nails plate B002
|
*new formula
Basically, the steps I took to create this manicure were the same as for the manicure I described in my last post. The main difference is that I used different stamping images from the stamping plate. The middle finger accent nail was also featured in an earlier post in which I did a quick review on the Essie 'Glazed Days' collection. You can click here to see that post.
Overall, I was really pleased with how this manicure turned out as well (even with the small smudge on my thumb!). I really like how these jelly polishes look over a silver base. Below, I've included a few additional close-up shots of my fingernails.
Subscribe to:
Comments (Atom)
