Wednesday, October 31, 2018

Halloween Day Manicure featuring OPI 'Today I Accomplished Zero'

My manicure for Halloween was OK, but I was a little disappointed with it overall. I left everything to the last minute this year, so I didn't have much time to do my nails after getting everything ready, and packing my Halloween treat bags for shelling out. As a result, I had to rush through this manicure:

Halloween images stamped in white over OPI Today I Accomplished Zero nail polish

The manicure is cute, but I didn't have the time to re-do any wonky stamping image transfers, and/or fix any stamping errors. I also would have really liked to find a way to add some 'Wow! factor'.


Polishes Used
Konad Special Polish - White
OPI 'Today I Accomplished Zero'
The featured polish in this manicure was OPI 'Today I Accomplished Zero' from the Summer 2014 'Coca Cola' collection. It's funny that I was able to use 2 different polishes from that collection for both of my Halloween manicures this year. Here's a link to my previous 'Sparkly Halloween Jack-o-Lantern Mani', featuring OPI's 'Orange You Fantastic!' from the same collection.

My favourite parts of the manicure were the adorable 'scary cute' images on the thumb nails. The ghost image is from Bunny Nails plate HD-C, and the mummy image if from Überchic Beauty plate Halloween-03.  The remaining images from the manicure were stamped from Überchic Beauty Plate Halloween-04. Here's a close up shot of my thumb nails:

Halloween nails featuring OPI 'Today I Accomplished Zero'

Have a safe and happy Halloween!!!

Sunday, October 28, 2018

Sparkly Halloween Jack-o-Lantern Mani

Today I have a Halloween Manicure to Share:

Manicure using a coppery-orange metallic foil polish, and an orange glitter, stamped with images of jack-o-lanterns in black. There are also some white and black nail gems accenting some nails.


I really wanted to do a Jack-o-Lantern manicure, and at first, I thought I would use a typical creme orange polish, and an orange glitter.  However, as I was looking through my collection for the orange glitter, I came across a glittery metallic coppery-orange polish that I thought would look amazing with the orange metallic glitter polish. I decided to use the two polishes for more of a Glam-o-Lantern look!

Here are the polishes I used:

Bottle shots of OPI 'A Woman's Prague-ative', Bundle Monster Stamping Polish 'Straight Up Black', and OPI 'Orange You Fantastic!'
Polishes Used

Polishes Used
OPI 'A Woman's Prague-ative'
Bundle Monster 'Straight Up Black'
OPI 'Orange You Fantastic!'

The orange metallic foil polish, 'A Woman's Prague-ative' is from OPI's Euro Centrale Collection from Spring 2013. The orange glitter polish 'Orange You Fantastic' was from OPI's Summer 2014 Coca-Cola Collection. I really can't get over how nice they look paired together!

For this manicure, my thumb, middle and ring finger on both hands are painted with a layer of 'A Woman's Prague-ative', and then with 2 layers of the glitter polish. When looking at it in real life, the glittery combination would sparkle through the full nail jack-o-lantern images stamped in black over the middle and ring finger nails. Unfortunately, that doesn't quite translate in the picture, so I just thought I'd mention it.

Below, are rotated images of my thumbnails which provide a better view of the cute Jack-o-Lantern Faces I stamped from Moyou London's 'Festive Collection' - plate 29.

Glittery 'thumb-o-lanterns' created with coppery orange polish, and orange glitter base, each stamped with a cute jack-o-lantern face image.
My 'Thumb-o-Lanterns'

The stamped image on my middle fingers was from Bunny Nails plate HD-C, and the stamped image on my ring fingers was from ÜberChic Beauty plate Halloween-03.

Stamping Plates Used
Moyou London Festive Collection - 29
ÜberChic Beauty 'Halloween-03'
Bunny Nails Plate HD-C

All in all, I absolutely love the way this manicure turned out. I normally try not to repeat manicures, but I could definitely see myself using this polish combination again to do another 'Glam-o-Lantern' manicure in the future!

Wednesday, October 24, 2018

Autumn Leaves Mani using China Glaze 'Aut-umm I Need That'

I recently purchased China Glaze's 'Aut-umm I Need That' from the Fall 2018 'Ready to Wear' collection. I normally am not drawn to brown polishes, but Aut-umm...'s beautiful shimmer that seems to reflect all of the greens, oranges, reds and golds of the changing fall leaves, caught my eye, and compelled me to purchase it!  Not only that, I also decided that I simply must do a 'fall leaves' manicure using this polish as soon as possible!

This manicure is the result:

Brown manicure using advanced stamping technique to apply coloured leave decals to accent some of the fingers. Amber coloured gems are used on accents for the other fingers.
Autumn Leaves Mani
I used 'Aut-umm I Need That' as the base colour for all of my nails, and then I used bundle monster plate BM-S321 (from the 'Botanicals Collection') to create fall leaf decals using the advanced stamping technique. The leaves are outlined in gold, and then filled in with various autumn colours.

First, here's a close up bottle shot of 'Aut-umm I Need That' which shows the beautiful shimmer:

Close up Bottle shot of China Glaze 'Aut-umm I Need That', nail polish


And here's a shot of all seven polishes I used to create this manicure:

Nicole by OPI 'Boys 'N Berry', OPI 'Atomic Orange', China Glaze 'Accent Piece', Sally Hansen 'Liquid Gold', China Glaze 'Baroqe Jungle', China Glaze 'Aut-umm I Need That', Revlon 'Frankly Scarlet'
Polishes Used

Polishes Used
Nicole by OPI 'Boys 'N Berry'
OPI 'Atomic Orange'
China Glaze 'Accent Piece'
Sally Hansen Color Foil 'Liquid Gold'
China Glaze 'Baroque Jungle'
China Glaze 'Aut-umm I Need That'
Revlon 'Frankly Scarlet' (745)

 I'm so happy with the way the manicure turned out! After applying the 6 leaf decals I created to 3 fingers on each hand, I applied amber coloured nail gems to the other two fingers to accent the look. Below I have included a couple of shots of my left hand.


Just for fun, I've included a link to my 'Fall Colours Mani' from 2014 where I used the 'Leadlight Technique to colour in a full nail stamping image from a different bundle monster plate, BM-H11.

Sunday, October 14, 2018

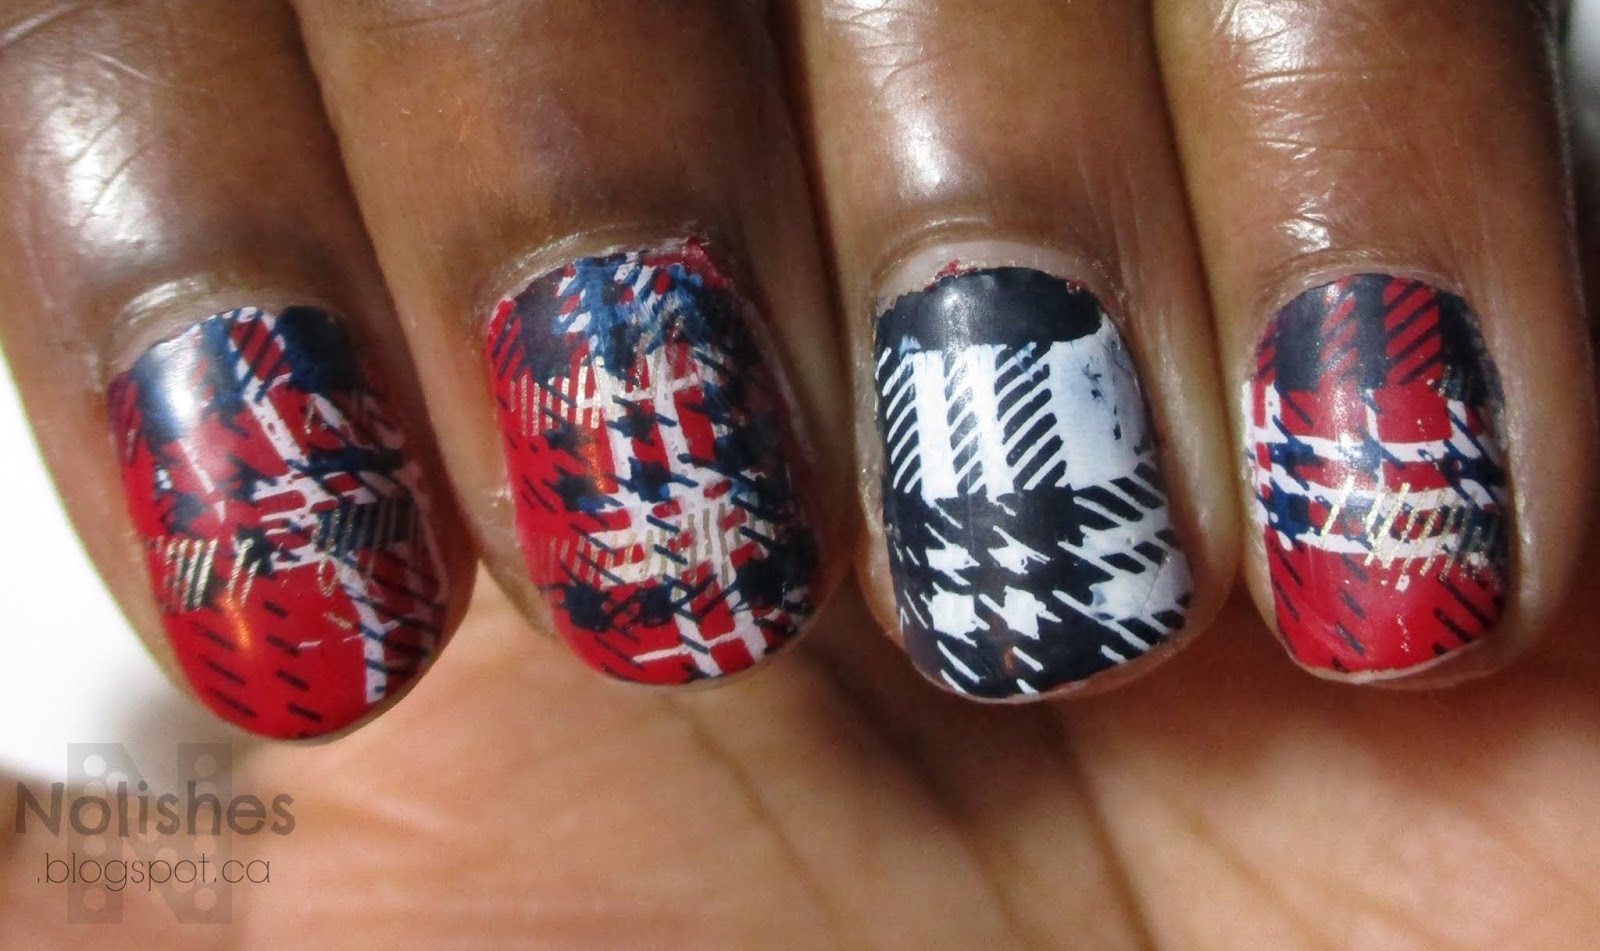
Red, White, Blue and Gold Plaid Manicure

This manicure was my attempt at recreating more of a traditional plaid using Red, White, Navy Blue, and Gold polishes:


In the past, I've done pink plaid in my 'Pink and White Pink Ribbon Mani', and yellow plaid in my 'Clueless Inspired Manicure'. I really liked those manicures, but since I have never done a plaid manicure using more traditional colours, I decided to give that a try.

For this manicure, I used the following polishes:

OPI 'Incognito in Sausalito', Sally Hansen Color Foil 'Liquid Gold', OPI 'Dutch Tulips', and Konad Special Nail Polish - White
Polishes Used

Polishes Used
Stamping Plates Used
OPI 'Incognito in Sausalito'
Moyou London Hipster Collection - 05
Sally Hansen Color Foil 'Liquid Gold'
Moyou London Hipster Collection - 06
OPI 'Dutch Tulips'
Clear Jelly Stamper Stamping Plate:
Konad Special Nail Polish - White
             'Got Plaid?' Plate CjS-56

The stamping on my index finger came out a little wonky, but overall, I really like the way the manicure turned out! In addition to the polishes mentioned, I also topped the look off with a matte topcoat (Essie's 'Matte about You') in order to make the finished result appear a bit more fabric like.

Sunday, October 7, 2018

Navy Blue and Gold Mani using OPI 'Holidazed Over You'

This manicure was created using various images from Lina Nail Art Supplies Stamping Plate 'You're a Damasque! - 01'.  I really like how the look turned out:

Images from Lina Nail Art Supplies 'You're a Damasque - 01' stamped in gold over navy blue jelly base, OPI 'Holidazed Over You'

I'm starting to realize that I don't really enjoy wearing dark polishes on their own these days. However, I really love how dramatic they look when paired with silver or gold metallic stamped images. The dark base provides the perfect high contrast background for the beautiful metallic images.

I did something similar with my 'Burgundy and Gold Mani', as well as my 'Navy and Silver Dot Design Mani'.

Here are some more images of the finished look:

various shots of blue and gold manicure

For this manicure, I got to use yet another untried polish - OPI 'Holidazed Over You'. 'Holidazed...' is a very dark navy blue jelly from the OPI 2017 Holiday collection: 'Love OPI, XOXO'. The polish is absolutely stunning. I love the finish! The highly pigmented navy blue hue combined with the transparent jelly formula give the polish so much dimension. It looks super squishy and super shiny - like polished onyx, or a pool of ink.  

Orly 'Luxe', Sally Hansen Color Foil 'Liquid Gold', and OPI 'Holidazed Over You'
Polishes Used

Polishes Used
Orly 'Luxe'
Sally Hansen Color Foil 'Liquid Gold'
OPI 'Holidazed Over You'

Sunday, September 30, 2018

Purple and Gold Mani using Revlon 'Plum Attraction'

The manicure that I am sharing today was really quick and easy to do:

Purple nails stamped with images from Lina Nail Art Supplies plate 'Make Your Mark - 04'.
Purple and Gold Manicure featuring Revlon 'Plum Attraction'

This look is a basic manicure with a couple of stamped images. For the stamping I used images from Lina Nail Art Supplies stamping plate 'Make Your Mark - 04'.  The ring finger was double stamped with 2 images for added texture.  I used my favourite gold polish for stamping, Sally Hansen Color Foils in 'Liquid Gold'.

Revlon 762 'Plum Attraction', and Sally Hansen Color Foils 'Liquid Gold'
Polishes Used
I wanted to do something simple for this manicure, because I really like the plum base polish I used (Revlon 'Plum Attraction'), and wanted it to show through.

Polishes Used
Revlon 'Plum Attraction' (762)
Sally Hansen Color Foil 'Liquid Gold'

Sunday, September 23, 2018

Blue and Gold manicure using Quo by Orly 'Celestial Star'

Today I have a quick 'remix mani' to share:


Polishes Used
Quo by Orly 'Celestial Star'
Sally Hansen Color Foil 'Yellow Gold'


I kept my ring finger the same from my previous 'Venetian Marble Mani', and painted over the other fingers with a deep blue sparkly polish from Quo by Orly, called 'Celestial Star'. I did a bit of stamping on the thumb (not shown), and middle finger, using an image from Bundle Monster + Magically Polished Collaboration plate BM-XL205. The polish I stamped with was Sally Hansen Color Foil in 'Yellow Gold'.  I also embellished the middle finger by painting a diagonal section in gold over the stamp, and then dotting along the edge with the blue polish.

This was one of those situations when my previous manicure was showing a bit of chipping on a few nails, but I didn't feel like removing my nail polish and starting fresh with a new manicure. Hence the remix mani, where I salvage or touch up any nails that still look fine, and paint over and/or embellish the rest!

I believe that the 'Celestial Star' polish was also untried, so I'm happy that I got to use it. I bought it years ago, along with 2 others from the same collection (the others were called 'Turquoise Moonlight', and 'Night Sky'). From what I can see on line, it looks like they came out around 2011. I noticed the polishes when I was organizing my collection recently. All 3 of them looked like they were thickening and evaporating in the bottles, even though I don't recall ever having used them (I may have years ago, and forgotten perhaps?), and the bottles seemed to be completely closed. I noticed this with a few other glitters, foils, and crackles. It seems that my creme polishes hold up relatively well over the years, but on occasion, some of the special effect polishes will thicken and/or dry out.

In addition to the 3 Quo by Orly polishes I just mentioned, I found 7 others that this appeared to be happening to. I put them aside to do a 'Project Polish' with - a challenge to use them up within a certain time period by putting them into heavy rotation. This may be a little tricky though, since they are all special effect polishes. I'm going to have to get creative to still be able to incorporate nail art while using polishes as my manicure base! I'll try to do a more detailed post later with pictures of the polishes.