Saturday, August 30, 2014

Black Lace Mani

Today's manicure is a nice way to lighten to look of dark nail polish.  By using black lace images instead of a full black nail, you still get the chic, edginess of black nail polish, but with a bit more softness and sophistication. Now normally, I tend to shy away from doing a full set of black nails, but I'm rather pleased with how this manicure turned out:

Black Lace Nail Stamping Manicure (Right), stamped using Messy Mansion MM44. Polishes used: Konad Special Polish in Black, and Sally Hansen's 'Big Smoky Top Coat'
Black Lace Mani - Right

I used Messy Mansion's Plate MM44 for the lace images. They were stamped with Konad Special Polish in Black.  I used Sally Hansen's 'Big Smoky Top Coat' as the base for this manicure. I put one coat of the smoky top coat over my regular base coat, and then stamped the image over it.  I followed up with a coat of my usual clear glossy topcoat, and then added nail art rhinestones to my ring fingers. I finished the manicure with another coat of clear, glossy topcoat over the rhinestones to seal them on the nail. 


Black Lace Nail Stamping Manicure (Left), stamped using Messy Mansion MM44. Polishes used: Konad Special Polish in Black, and Sally Hansen's 'Big Smoky Top Coat'
Black Lace Mani - Left

The photos above are with flash. In normal lighting, the nails look a touch darker, but there still is enough contrast between the stamped image and the negative space that you can see the design. I must say that I'm really impressed with the MM44 plate. This was my first time using it, so just before I did my nails, I experimented with the images. This is the 'laciest' of all the lace plates I own - the images are more delicate and intricate than I've seen on other lace stamps. I really like it! I can't wait to try to incorporate these images into other manicures!
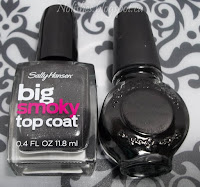
Sally Hansen 'Big Smoky Top Coat', and Konad Special Polish in Black
Polishes Used

Thursday, August 28, 2014

Peach and Copper Glitter Gradient Mani

After all of the bright colours of my last two 'Flamingo Themed Mani's', I was in the mood for a change. I decided that I wanted this manicure to be soft and pretty. This is what I came up with:

Peach and Copper Glitter Gradient Nail Stamping Manicure (Right), stamped with and image from Cici and Sisi Plate 02. Polishes used: Sally Hansen Triple Shine 'Dream Sequins', and Sally Hansen Color Foil 'Rose Copper'
Peach and Copper Glitter Gradient Mani - Right

This was my fist time doing a glitter gradient, and I have to say that I am quite pleased with the results! I definitely want to try this again.

The glitter that I used for the gradient, and the accent nail, was Sally Hansen Triple Shine 'Dream Sequins' (I love that name!).  I also used Sally Hansen Color Foil 'Rose Copper' both as a base colour on my ring fingers, as well as for the stamped design on my middle fingers. The stamping image I used was from Cici & Sisi plate 02. I remember how in one of my earlier posts (for the 'Muted Mani Fail'), I tried to stamp with a 'Color Foil' and I was having a little trouble with it. I'm pleased to say that I had no such troubles with this manicure! The stamp came out perfectly! This just goes to show how temperamental stamping can be - results can change from plate to plate, and from polish to polish.

I used Orly 'First Kiss' as the base colour for all of my fingers except for my ring finger. Here's one last look at the manicure, this time using my left hand.

Peach and Copper Glitter Gradient Nail Stamping Manicure (Left), stamped with and image from Cici and Sisi Plate 02. Polishes used: Sally Hansen Triple Shine 'Dream Sequins', and Sally Hansen Color Foil 'Rose Copper'
Peach and Copper Glitter Gradient Mani - Left

Tuesday, August 26, 2014

From the Vault: Light Pink and Black Mani

Here's another manicure I did a while back.

Light Pink and Black Manicure stamped with an image from Pueen Plate PUEEN23. Pink base colour with black stamped Victorian pattern.
Light Pink and Black Mani

The stamping was done with an image from Pueen plate PUEEN23.  However, I no longer remember which polishes I used. I like how this turned out. The overall look kind of reminds me of a luxurious wallpaper - the print is just so amazing! I've always loved how the images from the Pueen plates are so elegant and beautiful, and this one is no exception!

Sunday, August 24, 2014

Flamingo Themed Mani - 2nd Attempt

Since I wasn't fully satisfied with the execution of my last flamingo manicure, I decided to try again. This time, I had the idea to use the cover of the Moyou London Tropical Collection image plates as the inspiration for the mani. Here's a picture of the cover:

Moyou London Tropical Collection Sleeve
And here's the finished manicure:

Flamingo Themed Nail Stamping Manicure Version 2 - Left Hand. Polishes Used: Essie 'Turquoise and Caicos', Sally Hansen Xtreme Wear 'Mint Sorbet', DRK nails Metallic Brown stamping polish, China Glaze's 'Flip Flop Fantasy', and a dark green nail polish. Plates Used: Moyou London Plates:  Sailor Collection 04, Tropical collection 02 and 06, Time Traveller Collection: Back to the 80's 04; and Winstonia plate W210.
Flamingo Themed Mani Version 2 - Left Hand

Flamingo Themed Nail Stamping Manicure Version 2 - Right Hand. Polishes Used: Essie 'Turquoise and Caicos', Sally Hansen Xtreme Wear 'Mint Sorbet', DRK nails Metallic Brown stamping polish, China Glaze's 'Flip Flop Fantasy', and a dark green nail polish. Plates Used: Moyou London Plates:  Sailor Collection 04, Tropical collection 02 and 06, Time Traveller Collection: Back to the 80's 04; and Winstonia plate W210.
Flamingo Themed Manicure Version 2 - Right Hand

I used a lot of materials for this mani - a total of 5 image plates, and 5 nail polishes (not including base and top coat). For the base colour, I used Essie's 'Turquoise and Caicos'. All fingers except for my middle fingers were stamped with Sally Hansen Xtreme Wear in 'Mint Sorbet', using a wave image from Moyou London's Sailor Collection plate 04. I stamped my middle fingers with the flamingo pattern image from Moyou London's Tropical collection plate 06, using China Glaze's 'Flip Flop Fantasy'.

On my thumbs, I used the flamingo decal image from Winstonia plate W210, as well as one of the palm trees from Moyou London's Time Traveller Collection: Back to the 80's plate 04. On my ring fingers, I used the same flamingo decal from W210, but this time paired it with a tropical leaf image which was a part of one of the full nail images from Moyou London's Tropical collection - 02. I used DRK nails Metallic Brown stamping polish to colour the palm tree trunk, and coconut details on my thumbs and ring fingers.

***Edit: I realized well after publishing this post, that I forgot to include the name of the dark green polish I used for the palm leaves.  Unfortunately, I no longer remember which polish I used.***

Here are some images of the final result paired with the original piece it was inspired from:

Moyou London Tropical Collection Sleeve and the Manicured Thumbs they inspired

Moyou London Tropical Collection Sleeve and Manicured Thumb it inspired

I'm finally satisfied with my flamingo manicure! It took me a couple tries, but I'm glad I persevered.

Saturday, August 23, 2014

Flamingo Themed Mani

OK, so I'm realizing that I need a lot more practice with putting together a 'skittles' mani! I find it so hard to combine a bunch of different things in such a way that the whole look seems as if it belongs together. When I did my last manicure, the 'Pink, White and Silver Mani', I found inspiration for my next manicure idea from my bottle of China Glaze's Flip Flop Fantasy (new formula).  I fell in love with this colour, and it sort of reminded me of a flamingo. With that in mind, I decided to use it to create this flamingo themed manicure:

Flamingo Themed Nail Stamping Manicure stamped with images from Moyou London's Tropical Collection Plate 06. Polishes used: Sally Hansen 'Cur-tan Call', China Glaze 'Flip Flop Fantasy', and Konad Special Polish in White.
Flamingo Themed Mani

This manicure was a little frustrating for me. I use trial and error when I design. However, if I've tried too many times but I only end up with something halfway decent looking, I'll settle for that, and then try again another day. I'm not one for starting over too many times - I just feel like I'm wasting time, and nail polish if I scrap an OK design in my quest to make an amazing one (that's one of the great things about nail art - since it's temporary, you usually have a lot of opportunities to make it perfect!). So that's how I feel about this manicure. It is OK, but it's just not what I had envisioned. Incidentally, I did get a few compliments on it, which was nice!

I used Sally Hansen Complete Salon Manicure 'Cur-tan Call' for the base coat on my thumb, middle finger, and ring finger, and stamped them with 'Flip Flop Fantasy'.  I used 2 coats of 'Flip Flop Fantasy' as the base on my index and pinky fingers, and stamped them with Konad Special Polish in white. The images I stamped were all from Moyou London's Tropical Collection plate 06.

I'm not done with the flamingo theme yet, and I've got some new flamingo-y ideas that I can't wait to try for my next manicure!

Sunday, August 17, 2014

Pink, White and Silver Mani

This manicure is the end result of one of those times when I knew I had to do my nails, but I had no idea what I wanted to do with them! I ended up taking a look at some of my untried polishes for inspiration. I eventually decided I wanted to use one of my pink untrieds, as well as an OPI 'liquid sand' polish that I had just purchased. So here's what I came up with:

Pink, White, and Silver Nail Stamping Manicure, stamped with Pueen Plate PUEEN04, and Moyou London Explorer Collection 22. Polishes Used: China Glaze 'White on White' and 'Flip Flop Fantasy'; OPI 'It's Frosty Outside'; and Sally Hansen 'Silver Sweep'.
Pink, White and Silver Mani

I used China glaze 'White on White' for the base polish on all fingers except for my ring finger. I also used OPI's Liquid Sand 'It's Frosty Outside' on my ring finger. I used China Glaze's 'Flip Flop Fantasy' (new formula) and Sally Hansen Insta-Dri in 'Silver Sweep' to do the stamping and dotting over the white nails.  The stamping plates I used were PUEEN04, and Moyou London's Explorer Collection 22.  I also used one nail art rhinestone for my thumb.

This was my first experience with an OPI Liquid Sand polish. Personally, I'm not a big fan of textured nail polishes, so initially, I had decided to pass on these polishes. But then I saw a picture of a manicure someone did using 'It's Frosty Outside' and thought it looked so sparkly and opulent! That swayed me into buying one to try it out.

Now that I've tried it, I think that in real life, this polish seems a little more dull on the hand than it does in pictures. In pictures, it looks like a layer of crushed sparkly diamonds, but in real life it seems kind of like light gray sandpaper with pieces of silver glitter throughout. From the name, I guess that is what they were going for, and it is actually an interesting look, but it's just not as shiny and blingy as I hoped. I'm tempted to try a layer of topcoat, even though the tag on the bottle says not to.

As for the other (previously) untried polish, Flip Flop Fantasy, I'm very pleased with how bright and fun the color is. In fact, it has inspired a great idea for my next manicure, ensuring that for my next mani I won't be in the same predicament I found myself in when I started this one! Stay tuned...

Wednesday, August 13, 2014

'Clueless' Inspired Manicure

Recently, the 90's cult classic movie 'Clueless' has been brought back to the public consciousness. The music video for one of summer 2014's hit songs, 'Fancy' by Iggy Azalea featuring Charli XCX, paid homage to the movie by recreating some of it's most memorable scenes. Fashion played a major role in the movie, and one of the movie's most unforgettable pieces of wardrobe was prominently featured in the music video - lead character Cher's iconic yellow plaid skirt suit. I remember being amazed at how awesome that outfit was, the first time I saw the film! Seeing it again in the music video brought back so many memories. All hopped up on nostalgia, I was inspired to create this manicure based on that outfit.

'Clueless' Inspired Nail Stamping Manicure - Left. Polishes used: Sinful Colors 'Chick Chick', Konad Special Polishes in white, and black, and Claire's Cosmetics 'Splatter Paint'. Stamped with Moyou London Hipster Collection plate 05.
'Clueless' Inspired Manicure - Left
  
'Clueless' Inspired Nail Stamping Manicure - Right. Polishes used: Sinful Colors 'Chick Chick', Konad Special Polishes in white, and black, and Claire's Cosmetics 'Splatter Paint'. Stamped with Moyou London Hipster Collection plate 05.
'Clueless' Inspired Manicure - Right

 I really liked the way this turned out. It's a bright and fun twist on a traditional plaid.  I used Sinful Colors 'Chick Chick' as the base colour for the manicure.  I used three different plaid images from Moyou London's Hipster Collection Plate 05. I double stamped all of my nails, except for my ring fingers, with Konad Special polish in both white and black. On my ring finger, I applied a splatter effect top coat. The one I used was from Claire's Cosmetics, called 'Splatter Paint'.   I topped everything off with a high gloss topcoat.  I was tempted to go matte with this one, to make it more reminiscent of fabric. I was also thinking about trying to incorporate the jacket's silver buttons into the manicure as well, however I decided against both ideas in order to keep things simple.

This look was pretty quick and easy to do. Also, it would work with pretty much any base colour. I think I will definitely be trying this out with different colour combinations sometime in the future!

Sunday, August 10, 2014

From the Vault: 'Breakfast at Tiffany's' Inspired Mani

Here's another manicure that I did a few months back. In fact, I happen to remember that I did this manicure on May 4, 2014. The Google Doodle that day was a tribute to Audrey Hepburn, for what would be her 85th birthday. I was inspired to do this 'Breakfast at Tiffany's' themed mani to mark the occasion:

'Breakfast at Tiffany's' Inspired Nail Stamping Manicure - Right. Polishes Used: China Glaze 'For Audrey', Wet'n'Wild 'Break the Ice', Rimmel 'Black Satin', NYC 'French Tip White', Silver Glitter. Plates Used: Konad M79, and Bundle Monster BM-317.
'Breakfast at Tiffany's' Inspired Mani - Right

Naturally, I used China Glaze's 'For Audrey' as the base of the manicure. On my thumbs I did a colour-blocking effect by painting half the nail with Wet'n'Wild Megalast 'Break the Ice'.  I stamped my ring fingers with Rimmel's 'Black Satin' using an image from Moyou London's Rebel Plate 02. The white stamps on my middle and pinky fingers were done using images from Konad plate M79 and BM-317 (respectively) stamped with NYC's 'French Tip White'.  I used a silver glitter as a topcoat on my index fingers, however, I no longer remember which one I used. I also used some silver nail art tape, and some rhinestones to finish the look.

'Breakfast at Tiffany's' Inspired Nail Stamping Manicure - Left. Polishes Used: China Glaze 'For Audrey', Wet'n'Wild 'Break the Ice', Rimmel 'Black Satin', NYC 'French Tip White', Silver Glitter. Plates Used: Konad M79, and Bundle Monster BM-317.
'Breakfast at Tiffany's' Inspired Mani - Left

Overall, I like the manicure. This was my first time trying the colour-blocking effect separated by nail art tape, so it was fun to try out a new technique.  I remember that it took a long time to do since I had to wait for each colour to completely dry in order to be able to tape it off to do the other colour on the other side. I'm really impatient when it comes to waiting for my nails to dry in the middle of a nail art project (I just want to get it over with - while I'm still in the zone!) so it's no wonder that I haven't yet repeated this technique!

Greek Key Mani

Today's manicure was inspired by a street festival that I recently attended, that celebrates Greek food and culture.

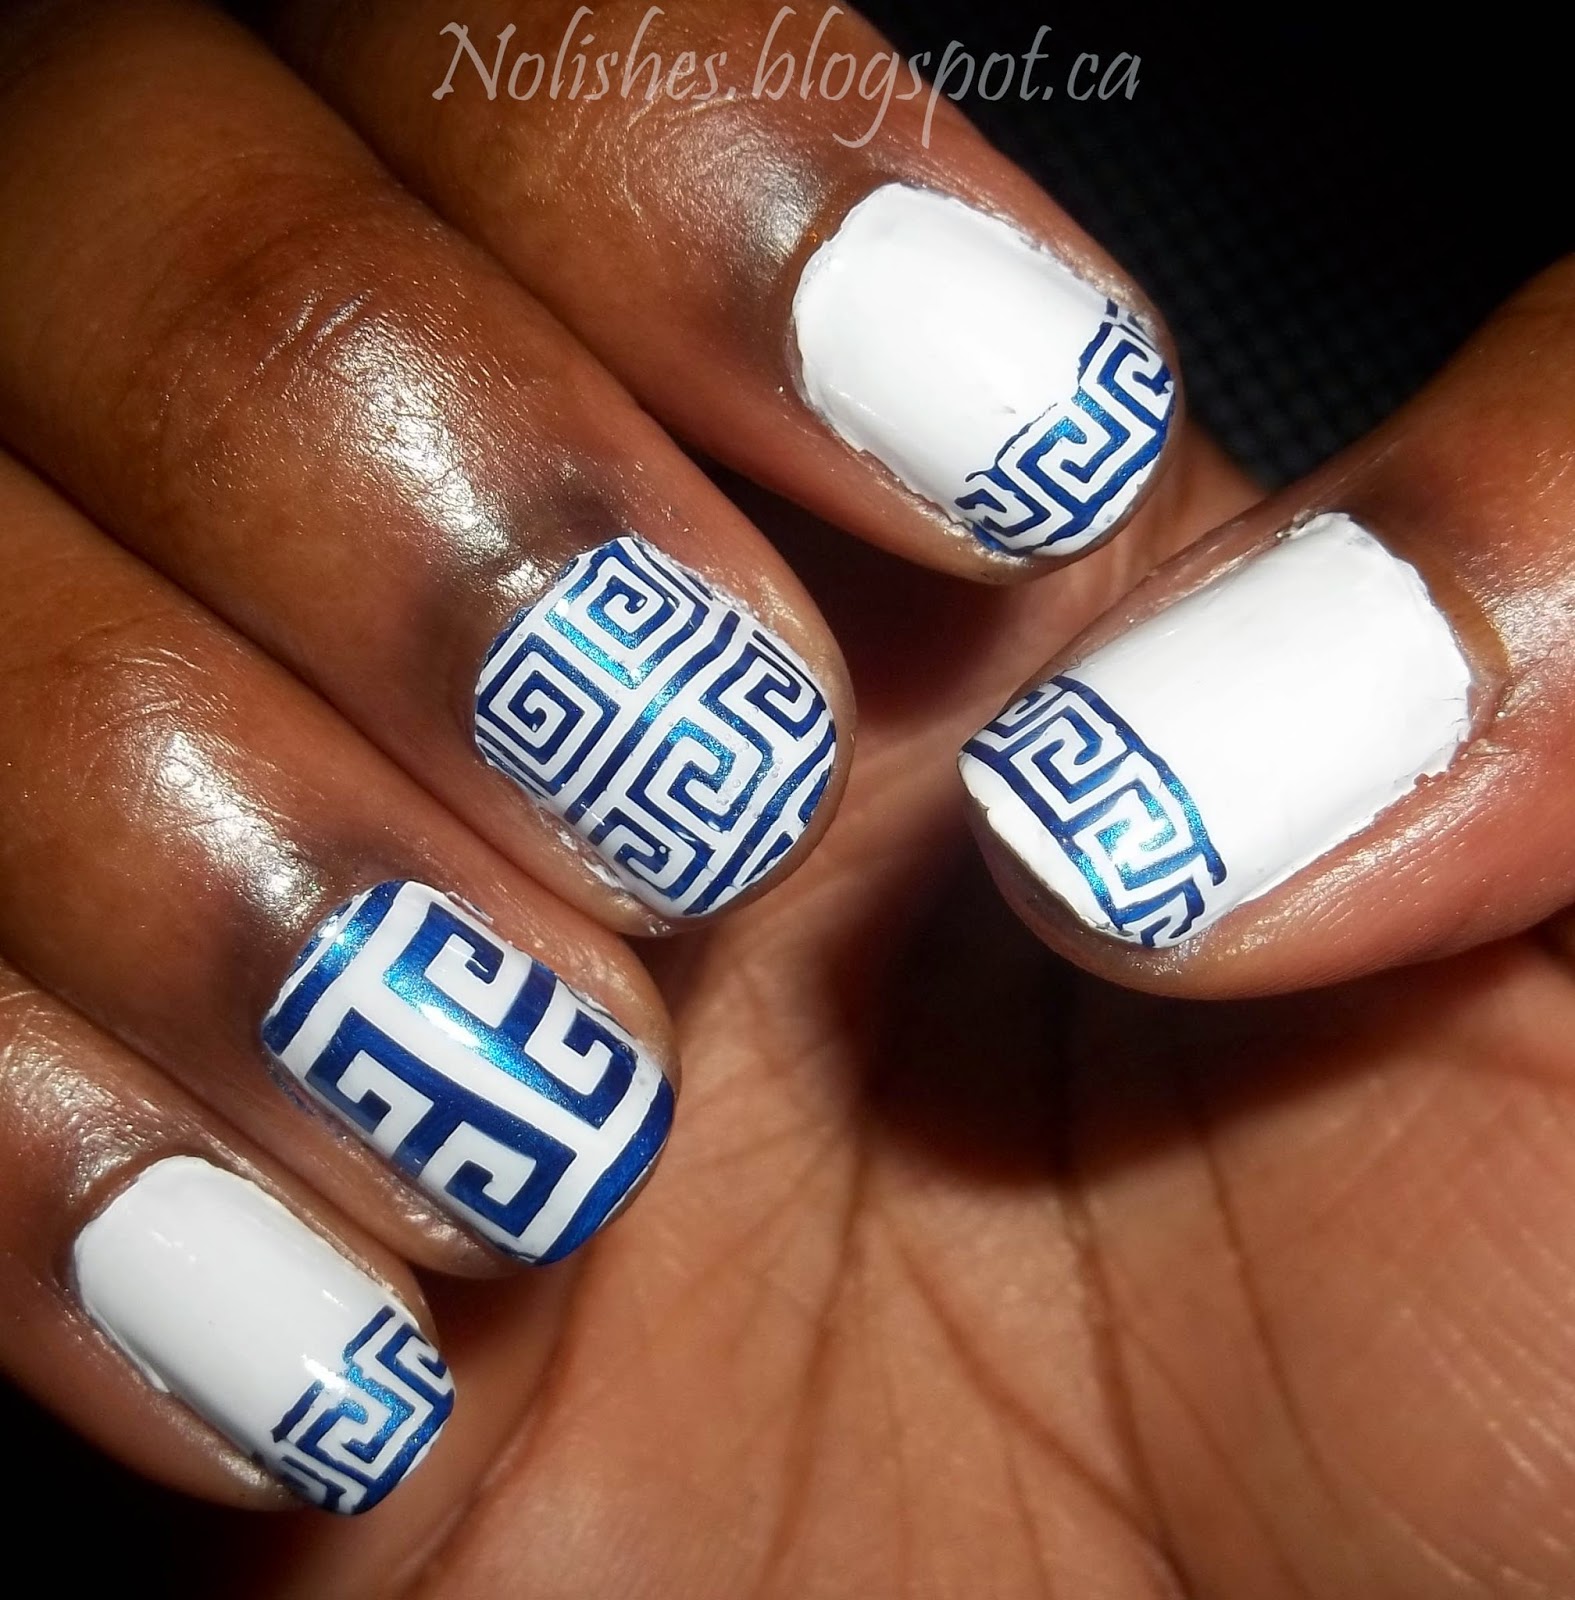
Greek Key Nail Stamping Manicure stamped with Moyou London plates Explorer Collection 18, and Greek Mythology Collection 06. Polishes used: NYC 'French Tip White', and China Glaze 'Scandalous Shenanigans'
Greek Key Mani

I used NYC's 'French Tip White' for the base, and China Glaze's 'Scandalous Shenanigans' for the design. My middle finger is stamped with an image from Moyou London's Explorer Collection - 18 plate, and the images on my other fingers are from Moyou London's Greek Mythology Collection - 06. I really like how this manicure turned out. It took me a couple tries to get it right (this mani required me to be a bit more careful with stamp placement than I'm used to!), but it was worth the effort.

Wednesday, August 6, 2014

Mondrian Inspired Mani

Today, I have a manicure inspired by the style of Dutch Painter Piet Mondrian:

Mondrian Inspired Nail Stamping Mani - Right, using Moyou London Artist Collection plate 01. Polishes Used: NYC 'French Tip White', Konad Black Special Polish, Essie 'Jelly Apple', Nfu Oh Jelly Syrup Series NFU JS19, and OPI Sheer Tints 'I Can Teal You Like Me'.
Mondrian Inspired Mani - Right

Mondrian Inspired Nail Stamping Mani - Left, using Moyou London Artist Collection plate 01. Polishes Used: NYC 'French Tip White', Konad Black Special Polish, Essie 'Jelly Apple', Nfu Oh Jelly Syrup Series NFU JS19, and OPI Sheer Tints 'I Can Teal You Like Me'.
Mondrian Inspired Mani - Left

To achieve this look, I started with a white base of NYC 'French Tip White'. Then, I used Konad Black Special Polish to stamp the grid pattern from Moyou London Artist Collection plate 01.
The nail polishes I used to fill in the blocks of colour were Essie 'Jelly Apple', Nfu Oh NFU JS19 (bright yellow), and OPI Sheer Tints 'I Can Teal You Like Me'.  

I was a little disappointed with the blue not being intense enough for the look I was going for, so I may have to try this again after I find the perfect 'true blue' jelly!

Monday, August 4, 2014

Pueen Encore SE03B Test Mani

Today I have a test mani to share.  I was playing around with my new Pueen Encore set, and decided to test out plate SE03B.

Pueen Encore SE03B Nail Stamping Test Manicure - Left Hand. Polishes used: Sally Hansen 'Silver Sweep', and Rimmel 'Black Satin'
Pueen Encore SE03B Test Mani - Left Hand

Pueen Encore SE03B Nail Stamping Test Manicure - Right Hand. Polishes used: Sally Hansen 'Silver Sweep', and Rimmel 'Black Satin'
Pueen Encore SE03B Test Mani - Right Hand

The base colour is Sally Hansen's Silver Sweep, and the stamping polish is Rimmel's Black Satin.

I really like this plate, and I'm excited to use the rest of the set too. As always, Pueen has delivered an elegantly designed set of plates, full of beautiful images!  I can see myself using these plates as a quick and easy way to spice up a basic manicure - something to use when you want to take a non-stamped mani to the next level, without all the effort of lining things up, doing decals, using multiple colours, etc. 

Of course, there are elements of these plates that can lend themselves to being used for more advanced stamping techniques, however I find the patterns so beautiful in their own right, that you can have an equally impressive manicure by letting the images speak for themselves. 

Saturday, August 2, 2014

Repurposed Mani

Today I have yet another incarnation of the 'Colourful Cartoon Mani'. I was growing tired of Version 2.0, and some of the accent nails started chipping, so I changed the worn polish with a neon yellow polish, and then stamped over everything using images from Moyou London's Hipster Collection 06.

Repurposed Nail Stamping Manicure using Moyou London Hipster Collection 06. Polishes used: OPI '4 in the Morning', Sally Hansen 'Silver Sweep', Konad Special Polish in Black, and China Glaze 'Yellow Polka Dot Bikini'
Repurposed Mani


I used Sally Hansen 'Silver Sweep' to stamp over OPI's '4 in the Morning'. The base colour of the accent nail is China Glaze's 'Yellow Polka Dot Bikini'.  I stamped over it with Konad's black special polish. I know, the stamping is a little crooked, but I only planned to wear the manicure for a single day, so I decided to go along with the slight imperfection. And besides, it took about 5 coats of the neon yellow to get opacity - I was not about to do that all over again! 

This was my first time using the Konad special polish. I've found that most of the other black polishes I own are quite effective for stamping, so I never really felt the need to buy the special polishes. However, recently I decided to try them out. I really do see a difference with the special polish. The black is darker, richer and deeper. I still plan to use my regular black polishes quite a bit for stamping (because they are much cheaper), but I think I will save my special polish for images with bolder lines, and larger prints, where I think the deeper black will make more of an impact.