Showing posts with label MoYou London. Show all posts

Wednesday, August 14, 2019

Leadlighting Manicure featuring Essie's Silk Watercolor Collection

Manicure featuring Essie's Silk Watercolor Collection: Essie ‘Highest Bidder’, Essie ‘Point of Blue’, Essie ‘Love Sheen’, Essie ‘No Shrinking Violet’, Essie ‘Blush Stroke’, Essie ‘White Page’, Essie ‘Art New-Beau’, Maniology ‘Straight Up Black’, Essie ‘Muse, Myself’, Essie ‘Pen & Inky’, and stamping plate Moyou London Trend Hunter - 01

Polishes Used
Polishes Used
Essie ‘Highest Bidder’
Essie ‘Point of Blue’
Essie ‘Love Sheen’
Essie ‘No Shrinking Violet’
Essie ‘Blush Stroke’
Essie ‘White Page’
Essie ‘Art New-Beau’
Maniology ‘Straight Up Black’
Essie ‘Muse, Myself’
Stamping Plate Used
Essie ‘Pen & Inky’
Moyou London Trend Hunter - 01

Manicure featuring Essie's Silk Watercolor Collection: Essie ‘Highest Bidder’, Essie ‘Point of Blue’, Essie ‘Love Sheen’, Essie ‘No Shrinking Violet’, Essie ‘Blush Stroke’, Essie ‘White Page’, Essie ‘Art New-Beau’, Maniology ‘Straight Up Black’, Essie ‘Muse, Myself’, Essie ‘Pen & Inky’, and stamping plate Moyou London Trend Hunter - 01

After reviewing my purchase of Essie's 'Glazed Days' collection which was released earlier this year, I decided to go back and do a manicure using Essie's 'Silk Watercolor' collection that I purchased back when it was released in 2015. 

Essie's Silk Watercolor Collection: Essie ‘Highest Bidder’, Essie ‘Point of Blue’, Essie ‘Love Sheen’, Essie ‘No Shrinking Violet’, Essie ‘Blush Stroke’, Essie ‘White Page’, Essie ‘Art New-Beau’, Essie ‘Muse, Myself’, and Essie ‘Pen & Inky’
Essie 'Silk Watercolor' Collection
I never did a complete review of the 'Silk Watercolor' collection when I purchased it. However, I did feature one of the shades in a blog post. It was the pink shade, 'Blush Stroke', which I used for a 'Pond' manicure. Here's a link to that post. 

For today's manicure, I decided to use all of the shades from the collection to create a cute, colourful look. I started with 'White Page' as my white base colour, and then stamped two different floral images on my thumbs, and ring fingers. The images were from Moyou London stamping plate 'Trend Hunter - 01', and the black stamping polish I used was Maniology's 'Straight Up Black'. I also stamped the cross pattern on my middle fingers from a portion of one of the images on the same plate using the same polish. 

Next, I coloured in the flower portions of the images with each of the colours from the 'Silk Watercolor' collection using the 'leadlight technique', which involves using a dotting tool (or any other tool or brush that can transfer polish) to place the transparent jelly polishes over different parts of the image. After this, I embellished the image on my middle finger with some black dots, and then added multi coloured dots on the bottom portion of my index, and pinky fingers. The multi-coloured dots were also made with the 'Silk Watercolor' collection. I completed the look by using a quick dry, glossy top coat in order to smoothe everything out, and add shine.

Below, is a collage with a few additional shots of the manicure:

Manicure featuring Essie's Silk Watercolor Collection: Essie ‘Highest Bidder’, Essie ‘Point of Blue’, Essie ‘Love Sheen’, Essie ‘No Shrinking Violet’, Essie ‘Blush Stroke’, Essie ‘White Page’, Essie ‘Art New-Beau’, Maniology ‘Straight Up Black’, Essie ‘Muse, Myself’, Essie ‘Pen & Inky’, and stamping plate Moyou London Trend Hunter - 01

Here are some of my thoughts about the 'Silk Watercolor' collection. I'm quite pleased with the colour saturation from the jelly polishes in the collection. The jellies look great over the white polish even with only one coat, which is really important for leadlighting. The white polish is pretty much your standard white polish. It performs well, but if you already have a white polish that you like, I don't see a specific need to get this one.

I also really like the colour range. There are more warm shades in the collection than cool shades, and I find that a lot of the colours are sort of 'in-between' shades, as opposed to 'true' shades ie 'pinky-red' as opposed to 'true' red. This works well for me, as I already have jelly polishes that are more classic shades, so these polishes are a great addition to my collection.

The 'Silk Watercolor' formula is really good as well. The jelly polishes are on the slightly thinner side, and have enough pigment to perform well for leadlighting, as well as on their own, as seen in my 'pond' manicure. Of course, I haven't used all of the jellies on their own yet, so I'm estimating the performance based on 'Blush Stroke', the one I've used (sort of) on it's own, as well as my experience with using all of the polishes in this manicure. 

All in all, really like these polishes. I really enjoyed creating this look, and I love how it turned out. I even got a couple compliments on this manicure! 

Sunday, October 28, 2018

Sparkly Halloween Jack-o-Lantern Mani

Today I have a Halloween Manicure to Share:

Manicure using a coppery-orange metallic foil polish, and an orange glitter, stamped with images of jack-o-lanterns in black. There are also some white and black nail gems accenting some nails.


I really wanted to do a Jack-o-Lantern manicure, and at first, I thought I would use a typical creme orange polish, and an orange glitter.  However, as I was looking through my collection for the orange glitter, I came across a glittery metallic coppery-orange polish that I thought would look amazing with the orange metallic glitter polish. I decided to use the two polishes for more of a Glam-o-Lantern look!

Here are the polishes I used:

Bottle shots of OPI 'A Woman's Prague-ative', Bundle Monster Stamping Polish 'Straight Up Black', and OPI 'Orange You Fantastic!'
Polishes Used

Polishes Used
OPI 'A Woman's Prague-ative'
Bundle Monster 'Straight Up Black'
OPI 'Orange You Fantastic!'

The orange metallic foil polish, 'A Woman's Prague-ative' is from OPI's Euro Centrale Collection from Spring 2013. The orange glitter polish 'Orange You Fantastic' was from OPI's Summer 2014 Coca-Cola Collection. I really can't get over how nice they look paired together!

For this manicure, my thumb, middle and ring finger on both hands are painted with a layer of 'A Woman's Prague-ative', and then with 2 layers of the glitter polish. When looking at it in real life, the glittery combination would sparkle through the full nail jack-o-lantern images stamped in black over the middle and ring finger nails. Unfortunately, that doesn't quite translate in the picture, so I just thought I'd mention it.

Below, are rotated images of my thumbnails which provide a better view of the cute Jack-o-Lantern Faces I stamped from Moyou London's 'Festive Collection' - plate 29.

Glittery 'thumb-o-lanterns' created with coppery orange polish, and orange glitter base, each stamped with a cute jack-o-lantern face image.
My 'Thumb-o-Lanterns'

The stamped image on my middle fingers was from Bunny Nails plate HD-C, and the stamped image on my ring fingers was from ÜberChic Beauty plate Halloween-03.

Stamping Plates Used
Moyou London Festive Collection - 29
ÜberChic Beauty 'Halloween-03'
Bunny Nails Plate HD-C

All in all, I absolutely love the way this manicure turned out. I normally try not to repeat manicures, but I could definitely see myself using this polish combination again to do another 'Glam-o-Lantern' manicure in the future!

Sunday, October 14, 2018

Red, White, Blue and Gold Plaid Manicure

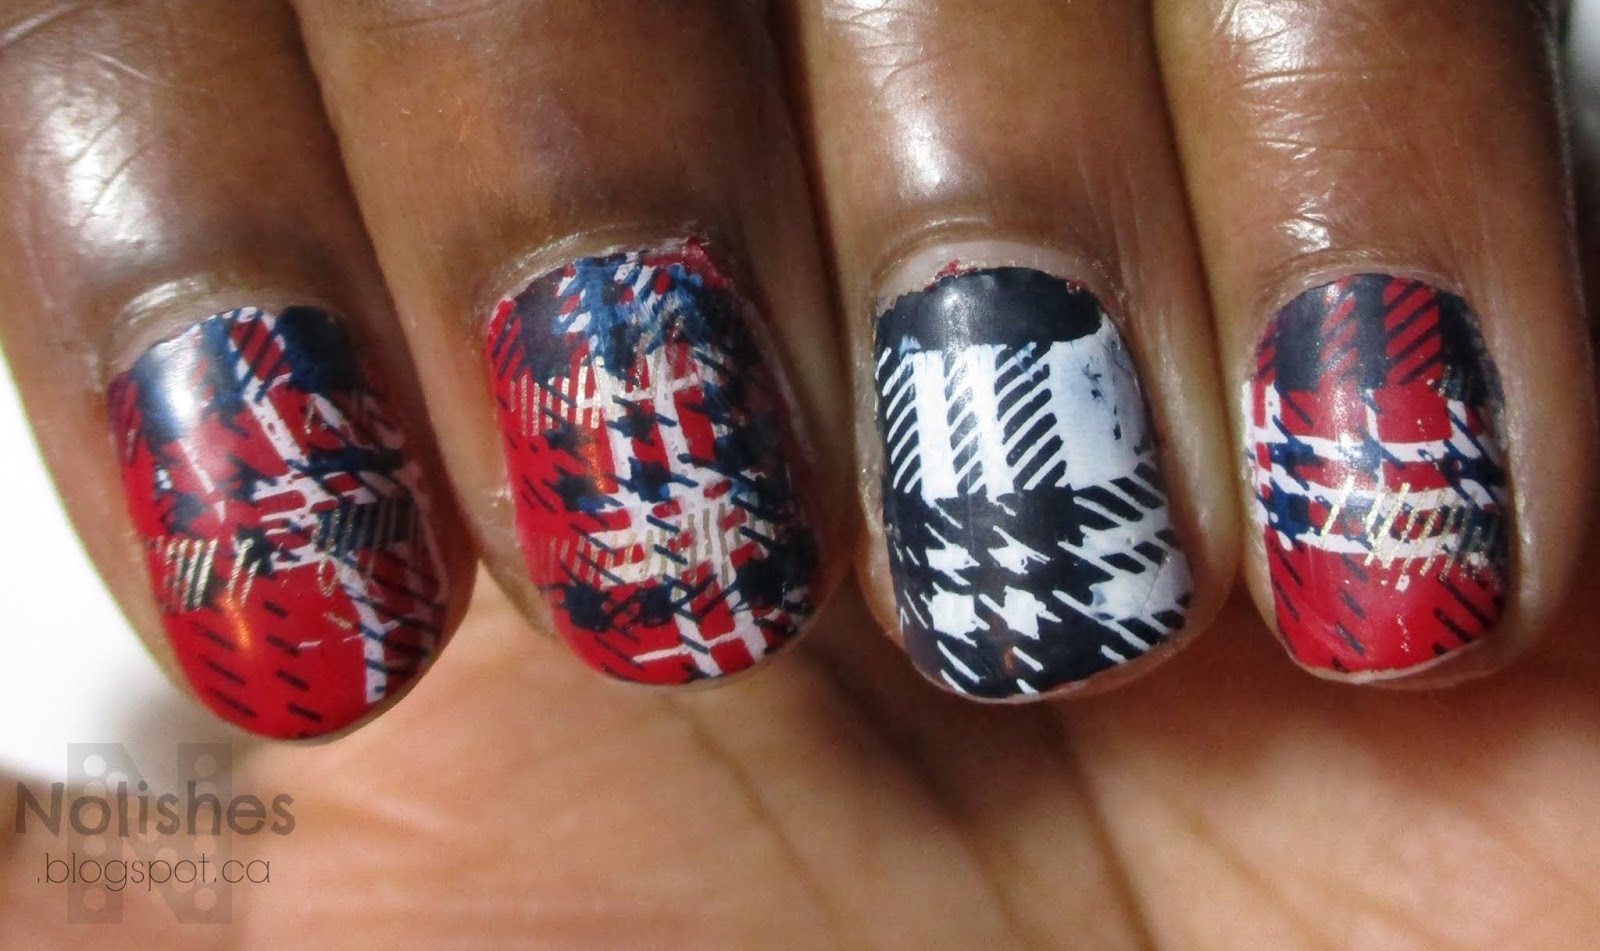
This manicure was my attempt at recreating more of a traditional plaid using Red, White, Navy Blue, and Gold polishes:


In the past, I've done pink plaid in my 'Pink and White Pink Ribbon Mani', and yellow plaid in my 'Clueless Inspired Manicure'. I really liked those manicures, but since I have never done a plaid manicure using more traditional colours, I decided to give that a try.

For this manicure, I used the following polishes:

OPI 'Incognito in Sausalito', Sally Hansen Color Foil 'Liquid Gold', OPI 'Dutch Tulips', and Konad Special Nail Polish - White
Polishes Used

Polishes Used
Stamping Plates Used
OPI 'Incognito in Sausalito'
Moyou London Hipster Collection - 05
Sally Hansen Color Foil 'Liquid Gold'
Moyou London Hipster Collection - 06
OPI 'Dutch Tulips'
Clear Jelly Stamper Stamping Plate:
Konad Special Nail Polish - White
             'Got Plaid?' Plate CjS-56

The stamping on my index finger came out a little wonky, but overall, I really like the way the manicure turned out! In addition to the polishes mentioned, I also topped the look off with a matte topcoat (Essie's 'Matte about You') in order to make the finished result appear a bit more fabric like.

Sunday, September 16, 2018

Venetian Marble Mani

Today's manicure is a really fun look I did using a stamped marble image, and three polishes from OPI's Venice Collection from fall/winter 2015. I'm calling it my Venetian Marble Mani.

White, black, and gold manicure with nail stamped images simulating striations in marble. Gold, ring finger accent nail with a light blue accent gem.
Venetian Marble Manicure
Polishes Used
OPI 'My Gondola or Yours?'
OPI 'Baroque... But Still Shopping!'
OPI 'I Cannoli Wear OPI'

For this manicure, I started with a white base of OPI's 'I Cannoli Wear OPI' on all of my nails except for my ring finger. I then used Moyou London nail stamping plate 'Let's Nail Moscow X MYL 01' to stamp the marble striations in black using OPI's 'My Gondola or Yours?'. For my ring finger accent nail, I used OPI's 'Baroque... But Still Shopping!', and finished it off by centering a small light blue gem at the base of the nail.

OPI  Polishes: 'My Gondola or Yours?', 'Baroque... But Still Shopping!', and 'I Cannoli Wear OPI'
Polishes Used

I really like how this one turned out, however if I had to do it again, I would like to try double stamping another marble image with some gold polish on the white and black nails, to simulate gold veining in the marble. I would also like to play around with either top-coating the stamped nails with a white crelly polish to slightly cover the stamped image, or mixing grey and black polish on the plate to get a more mottled uneven effect with the darker lines. I think these changes would add a bit more dimension to the look.

All in all, I'm quite pleased with the look - and I even got a couple of compliments too! 

Saturday, September 15, 2018

Pink, Grey, and Silver Manicure

For today's post, I have an impromptu mani from a few weeks ago.  I wasn't able to get a really great photograph of the manicure itself, but I really like the colour combination I used, so I wanted to share that aspect of the mani. Here's a shot of the polishes:

picture of Revlon 'Flirt', KB Shimmer 'Elle', and Sally Hansen Xtreme Wear 'Silver Sweep'
Polishes Used
Polishes Used
Revlon 'Flirt'
KB Shimmer 'Elle'
Sally Hansen Insta-Dri 'Silver Sweep'

Basically, the manicure was Revlon 'Flirt' on my pinky, middle, and pointer fingers, with KB Shimmer 'Elle' on my thumb and ring finger. On my middle finger, I did a simple stamped motif from one of the images on Moyou London nail stamping plate 'Minimal' - 03. The image was stamped using Sally Hansen Insta-Dri 'Silver Sweep'. I cropped a small portion of one of the better shots I was able to get of the mani, and posted it below.


In the photo, you can just barely see the silver stamped image on the pink base covering my middle finger. You can also see my ring finger, painted with KB shimmer's 'Elle'. 'Flirt' is a very blue-based shade of pink, and it looks so lovely with 'Elle', a grey crelly polish with lots of pink and silver glitters. The small silver stamped accent helped bring the look together even more by complementing the silver glitters in 'Elle'.

Monday, May 4, 2015

'May the Fourth Be With You' Mani

In honour of May the 4th, I decided to rework my previous mani into a space themed galaxy manicure:

Space themed manicure featuring  black nails with gold and holographic glitter, stamped with orbiting planets in silver on the thumb, and a grey and silver rocket ship with red and orange flames trailing it is stamped on the ring finger.
May the Fourth be with Your Manicure!
There is so much wear and tear on this manicure, that it's not even funny! The base for this manicure was only supposed to be an impromptu weekend manicure, that was hastily applied on top of the manicure I wore for most of last week - it's unbelievable how many layers of polish are on my nails right now! The plan was originally to do a new manicure on Sunday night, so that everything would be fresh for Monday morning, but then I came up with the idea to re-purpose the mani, since I already had the galaxy framework that I could build upon to create a May the Fourth Mani.

My previous mani featured a black base of Wet n Wild 'Black Crème', and a black, gold, and holographic glitter, Sally Hansen Complete Salon Manicure 'Midnight Glitz'. That combination already looked very 'spacey' so I just emphasized that by adding a cute spaceship from one of my Moyou London 'Sci Fi' plates, and some planets in orbit from my Messy Mansion 'Space Themed' plate. I made the rocket ship decal using advanced stamping technique.

Here are the details of the polishes and plates that I used to create this look:

Polishes Used:
Plates Used:
Wet n Wild Wild Shine ‘Black Crème’

OPI ‘Romantically Involved’
Messy Mansion ‘Space Themed’ MM33
Essie ‘No Place Like Chrome’

Sally Hansen C.S.M. ‘Midnight Glitz’
Moyou London Sci-Fi Collection - 03
OPI ‘Atomic Orange’

OPI ‘Embrace the Gray’


Wet n Wild Wild Shine ‘Black Crème’, OPI ‘Romantically Involved’, Essie ‘No Place Like Chrome’, Sally Hansen Complete Salon Manicure ‘Midnight Glitz’, OPI ‘Atomic Orange’, and OPI ‘Embrace the Gray’
Polishes Used
All in all, I think it is a super cute manicure (minus the tip wear, and bulky, multi-layered polish application!). I really like how the space-ship decal turned out, and how cool it looks floating on the background of the black and holo-glitter 'space'.

Cinco de Mayo Manicure

Here's a manicure I did for Cinco de Mayo, 2014:

Cinco de Mayo Nail Stamping Manicure in Black, Gold, Red, White and Green. Stamped using Cheeky's Jumbo Plate 1 'Viva Mexico', and Moyou London's Pro XL Collection plate 06.
Cinco de Mayo Manicure
Unfortunately, I no longer remember exactly which polishes I used to create this look. I used black nail polish for the base colour on all of my fingers except for my ring fingers. I then stamped these fingers with gold nail polish using images from Cheeky's Jumbo Plate 1, 'Viva Mexico'. On my ring fingers, I used the same gold nail polish as the base colour.  I then stamped the ring fingers with the Aztec print image from Moyou London's Pro XL Collection plate 06. I created a red, white, and green gradient by filling the engraving with a drop of each colour before swiping and picking up the image.

I really like this manicure, but I especially love how the accent nails turned out.  You can barely recognize the Aztec print, instead, it looks like a distressed surface with bits of gold peaking through. So awesome! I definitely want to try this technique again!

Saturday, May 2, 2015

Black, Gold, and Holo Glitter Mani

Today I have a quick and easy weekend mani to share:

Glitter Manicure featuring black polish, covered with a gold and holographic glitter mix, and a nail stamped quatrefoil lattice pattern stamped in gold on the ring finger.
Black, Gold, and Holo Glitter Mani

Polishes Used:
Plate Used:
Wet n Wild Wild Shine ‘Black Crème’

Sally Hansen Complete Salon Manicure
                    ‘Midnight Glitz’
Moyou London Time Traveller Collection:
                   Back to the 60’s – Plate 04
Essie ‘Good as Gold’


Wet n Wild Wild Shine ‘Black Crème’, Sally Hansen Complete Salon Manicure ‘Midnight Glitz’, and Essie ‘Good as Gold’
Polishes Used
I got bored of my previous manicure, and decided to do a quick polish change for the weekend. I decided to do a simple glitter mani, but just as I finished, I had the idea to add a little stamping on my ring finger as an accent. I decided to use this quatrefoil stamping image that I originally intended to use a couple manicures ago, but didn't after changing my mind at the last minute.

I like this manicure - it's simple, and edgy. It's been a while since I wore a holographic glitter, so it was a lot of fun watching it sparkle, and reflect beautiful flashes of colour! I think that the next time I try this glitter, I would like to put it over a gold, sheer black, or dark blue base. There are black glitter particles in 'Midnight Glitz', so even though the holographic particles look really good on a black background, the black glitters get completely lost, so a black base probably isn't the best choice. I'll have to do a little more experimenting with this.

The base polish I used for this manicure was Wet n Wild 'Black Crème'. I did a review on the newly revamped Wet n Wild Wild Shine Polishes recently, and at the time, I didn't own this polish. After reviewing and liking the previous polishes I picked up, I went out and bought the black and white polishes to add to the set. So far I'm really liking 'Black Crème' too. I only used one thick coat of it for this mani, and I ended up with full coverage - and I was still wearing yesterday's manicure underneath, so that's saying a lot!

Tuesday, April 28, 2015

Grey, Dark Teal, and Blue 60's Print Mani

Today I have a very simple stamping manicure to share with you.


To add a little something extra into the basic design, I decided to add a third color by doing a bit of dotting on the middle finger, and I used the advanced stamping technique to incorporate the third colour into the stamp on my ring finger.

In retrospect, I wish I had used the stamp on my middle finger on all of my nails for a fun, uniform print. I really love how that print looks with these 3 colours! Here is the information on the colours I used:

Polishes Used:
Plate Used:
Sally Hansen Insta-Dri ‘Navy Fleet’
Moyou London Time Traveller Collection:
Sally Hansen Insta-Dri ‘Brisk Blue’
                 Back to the 60’s - 04
Nubar ‘Marble Tower’


Overall, I really like this manicure. It's very similar to another one I did recently, and absolutely adored. I was also pleasantly surprised with how much I really like these 60's inspired patterns from the Moyou London 'Back to the 60's' plate 4. It was one of those situations where I mainly bought the plate for one pattern that I decided I simply had to have - a classic quatrefoil pattern - and was just sort of impartial to the other patterns on the plate. Initially when I was designing this manicure, I reached for the plate to use the quatrefoil pattern, but then the 2 patterns that I ended up using caught my eye, so I switched gears and used them instead!

Thursday, April 23, 2015

Happy Belated Earth Day!

Yesterday, I didn't get a chance to put up an earth day manicure, because I really wanted to try out my new peel-off base coat. So today, I have a belated Earth Day mani to share with you!

Earth Day inspired manicure made using a light blue base polish, stamped with black map imagery on the pinky, middle and index fingers. The thumb and ring finger are stamped with green continent images.
Earth Day Mani

Polishes Used
Plate Used
Wet n Wild Wildshine ‘Putting on Airs’
Moyou London Scholar Collection - 07
Konad Special Polish in Black

Sally Hansen Insta-Dri 'I-rush Luck'


Wet n Wild Wildshine 'Putting on Airs', Sally Hansen Insta-Dri 'I-rush Luck', and Konad Special Polish in Black
Polishes Used

I really like how this manicure turned out! The colours are perfect, and I love the images from the Moyou Scholar plate. I honestly couldn't stop staring at my nails all day! I love how the map imagery on the pinky, middle and index fingers look exactly like a page out of an atlas, while the thumb and ring fingers look exactly like little globes. I love when a manicure is both quick and easy to do, but the end result is so cute, and memorable!

This is also my first time using one of the new reformulated and redesigned Wet n Wild Wildshine polishes. I really like the look of the new bottles - such a great improvement! I was also pretty happy with the formula of this polish. It was just a touch on the thick side, but not to the point where it caused any problems. In fact, I'm hoping that the thickness would make these polishes good for stamping!

Tuesday, April 21, 2015

Impromptu Mani: Blue and Silver Filigree

Today I have a quick and easy impromptu mani to share.

A basic nail stamping manicure created with a dark teal base polish stamped with a dense filigree pattern in silver.
Blue and Silver Filigree Mani

I got a few chips on my previous mani, and decided on a quick polish change. I didn't have much time or inspiration, so I just grabbed a stamping plate and two nearby polishes, and got to work!

Polishes Used:
Revlon Brilliant Strength 'Beguile'
Sally Hansen Insta-Dri 'Silver Sweep'

Plate Used:
Moyou London Cookbook Collection - 04

Revlon Brilliant Strength 'Beguile', and Sally Hansen Insta-Dri 'Silver Sweep'

I really like how it turned out! I really love these types of dense filigree patterns. To me, they are the perfect mix of showy, and elegant!

Sunday, April 5, 2015

Light Pink and Mint Green Easter Manicure

Happy Easter to all those celebrating!

Today, I have an Easter manicure to share:

Pastel pink and green nail stamping manicure. Left hand has light green base polish on thumb, pinky and index. Pinky and index are stamped in with tribal geometric design, and thumb is stamped with Happy Easter (all stamping is in gold). Ring finger has light pink polish with suspended glitter, and middle finger has a light pink creme polish. I made dots of green and gold polish on the middle finger.  Right hand is the opposite (switching light green for pink in all cases).
Light Pink and Mint Green Easter Manicure

Polishes Used:
Sally Hansen Color Foil 'Yellow Gold'
Nicole by OPI 'Selena' from the Selena Gomez Collection
Nicole by OPI 'Alex by the Books' from the Modern Family Collection
NCLA 'Lavish Spender'
NCLA 'Posh and Privileged'

Plate Used:
Moyou London Festive Collection Plate 14

Sally Hansen Color Foil 'Yellow Gold', Nicole by OPI 'Selena' from the Selena Gomez Collection, Nicole by OPI 'Alex by the Books' from the Modern Family Collection, NCLA 'Lavish Spender', and NCLA 'Posh and Privileged'
Polishes Used
For me, one of the best things about this manicure was getting to use 4 untried polishes that I've been really looking forward to using! 'Selena' and 'Alex by the Books' were both purchased last summer during a big sale one of my local drug store chains was having, clearing out the Nicole by OPI 'Modern Family', and 'Selena Gomez' collections. I remember that these two colours were sold out at the 2 super convenient locations that I most frequently go to, so I had to go hunting at a few other locations.  I also remember being so pumped when I finally found them, that I bought backups!

The story behind the other 2 polishes was kind of the opposite scenario. They are both from an NCLA collection called 'Duchess of L.A.'. I remember seeing another polish from the collection somewhere on line, and instantly being mesmerized by its beauty. The colour was called 'Let Them Eat Cake', and was a milky lilac based polish with purple, blue, silver, and white glitters. That started me on researching the collection, and eventually being taken with 'Lavish Spender', and 'Posh and Privileged' too. Now, I'm generally a pretty frugal shopper, and try to get most things on sale or clearance. That preference, along with the higher price of this indie brand, kept me from actually making the purchase for quite some time. Eventually, after months of price-watching to no avail, shortly after the holidays, I decided to go ahead and splurge on the polishes as a belated Christmas gift for myself!

Now that the Crackle Polish Challenge that I've been doing for the last two and a half months is over, I decided to celebrate my new-found freedom from crackle nail polish by using some of my most anticipated untried polishes. The fact that these were all pastels worked perfectly for the occasion, so I jumped at the chance to use them for this mani!

Overall, I really love the finished look of the mani! It reminds me of decorated, and speckled Easter Eggs. I also like how the polishes work so well together. It was also fun to do a manicure where I actually intended to design different versions on each hand, that complimented each other!

Tuesday, March 24, 2015

Crackle Polish Challenge #19 - Diagonal Stripe Themed Mani

2015 Crackle Polish Challenge Manicure #19

Featured crackle application:
Using manicure tape to mask areas of a crackle combo to create diagonal lines of clear polish.

Featured crackle polish:
OPI 'Red Shatter'

Nail stamping manicure featuring all nails covered with red shatter polish over a gold base. On the thumb and ring finger, pieces of nail art tape were used to mask randomly placed diagonal lines, so that when removed it would leave lines of clear polish. The remaining fingers are stamped with a nail stamping pattern featuring randomly place thin white lines.
Diagonal Stripe Themed Mani
Polishes Used:
Quo by Orly 'Filthy Rich'
OPI 'Red Shatter'
Konad Special Polish in White

Plate Used:
Moyou London Holy Shapes Collection - 07

Quo by Orly 'Filthy Rich', OPI 'Red Shatter',  and Konad Special Polish in White
Polishes Used
I like how my thumbnail turned out in this manicure. The tape removed cleanly, and the way it breaks the shatter polish into sections is a pretty cool effect.  Overall, I'm kind of on the fence about this manicure - I don't necessarily hate it, but I don't love it either. Oh well, the beautiful thing about nail polish is that you don't have to wear it forever!  LOL!

Monday, March 16, 2015

St. Patrick's Day Manicure

For today's manicure, I ended up taking a little break from the Crackle Polish Challenge in order to squeeze in something for St Patrick's Day.

Nail stamping manicure featuring kelly green nails, stamped with gold, and forest green St Patrick's day related imagery.

Polishes Used:
Maybelline Color Show 'Walk in the Park'
Sally Hansen Color Foil 'Liquid Gold'
OPI 'Green-Wich Village'

Plate Used:
Moyou London Festive Collection - 21

Maybelline Color Show 'Walk in the Park', Sally Hansen Color Foil 'Liquid Gold', and  OPI 'Green-Wich Village'
Polishes Used
I really love how this manicure turned out! I can't believe how gorgeous the kelly green shade of the base polish ('Green-Wich Village') is, and I'm pleased with how the stamping turned out! Also, it was so much fun to be able to concentrate solely on what colours and images I wanted to use, and not having to worry about trying to work crackle texture into the design, as I've been doing for my last 17 manicures!

I really hope that I can get one more St Patrick's Day mani in before the 17th, because I have a couple other green polishes in mind that I think would be perfect!

Additional shots of the Green, and Gold St Patrick's Day Manicure
St Patrick's Day Mani - Additional Shots

Saturday, February 28, 2015

Crackle Polish Challenge #15 - Rainbow Graffiti Mani

2015 Crackle Polish Challenge Manicure #15

Featured crackle application:
Combining multiple crackle polishes with regular polishes for a graffiti art effect

Featured crackle polish:
OPI 'Black Shatter'
A nail stamping manicure using 10 nail polishes to create a multi-colour abstract splatter effect manicure. The ring finger has a silver and black graffiti tag decal.
Rainbow Graffiti Mani
Polishes Used
Claire’s ‘Splatter Paint’
Sally Hansen Crackle Overcoat ‘Cherry Smash’
Nicole by OPI ‘Tangerini Bikini’
OPI ‘The “It” Color’
Sally Hansen Complete Salon Manicure ‘Grass Slipper’
OPI ‘Turquoise Shatter’
OPI ‘Super Bass Shatter’
Sally Hansen Insta-Dri ‘Silver Sweep’
OPI ‘Black Shatter’
Konad Special Polish in Black

Claire’s ‘Splatter Paint’, Sally Hansen Crackle Overcoat ‘Cherry Smash’, Nicole by OPI ‘Tangerini Bikini’, OPI ‘The “It” Color’, Sally Hansen Complete Salon Manicure ‘Grass Slipper’, OPI ‘Turquoise Shatter’, OPI ‘Super Bass Shatter’, Sally Hansen Insta-Dri ‘Silver Sweep’, OPI ‘Black Shatter’, and Konad Special Polish in Black
Polishes Used
Nail Stamping Plate Used:
Moyou London Rockstar Collection - 12

I wanted this manicure to be colourful and fun, so I decided to use a bright yellow base colour (OPI 'It Color'), to layer all of the other polishes over. I started with small strokes of the four shatter polishes (red, turquoise, purple, and black) , and tried to vary the direction, placement and length of the strokes for a random effect. I used the black shatter polish last, to help it stand out a little more.

Then I used a dotting tool to add dots of the orange and green regular polishes, again varying the size of the dots, and their placement. After that, I topped all of my nails with a splatter effect glitter topcoat. I made 2 graffiti tag nail stamping decals using silver and black polishes, and then placed the decals over my ring fingers. I finished the look off with some topcoat to seal everything in and to add shine.

I really love the finished look! This manicure was so much fun to do, and to wear - I found myself looking at my nails a lot as I went through my day!

Here are some more shots of the completed manicure:

3 different shots of the Rainbow Graffiti Manicure
Rainbow Graffiti Mani - Extra Shots

Saturday, February 14, 2015

Crackle Polish Challenge #12 - Red Shatter Tip Valentine Mani

2015 Crackle Polish Challenge Manicure #12

Featured crackle application:
Using crackle polish to embellish nail tips

Featured crackle polish:
Sally Hansen Crackle Overcoat 'Cherry Smash'

Nail stamping manicure featuring nail tips embellished with red shatter polish, and nail stamps of cupid on the thumb, and a full nail heart design on the middle finger. The ring finger is covered with chunky red glitter.
Red Shatter Tip Valentine Mani
Polishes Used:
Sally Hansen Crackle Overcoat 'Cherry Smash'
Sally Hansen Complete Salon Manicure 'Strawberry Shields'
China Glaze 'Love Letters'
Sally Hansen Xtreme Wear 'Cherry Red' 

Plates Used:
Moyou London Festive Collection - 20
PUEEN43
Sally Hansen Crackle Overcoat 'Cherry Smash', Sally Hansen Complete Salon Manicure 'Strawberry Shields', China Glaze 'Love Letters', and Sally Hansen Xtreme Wear 'Cherry Red'
Polishes Used
Today I have one final Valentine's day Mani to share for this year. Still keeping with the Crackle Polish Challenge, I used red shatter polish to decorate my nail tips. One thing that I really like about using shatter polish this way, is that you don't have to be as careful when polishing your nail tips as you would normally have to be for a traditional French manicure. Actually, this is the main reason that I don't do a lot of tip designs or French manicures on this blog - I rarely have the patience for that!

I could definitely see myself trying this shatter tip mani again with my white shatter polish, or maybe even trying to layer a different coloured shatter polish over a traditional white French tip.

Bye for now, and Happy Valentine's Day!!!