Wednesday, July 30, 2014

Colourful Cartoon Mani - Version 2.0

I had to touch up some wear and tear on my 'Colourful Cartoon Mani', so I used the opportunity to revise it a bit to give it a different look. I had a tiny bit of tip wear, and I lost one of the gems I had placed on my middle finger. So I decided to repaint the worn tips on my accent nails with random splotches of colour, and to change the neutral nail polish shade for black polish.

Colourful Cartoon Nail Stamping Manicure using Lead Light Technique, and Moyou London Princess Collection Plate 11. Polishes used include: Misa 'Bed of Roses'; Nfu OH Jelly Syrup Series Polishes NFU JS20, NFU JS18, NFU JS17, NFU JS12; China Glaze 'Creative Fantasy'; OPI '4 in the Morning'; NYC 'French White Tip', and Rimmel 'Black Satin'
Colourful Cartoon Mani - Version 2.0

The black polish I used was OPI's '4 in the Morning' from their Gwen Stefani collection.  This was my first time using this particular polish.  I was on the fence about buying it for the longest time (truthfully, I had pretty much chosen to pass on it) until I decided on a whim yesterday to buy it to try it out with this manicure. This polish is really all about the formula. The semi-matte finish reminds me of black rubber! In the picture above, my index and middle fingers look slightly shinier than the polish looks in real life, because I had just applied some cuticle oil prior to taking the shot.  The pinky finger gives a more accurate depiction of how the polish actually looks.
  
After the first 2 changes, I decided the manicure needed a little something extra to tie it all together. I went ahead and stamped some other cartoon/doodle themed images, which were from the same image plate that I used for the accent nails (Moyou London Princess collection 11).  I used another polish I bought yesterday, China Glaze's 'Kiss my Glass'.  I was going for a subtle, monochromatic look in order to add a little more visual interest, but to not compete with the super colourful accent fingers. 

Colourful Cartoon Nail Stamping Manicure using Lead Light Technique, and Moyou London Princess Collection Plate 11. Polishes used include: Misa 'Bed of Roses'; Nfu OH Jelly Syrup Series Polishes NFU JS20, NFU JS18, NFU JS17, NFU JS12; China Glaze 'Creative Fantasy'; OPI '4 in the Morning'; NYC 'French White Tip', and Rimmel 'Black Satin'
Colourful Cartoon Mani - Version 2.0 (Closeup of Additional Stamping)

Because of how subtle the stamping was, it was really hard to get a picture that showed the stamping well enough! The photo above is the best I could do to show the gunmetal on black stamping, and the photo below is a photo of the entire look.

Colourful Cartoon Nail Stamping Manicure using Lead Light Technique, and Moyou London Princess Collection Plate 11. Polishes used include: Misa 'Bed of Roses'; Nfu OH Jelly Syrup Series Polishes NFU JS20, NFU JS18, NFU JS17, NFU JS12; China Glaze 'Creative Fantasy'; OPI '4 in the Morning'; NYC 'French White Tip', and Rimmel 'Black Satin'
Colourful Cartoon Mani - Version 2.0 (Additional Stamping)


Sunday, July 27, 2014

Colourful Cartoon Mani

Today I'm sharing another manicure using the 'leadlight' technique:

Colourful Cartoon Nail Stamping Manicure using Lead Light Technique, and Moyou London Princess Collection Plate 11. Polishes used include: Misa 'Bed of Roses'; Nfu OH Jelly Syrup Series Polishes NFU JS20, NFU JS18, NFU JS17, NFU JS12; China Glaze polishes 'Creative Fantasy' and 'Inner Beauty'; NYC 'French White Tip', and Rimmel 'Black Satin'
Colourful Cartoon Mani

I used several jelly polishes from the Nfu Oh 'Jelly Syrup' series, China Glaze, OPI, and Misa.  I don't remember exactly which ones because I didn't plan out the colours before I used them. I just laid out all of my jelly nail polishes, and grabbed whichever one I felt like using when filling in different parts of the image.  It was so much fun - just like a tiny colouring book!

Here are pictures of the 4 stamped fingers:

Colourful Cartoon Nail Stamping Manicure using Lead Light Technique, and Moyou London Princess Collection Plate 11. Polishes used include: Misa 'Bed of Roses'; Nfu OH Jelly Syrup Series Polishes NFU JS20, NFU JS18, NFU JS17, NFU JS12; China Glaze polishes 'Creative Fantasy' and 'Inner Beauty'; NYC 'French White Tip', and Rimmel 'Black Satin'
Close-Up of Accent Nails
Despite the haphazard manner I used for selecting colours, a few elements in the images stayed constant from finger to finger.  I tried to use the same colours for the Cat, the Snake, and the Giraffe-like creature.

For the cat I used Misa 'Bed of Roses' for the nose, and NFU JS20 for the fur. The snake in front of the cat was coloured using NFU JS18  for the face, and NFU JS17 for the body. The giraffe thingy behind the cat was coloured using NFU JS12 for the body, Misa 'Bed of Roses' for the snout, and China Glaze 'Creative Fantasy' for the neck fur fringe. I also used a white base of NYC 'French White Tip' , and Rimmel 'Black Satin' for the stamping. The image I used was from Moyou London Princess collection plate 11

The neutral nails were painted with China Glaze 'Inner Beauty'. I also used some purple, teal, and fuchsia nail art rhinestones on my middle fingers.

Overall, I really like the way this manicure turned out. This cartoon image was one of the main reasons that I bought this Moyou London plate.  That was way before I even knew about the leadlight technique - I love the way that this method of adding colour really brought this image to life. 

Saturday, July 26, 2014

Muted Mani Fail!

Today's manicure was so unsuccessful, I can only show you the 2 fingers that came out the best!

Muted Nail Stamping Manicure using Pueen plate PUEEN11. Polishes used: Essie 'Playa del Platinum', and Sally Hansen Color Foil in 'Yellow Gold'
Muted Mani

This started as an emergency manicure. My previous 'Tulip Themed' nails started chipping a tiny bit on day 3 of the manicure, and I couldn't stop myself from peeling off the chipped nail polish (a terrible habit, I know!). This left me with a completely jacked up mani that had to be addressed!

I kind of expected my tulip mani to last about a week, since I noticed that all of my other leadlight manicures lasted about that long. So I really hadn't counted on doing my nails so soon after spending all of that time on them just 3 days before.  I was so reluctant to do a new mani that I kept putting it off.   By the time I finally got around to it, it was late and I was really tired. This was definitely not the best time to experience technical stamping difficulties! 

I was trying to stamp Sally Hansen's Color Foil in 'Yellow Gold" over Essie's "Playa del Platinum"  (after the bright colors of the tulip mani, I wanted something calm and muted for my next one). I was using an image from PUEEN11. I was having major problems trying to consistently get the image to pick up perfectly.  Most of my attempts had missing areas, or the edges weren't crisp. I think it was because the Sally Hansen polish dries quite fast, so you have to work quickly. Perhaps it also helps to use more deeply etched image plates with these fast drying polishes. I'm guessing that with deeper etching, you won't have to worry so much about taking away too much polish with your swipes, which might give you that extra little bit of time you need to pick up the image cleanly. I've also noticed that you can't slack as much on technique when you're not using deep images. For example, I find that you can't get away with not cleaning the plate after every transfer! I'm going to have to experiment a bit more with all of these theories on a day when I have more time and patience.

Anyways, my nails didn't end up looking horrible - just not good enough to be memorialized on this blog! And they definitely looked a heck of a lot better than the semi-peeled off mess I had before, so I still rocked the mani for the last 2 days of my work week.

Monday, July 21, 2014

Tulip Themed Half-Moon Manicure

Tulip Themed Half-Moon Nail Stamping Manicure using Moyou London Pro Collection Plates 07 and 08. Polishes used: Sally Hansen Complete Salon Manicure in 'Barracuda', Essie 'Jelly Apple', NYC Quick Dry Nail Polish in 'High Line Green', Nfu OH Jelly Syrup Series JS34, and Rimmel 'Black Satin'
Tulip Themed Half-Moon Manicure
This is my first attempt at a half-moon manicure. For the most part, I like how it turned out. Originally, I wasn't going to 'frame' the half moon with any sort of border, but it just looked unfinished. I added the red art nail tape as an afterthought a full day after I originally did my nails. As a result, it was really difficult to add the tape to the completely dry nail, especially since I had to try to curve it to follow the crescent of the half moon. Luckily, the tape placement issues are way less noticeable in real life than they are in the photo!

I used the following nail polishes to create this look:
Sally Hansen Complete Salon Manicure in 'Barracuda'
Essie 'Jelly Apple'
NYC In a New York Minute Quick Dry Nail Polish in 'High Line Green'
Nfu OH JS34
Rimmel 'Black Satin'

The stamping images I used were from Moyou London Pro Collection plates 07 and 08. I also used a few yellow rhinestones, and of course, the aforementioned red nail art tape. 

Tuesday, July 15, 2014

From the Vault: Black and Gold Mani

Here's another mani from a couple months back. 

Black and Gold Nail Stamping Manicure using Moyou London Pro XL Collection plate 06. Polishes Used: OPI 'Love Angel Music Baby', and Rimmel 'Black Satin'
Black and Gold Mani

The base colour I used was OPI's Love Angel Music Baby, from the Gwen Stefani collection. I used Rimmel's 'Black Satin' for stamping, and I used Pro-FX Quick Dry High Gloss Top Coat to add some shine, and bring out L.A.M.B's beautiful shimmer. The images I stamped were from Moyou London Pro XL Collection plate 06.

I like how each component of this manicure looks, however I remember quickly becoming bored with the overall look (after only a day or 2). I can't quite put my (polished) finger on it, but for some reason I didn't find this manicure as visually interesting as some of my other ones. I think I would like to try a version of this with the same base color, but with the image stamped in a lighter or brighter colour, or maybe a version using a less 'busy' image for the index, middle, and pinky fingers - or maybe no image at all?!  Hmmmn... I normally don't like to revisit manicures that I've done, but I may just have to make an exception for this one!

Monday, July 14, 2014

From the Vault: Australian Aboriginal Art Themed Mani

I did this manicure a couple months ago.  It was done on a whim with polishes I just happened to have in reach. Virtually no forethought or planning went into this one - and it came out beautifully!

Australian Aboriginal Art Themed Nail Stamping Manicure - Left, using Moyou London Explorer Collection Plate 20. Polishes used: Wet n Wild Fastdry 'Saved by the Blue', and Sally Hansen 'Silver Sweep'
Australian Aboriginal Art Themed Mani - Left Hand

Australian Aboriginal Art Themed Nail Stamping Manicure - Right, using Moyou London Explorer Collection Plate 20. Polishes used: Wet n Wild Fastdry 'Saved by the Blue', and Sally Hansen 'Silver Sweep'
Australian Aboriginal Art Themed Mani - Right Hand


For this mani, I used Wet n Wild Fastdry 'Saved by the Blue' as the base colour, and Sally Hansen Insta-Dri 'Silver Sweep' to stamp with.  The stamping images are all from Moyou London Explorer Collection - 20.

This mani was so quick and easy to do, that there really isn't that much to say about it...  I'll have to make this post quick and easy, to match!  : D

From the Vault: Black and Grey Lace Mani

Here's another oldie but goodie.  This was done maybe 4 or 5 months ago.

Black and Grey Lace Nail Stamping Manicure using Moyou London Time Traveller Collection plates: Back to the 80's - plate 06, and Back to the 20's - plate 03. Polishes Used: OPI 'Skull and Glossbones', and Rimmel 'Black Satin'
Black and Grey Lace Mani

This was done using OPI's 'Skull and Glossbones' as the base color stamped with Rimmel's 'Black Satin'.  I used 2 Moyou London Plates for the images.  The Lace was from the Time Traveller: Back to the 80's - 06 plate, and the awesome art deco designs on my thumb and ring finger are from the Time Traveller: Back to the 20's - 03 plate.  

I love the way this turned out - it's definitely one of the more sophisticated mani's I've done (I tend to like bright colours and fun designs!). I remember this mani resulting in a few of compliments too!

From the Vault: Blue and White Porcelain Mani

I have dozens of pictures of manicures I did over the past 7 months or so that I've been nail stamping. Every once in a while, I hope to put some of my favorites up.  Here's a manicure that I did a few months back. 

Blue and White Porcelain Nail Stamping Manicure, using Moyou London Pro Collection Plate 07. Polishes used: NYC 'French White Tip', stamped with Maybelline Color Show 'Midnight Blue'.
Blue and White Porcelain Mani

My base colour is NYC 'French White Tip', and it is stamped with Maybelline Color Show 'Midnight Blue'.  The image I used was from Moyou London Pro Collection - 07. 

The annoying thing about posting old manis is that you can't go back and fix things in the shot - you're stuck with whatever photos you've taken.  This picture shows the mani well, but I would have preferred a solid background. Oh well, I guess it's not that big of a deal.  The other problem I'm having with some of my older mani pics is I can't always remember exactly which polishes I've used!

As a result, I realize that I won't be able to put all of my old photos up - but that's probably for the best. As with anything in life, there's a huge learning curve with nail stamping... let's just say that there are quite a few manicures that I did that are probably best left unpublished!  ; )

OPI Sheer Tints Leadlight Mani

OPI Sheer Tints Leadlight Nail Stamping Manicure, using OPI polishes 'Be Magentale With Me', 'I'm Never Amberrassed', 'I Can Teal You Like Me', and 'Don't Violet Me Down'. Stamped with Moyou London Pro Collection XL Plate 06
OPI Sheer Tints Leadlight Mani

This is my first ever manicure using the leadlight stamping technique.  I did it a week ago, but I'm really behind with my posting, and so now I'm just throwing things up out of order!

I really loved this mani, and I couldn't stop looking at my nails throughout the week.  I even received a couple of compliments!

I used all 4 of the OPI Sheer Tints polishes:  Be Magentale With Me, I'm Never Amberrassed, I Can Teal You Like Me, and Don't Violet Me Down. However, the photo makes it hard to distinguish between the Magenta and Violet shades.  The base color is NYC French Tip White, and the outline is stamped with Rimmel Black Satin using Moyou London's Pro Collection XL Plate 06.

Pink and Green Mani using Leadlight Technique

Today's nail art was time-consuming, but worth the effort.

Pink and Green Nail Stamping Manicure using Leadlight Technique. Stamped with Pueen Plate PUEEN24. Polishes Used: NYC 'French Tip White', Rimmel 'Black Satin', Nfu Oh Jelly Syrup series polishes NFU JS17 (pistachio green), NFU JS24 (fuchsia), NFU JS34 (forest green), NFU JS36 (olive green), and OPI Be Magentale With Me


Some time ago, I watched a YouTube video by Messy Mansion on how to do the leadlight technique, and have been obsessed ever since! This is only my second ever manicure using the technique, so it's not perfect, but I still love how it turned out. I love being able to incorporate multiple colours into my stamping. 

I used the following polishes to achieve this look:

Base of the mani:
NYC French Tip White stamped with Rimmel Black Satin (using Pueen24)
Leadlighting effect:
Nfu Oh Jelly Syrup series polishes NFU JS17 (pistachio green), NFU JS24 (fuchsia), NFU JS34 (forest green), NFU JS36 (olive green), and OPI Be Magentale With Me
Base coat and top coat:
Pro-FX Protein enriched base coat and revitalizer, and Pro-FX Quick dry high gloss top coat.

I also used some fuchsia nail art rhinestones.

The part that took the longest was filling in all of the little dots with a dotting tool.  I doubt that I'll ever do a repeat of this mani, just because of how long it took.  Maybe I'd use this pattern for an accent nail or two, but at this point, I'm not looking forward to colouring hundreds of little dots on all 10 nails ever again! LOL!

Sally Hansen Color Foils

Sally Hansen Color Foils (Complete Collection): Pink Platinum, Titanium Flush, Rose Copper, Minted Metal, Cobalt Chrome, Purple Alloy, Leaden Lilac, Liquid Gold, Yellow Gold, and Sterling Silver
Sally Hansen Color Foils (Complete Collection)

A few weeks ago, I ran around in a mad frenzy trying to purchase sufficient quantities of the limited edition Sally Hansen Color Foil Nail Makeup collection. A local drugstore chain had all Sally Hansen products on sale, so I purchased the entire collection on the first day of the promotion. As the week went by I convinced myself that I needed backup bottles of my 3 favorite colors from the collection (Liquid Gold, Yellow Gold, and Sterling Silver) - and that's when all of the running around began.

The majority of the drugstores I visited only had a display of 20 polishes - 2 bottles of each of the 10 shades in the collection. I'm pretty lucky that the collection was fairly new and just coming to the shelves in all of the stores, because in most cases nothing was sold out.  I was the first person to buy any of them in the first store I visited, and the display itself looked relatively untouched (no annoying test strokes all over the cardboard). 

Most of my enthusiasm for these polishes is because they work well for nail stamping. For most of the colors (6 to be exact), although I think they are beautiful, I don't really like the way the polish looks on my nails.  I don't see myself ever doing a full manicure with anything other than Rose Copper, Liquid Gold, Yellow Gold, and Sterling Silver.  However I can definitely see myself getting a lot of use out of all of these polishes as stamped accents over other polishes, and maybe an accent nail here and there. Here are all of the colors swatched:

Sally Hansen Color Foil Swatches: Pink Platinum, Titanium Flush, Rose Copper, Minted Metal, Cobalt Chrome, Purple Alloy, Leaden Lilac, Liquid Gold, Yellow Gold, and Sterling Silver
Sally Hansen Color Foil Swatches
 
From left to right we have Pink Platinum, Titanium Flush, Rose Copper, Minted Metal, Cobalt Chrome, Purple Alloy, Leaden Lilac, Liquid Gold, Yellow Gold, and Sterling Silver.

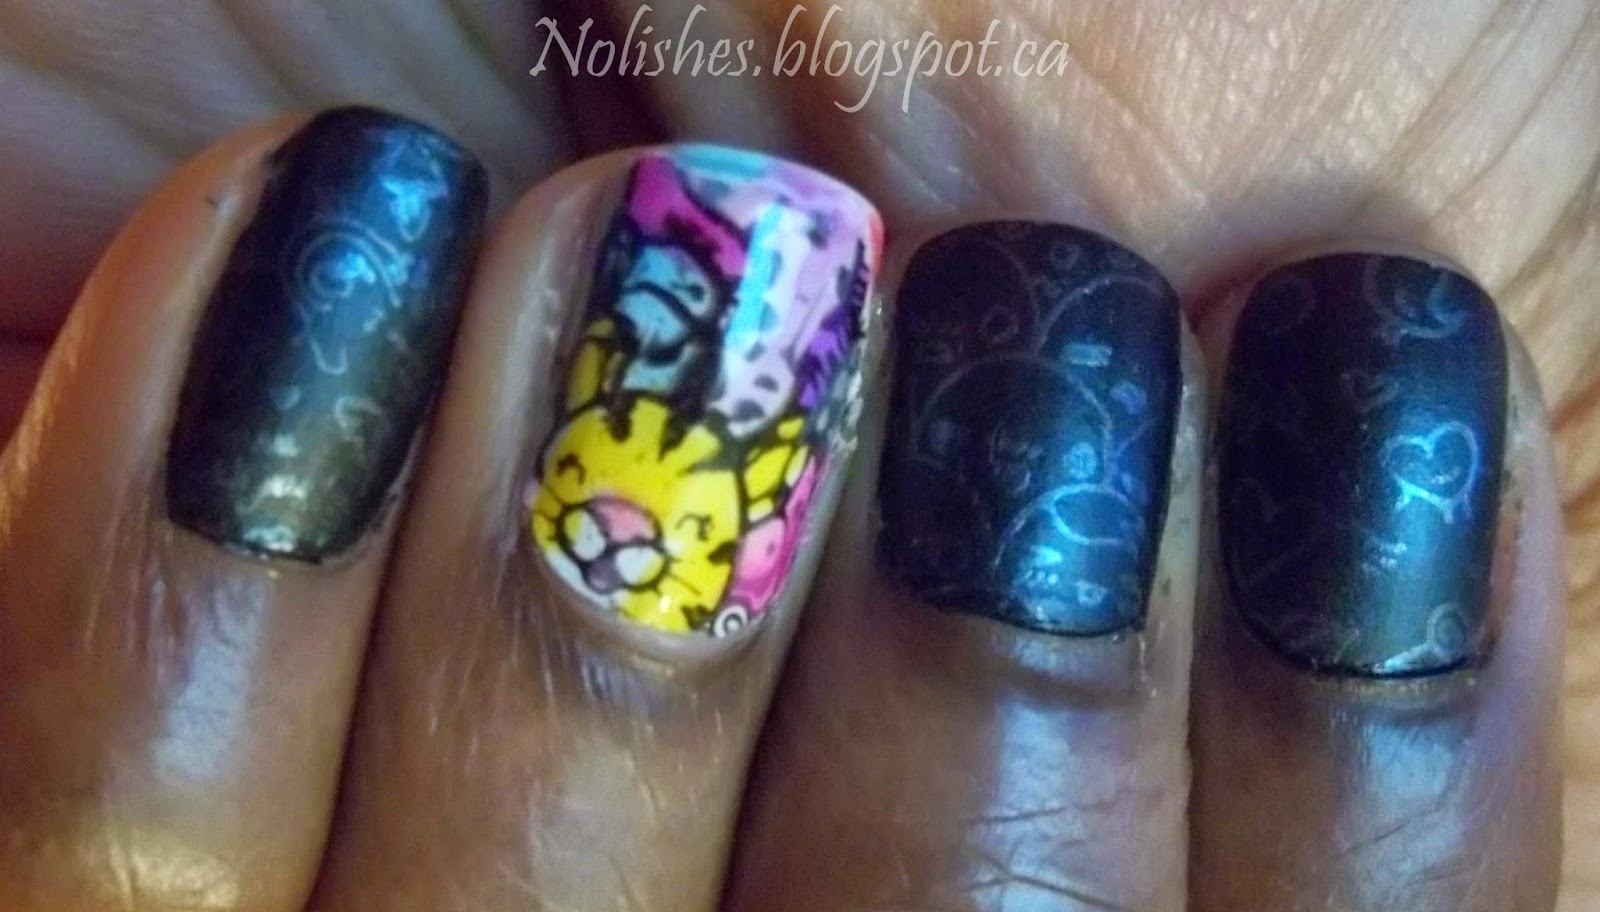
Here are some stamped mani looks that I came up with so far:
Sally Hansen Color Foil Nail Stamping Demo Manicure using OPI polishes 'Don't Touch My Tutu' and 'Pirouette My Whistle', stamped with a 'Leaden Lilac' accent decal
OPI polishes Don't Touch My Tutu and Pirouette My Whistle, stamped with a Leaden Lilac accent decal

Sally Hansen Color Foil Nail Stamping Demo Manicure using OPI 'Chic from Ears to Tail' stamped with 'Liquid Gold', and Finger Paints 'Go Baroque' on accent nail
OPI Chic from Ears to Tail stamped with Liquid Gold, and Finger Paints Go Baroque on accent nail

Sally Hansen Color Foil Nail Stamping Demo Manicure using OPI 'Shocking Pink' stamped with 'Sterling Silver', and a 'Sterling Silver' accent nail
OPI Shocking Pink stamped with Sterling Silver, and a Sterling Silver accent nail
Prior to the mad dash to get these metallic polishes, I was obsessed with neon nail polishes. I wanted to try to incorporate the two looks together, so that's where I came up with the neon pink and silver mani pictured above.  The image I used for the pattern was from Cheeky Jumbo plate A.
The light pink and gold mani was stamped with Moyou London's Artist plate 03, and the star decal on the otherwise demure white and silver sparkle mani is from BM-005.

As a whole, I really love this collection. The polishes stamp so well, and I'm ecstatic that I finally have a wide range of metallic-finish coloured polishes to create stamped manis with. I only started nail stamping in late 2013, so I missed out on the China Glaze Romantique collection (2009), and the Kiko Mirror collection (spring 2013).  It's been frustrating checking out other blogs, and seeing all of the stamping possibilities that coloured metallic polishes can provide, but not being able to get my hands on these popular, sold out, limited edition collections.  You can see now why I was so eager to snap up these Sally Hansen beauties as soon as the opportunity presented itself!

Also, I can certainly say that without a doubt, the 2 gold shades in the collection are now my favorite golds for stamping. The silver is amazing too, but there have always been a lot of great silver stamping polishes on the market.  All in all I'm really satisfied with this purchase!